5 - 81
ENG
CRANKCASE AND CRANKSHAFT
3. Install:
• connecting rod cap
NOTE:
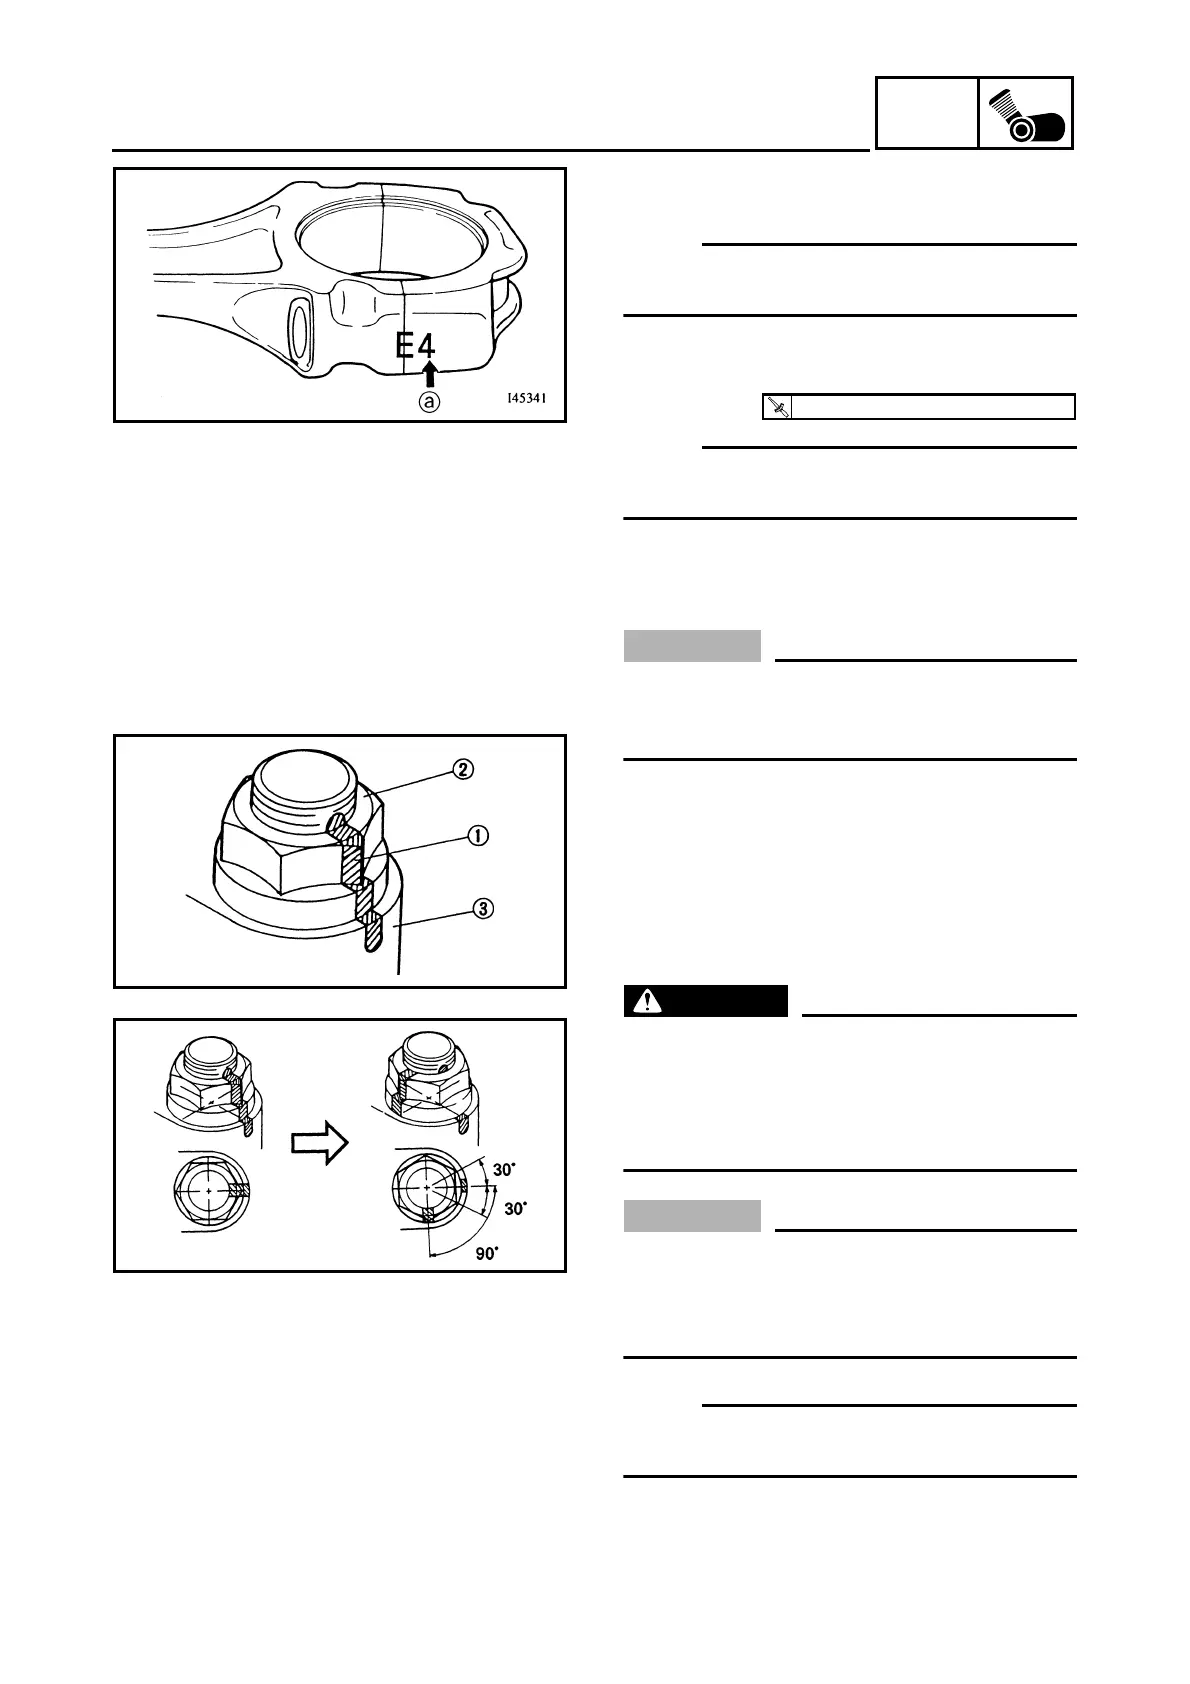
Be sure that the characters a on the side of
the cap and connecting rod are aligned.
4. Tighten:
• nuts (connecting rod cap)
NOTE:
Apply molybdenum disulfide grease to the rod
cap bolt threads and nut surfaces.
▼▼▼▼ ▼ ▼▼▼▼ ▼ ▼▼▼▼ ▼ ▼▼▼▼ ▼ ▼▼▼▼ ▼ ▼▼▼▼ ▼▼▼
a. Replace the connecting rod bolts and nuts
with new ones.
CAUTION:
Tighten the connecting rod bolts using the
plastic-region tightening angle method.
Always install new bolts and nuts.
b. Clean the connecting rod bolts and nuts.
c. Tighten the connecting rod nuts with speci-
fied torque.
d. Put a mark 1 on the corner of the connect-
ing rod nut 2 and the connecting rod 3.
e. Tighten the nut further to reach the speci-
fied angle (90°).
WARNING
When the nut is tightened more than the
specified angle, do not loosen the nut and
then retighten it.
Replace the bolt with a new one and per-
form the procedure again.
CAUTION:
• Do not use a torque wrench to tighten the
nut to the specified angle.
• Tighten the nut until it is at the specified
angles.
NOTE:
When using a hexagonal nut, note that the
angle from one corner to another is 60°.
▲▲▲▲ ▲ ▲▲▲▲ ▲ ▲▲▲▲ ▲ ▲▲▲▲ ▲ ▲▲▲▲ ▲ ▲▲▲▲ ▲▲▲
T
R
.
.
16 Nm (1.6 m · kg, 11 ft · lb) + 90°
 Loading...