25
4.
OPERATION PROCEDURE
Sterilize & Dry
STERILIZE & DRY operation process
Confirm the following.
① Is the drain valve closed? P.8
② Is the drain filter installed? P.7
③ Is the bottom plate in place? P.7
④ Is the drain bottle in place? P.9
⑤ Does chamber have proper amount of water? P.10
⑥ Is the lid closed completely? P.11
In the “STERILIZE & DRY” process, water is automatically drained from the chamber to the
drain bottle before the drying process begins. Check water level in the drain bottle prior to
operation and drain as necessary to prevent an overflow.
Setup
♦Turn on the main power switch.
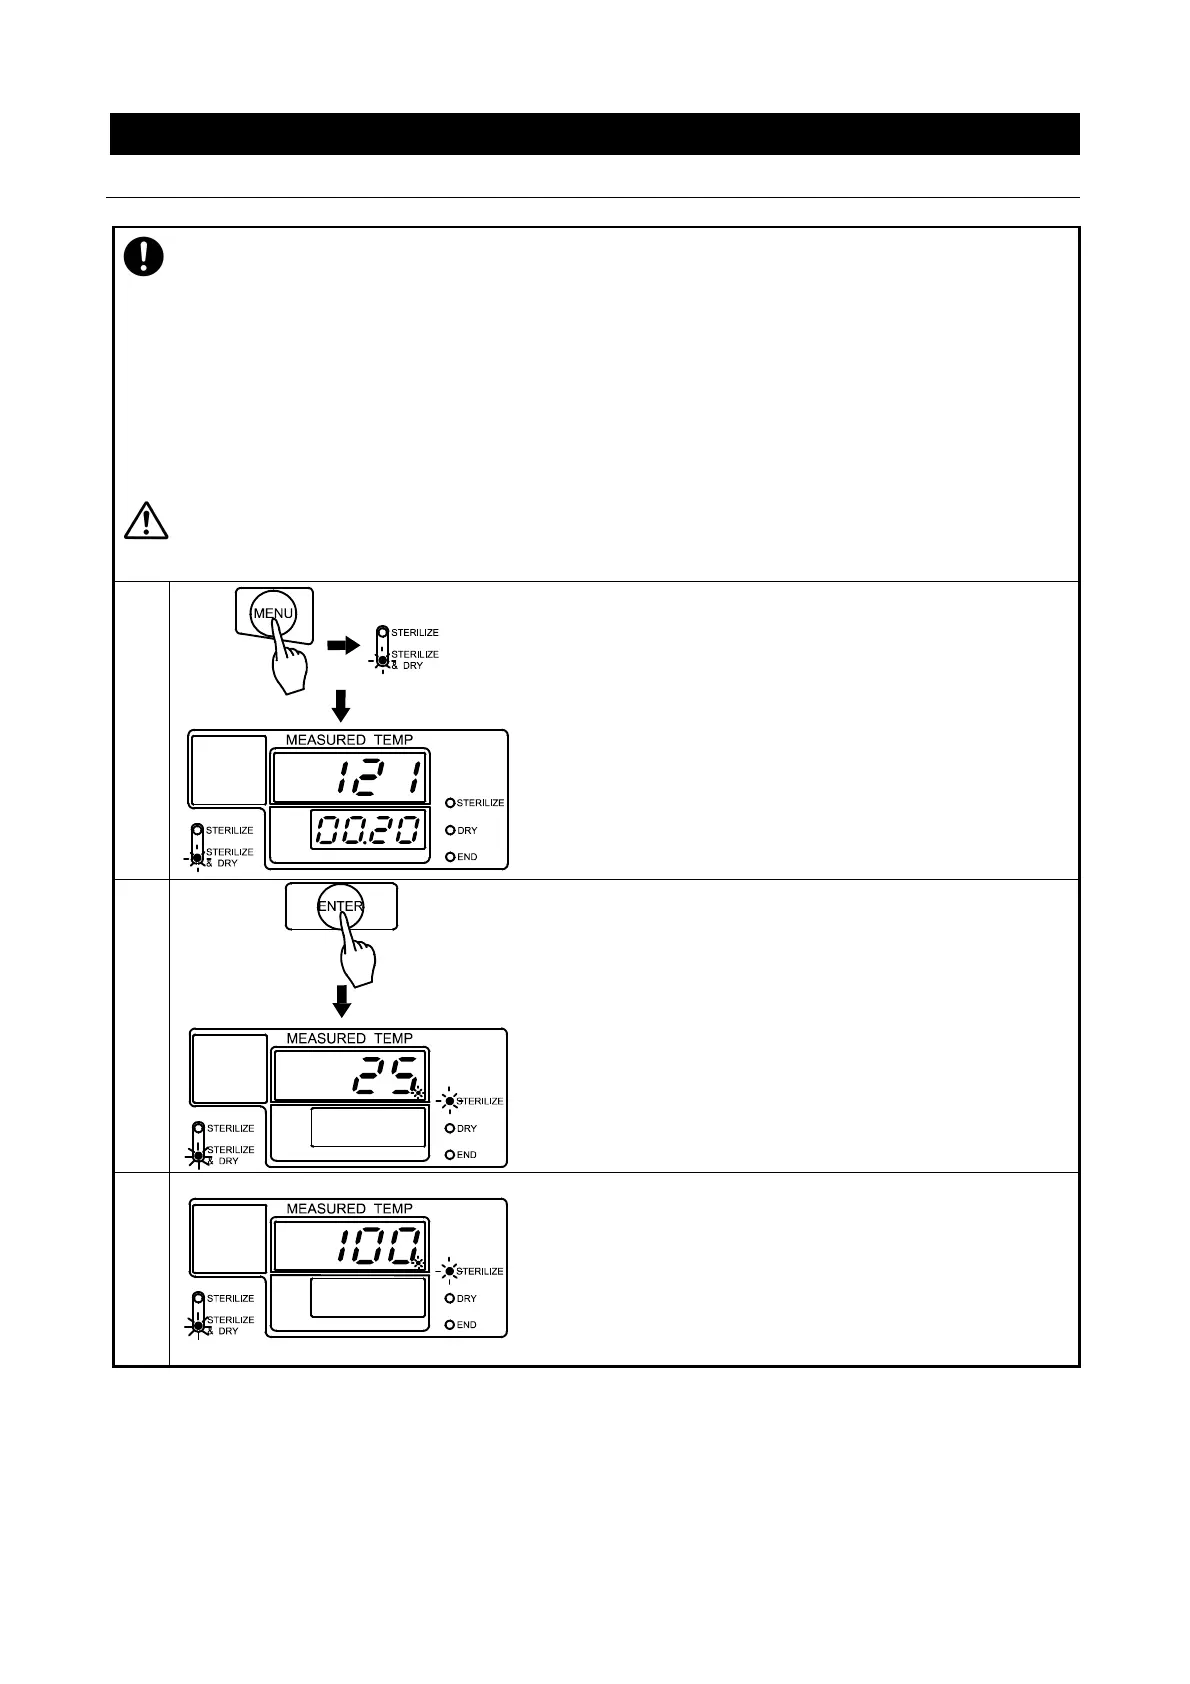
♦Select “STERILIZE & DRY” with the “MENU” key.
(See P.22)
♦Set temperature and time as desired.
(See P.21 & 22)
→Main display flashes temperature setting.
→Sub display flashes time setting.
→Sterilize & Dry menu lamp flashes.
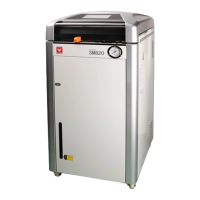
Operation Start / Air Purge
♦Press “ENTER”.
Operation begins. Sterilization heater turns on.
Solenoid exhaust valve opens to purge air from chamber.
→Main display shows water temperature.
→Sub display is blank.
→Sterilize process lamp flashes.
→Sterilize & Dry menu lamp lights.
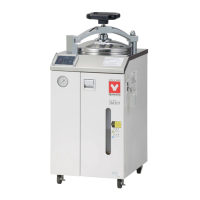
Pressurization
When air is purged, the solenoid exhaust valve closes, and
pressurization stage begins. (Approximately 20-25 minutes)
→Main display shows chamber temperature.
→Sterilize lamp flashes.
→Sterilize & Dry menu lamp lights.