Getting Started
16
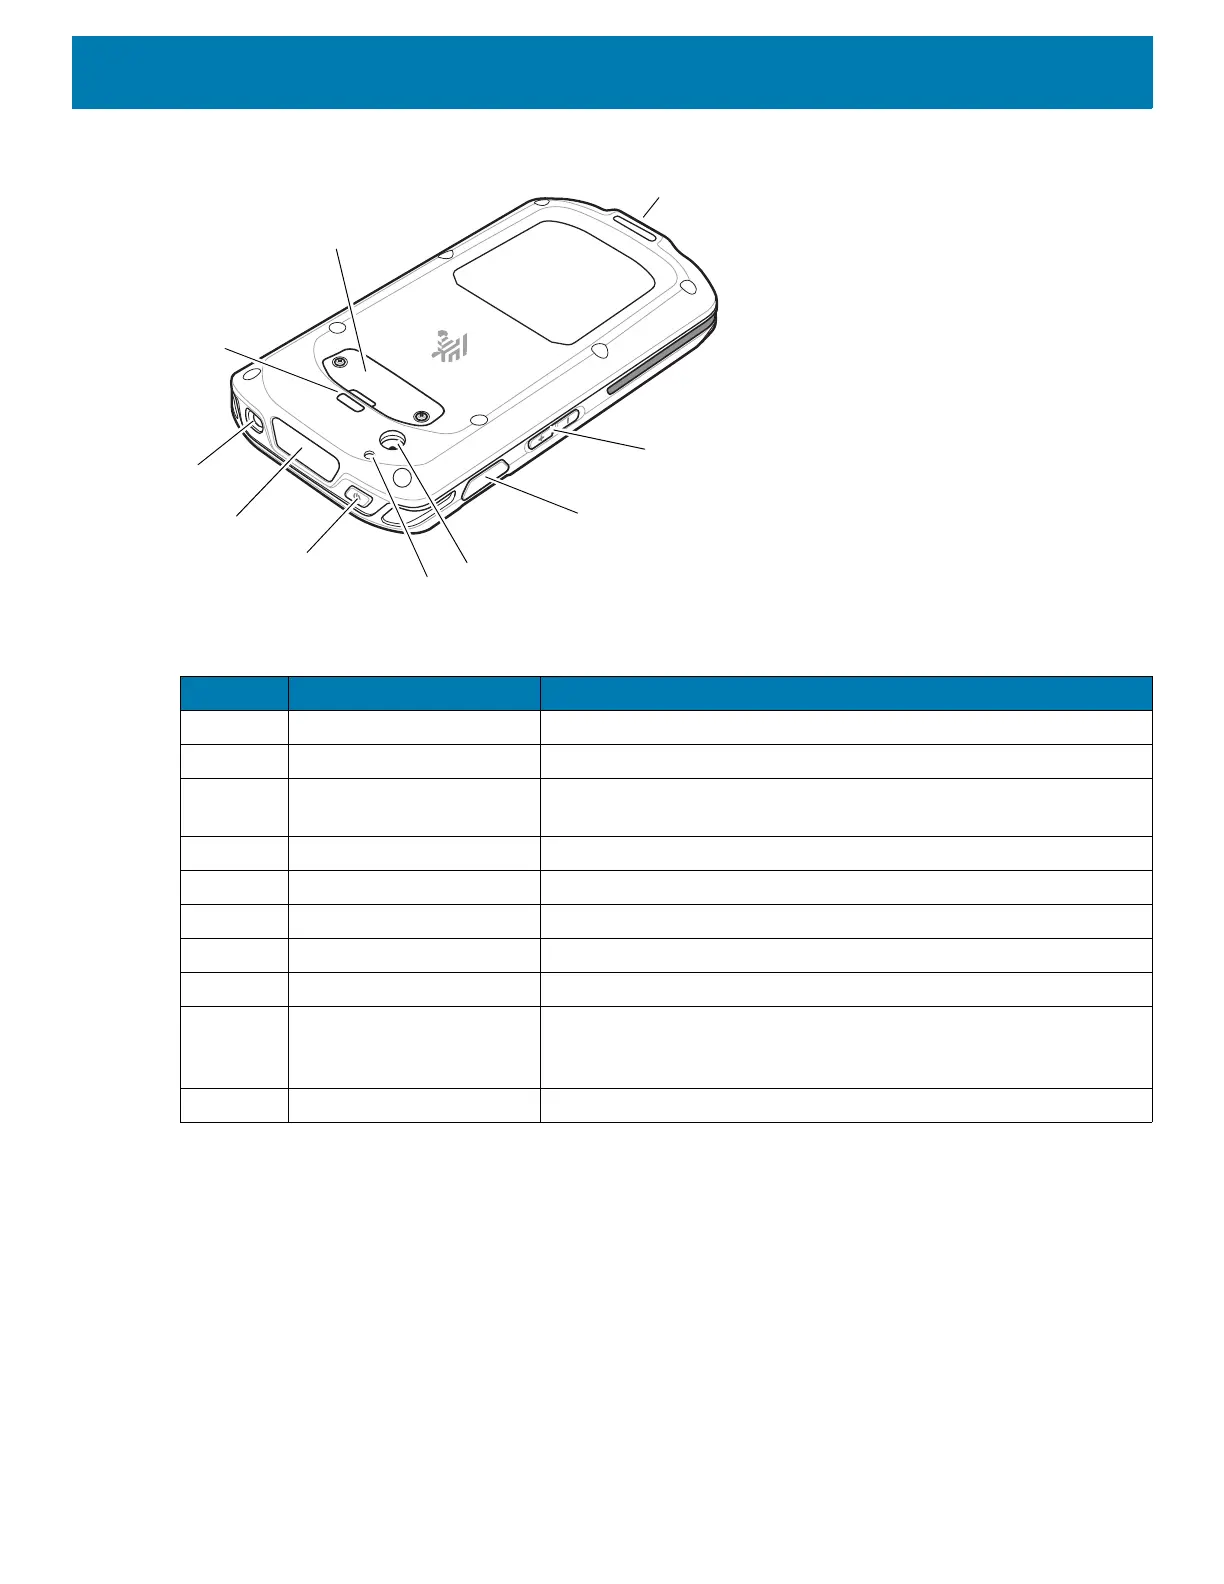
Figure 4 Rear View
Setup
Perform this procedure to start using the device for the first time.
1. Install a micro secure digital (SD) card (optional).
2. Charge the device.
3. Power on the device.
Table 4 Back View Features
Number Item Function
1 Headset Jack For audio output to headset.
2 Imager Window Provides data capture using the imager.
3 Power Button Turns the display on and off. Press and hold to reset or power off
the device.
4 Camera Flash Provides illumination for the camera (optional).
5 Camera Takes photos and videos (optional).
6 Scan Button Initiates data capture.
7 Volume Up/Down Button Increase and decrease audio volume.
8 Hand Strap Mount Point Provides latching point for the hand strap.
9 Access Door Provides access to the microSD card slot. Optional 2-Pin Access
Door is available on device with the SE4710 imager for use with the
Trigger Handle.
10 Hand Strap Mount Point Provides latching point for the hand strap.
 Loading...