INSTALLATION INSTRUCTIONS AND FIRST-TIME SET-UP
Axio Observer HAL 100 illuminator ZEISS
12/2016 431004-7244-001 67
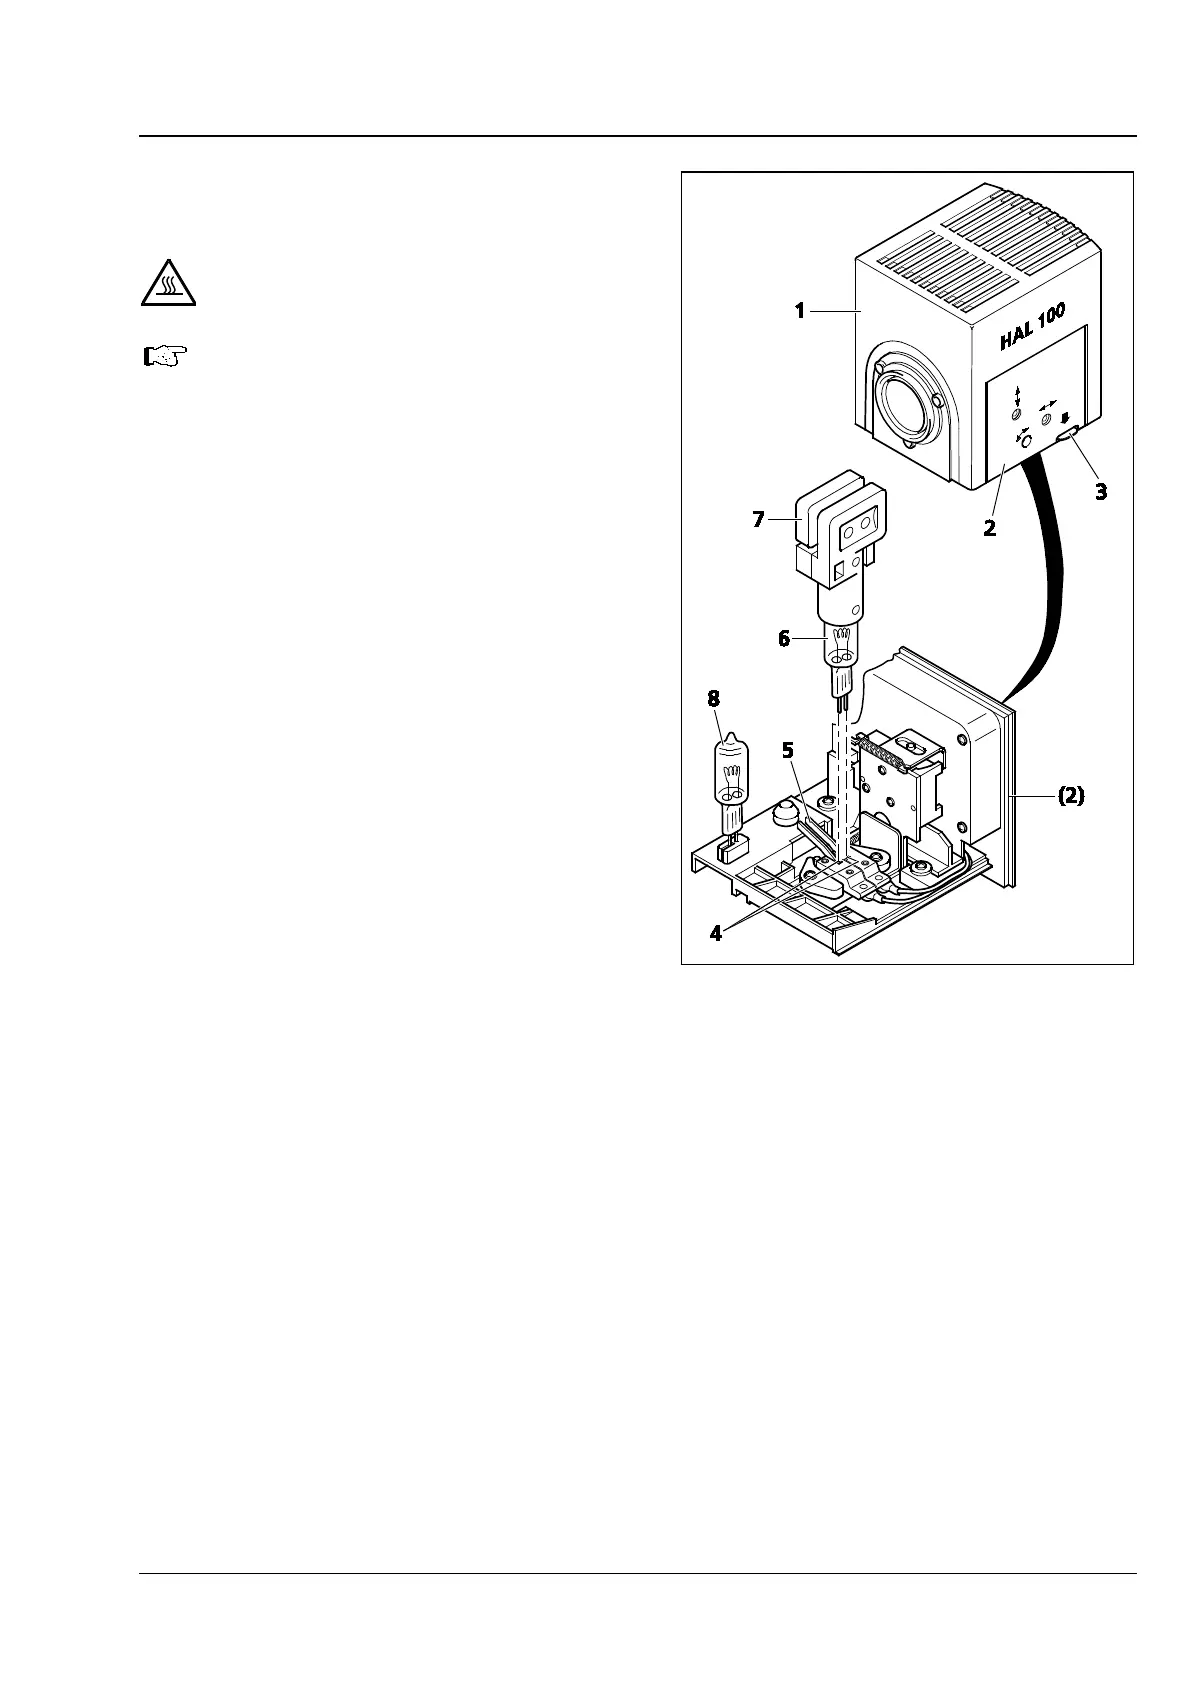
4.22.3 Replacing the halogen bulb 12 V
100 W
Hot surface!
The lamp housing does not need to be
removed from the stand in order to
replace the halogen
replacement tool (Fig. 53/7) is not to
be stored in the lamp housing when
the illuminator is in use.
The spare bulb (
Fig. 53/8
in place in the lamp housing.
• Switch off the microscope and remove the plug
(Fig. 50/6) from the 12 V/100 W socket
(Fig. 50/3 for reflected light or Fig. 50/5 for
transmitted light). Allow to cool for about 15
min.
• Press the release button (Fig. 53/3) on the
HAL 100 illuminator (Fig. 53/1) downwards and
remove the bulb holder (Fig. 53/2) completely.
Place it on a flat surface.
• Press down the two spring levers (Fig. 53/5) and
remove the old halogen bulb (Fig. 53/6) by
pulling it upwards.
• Press down the two spring levers and insert the
new bulb into the bulb socket (Fig. 53/4).
Release the spring levers. Always hold the
halogen bulb by means of the bulb replacement
tool (Fig. 53/7), as traces of grease on the bulb
may shorten bulb life.
• Briefly depress the spring levers once more to
center the bulb.
• Reinsert the bulb holder until you feel it click
into place.
Fig. 53 Replacing the halogen bulb