806834 v1.02 07.21 G5 Online install instructions and user guide
104
USER GUIDE
SAFETY
INSTALLATION
TROUBLE
SHOOTING
COMMISSION
USER GUIDE
TAP SAFETY
LCD SCREEN
CONTACT
INSTALLATION
GUIDE
4.1 Filter maintenance continued
Internal filter change continued
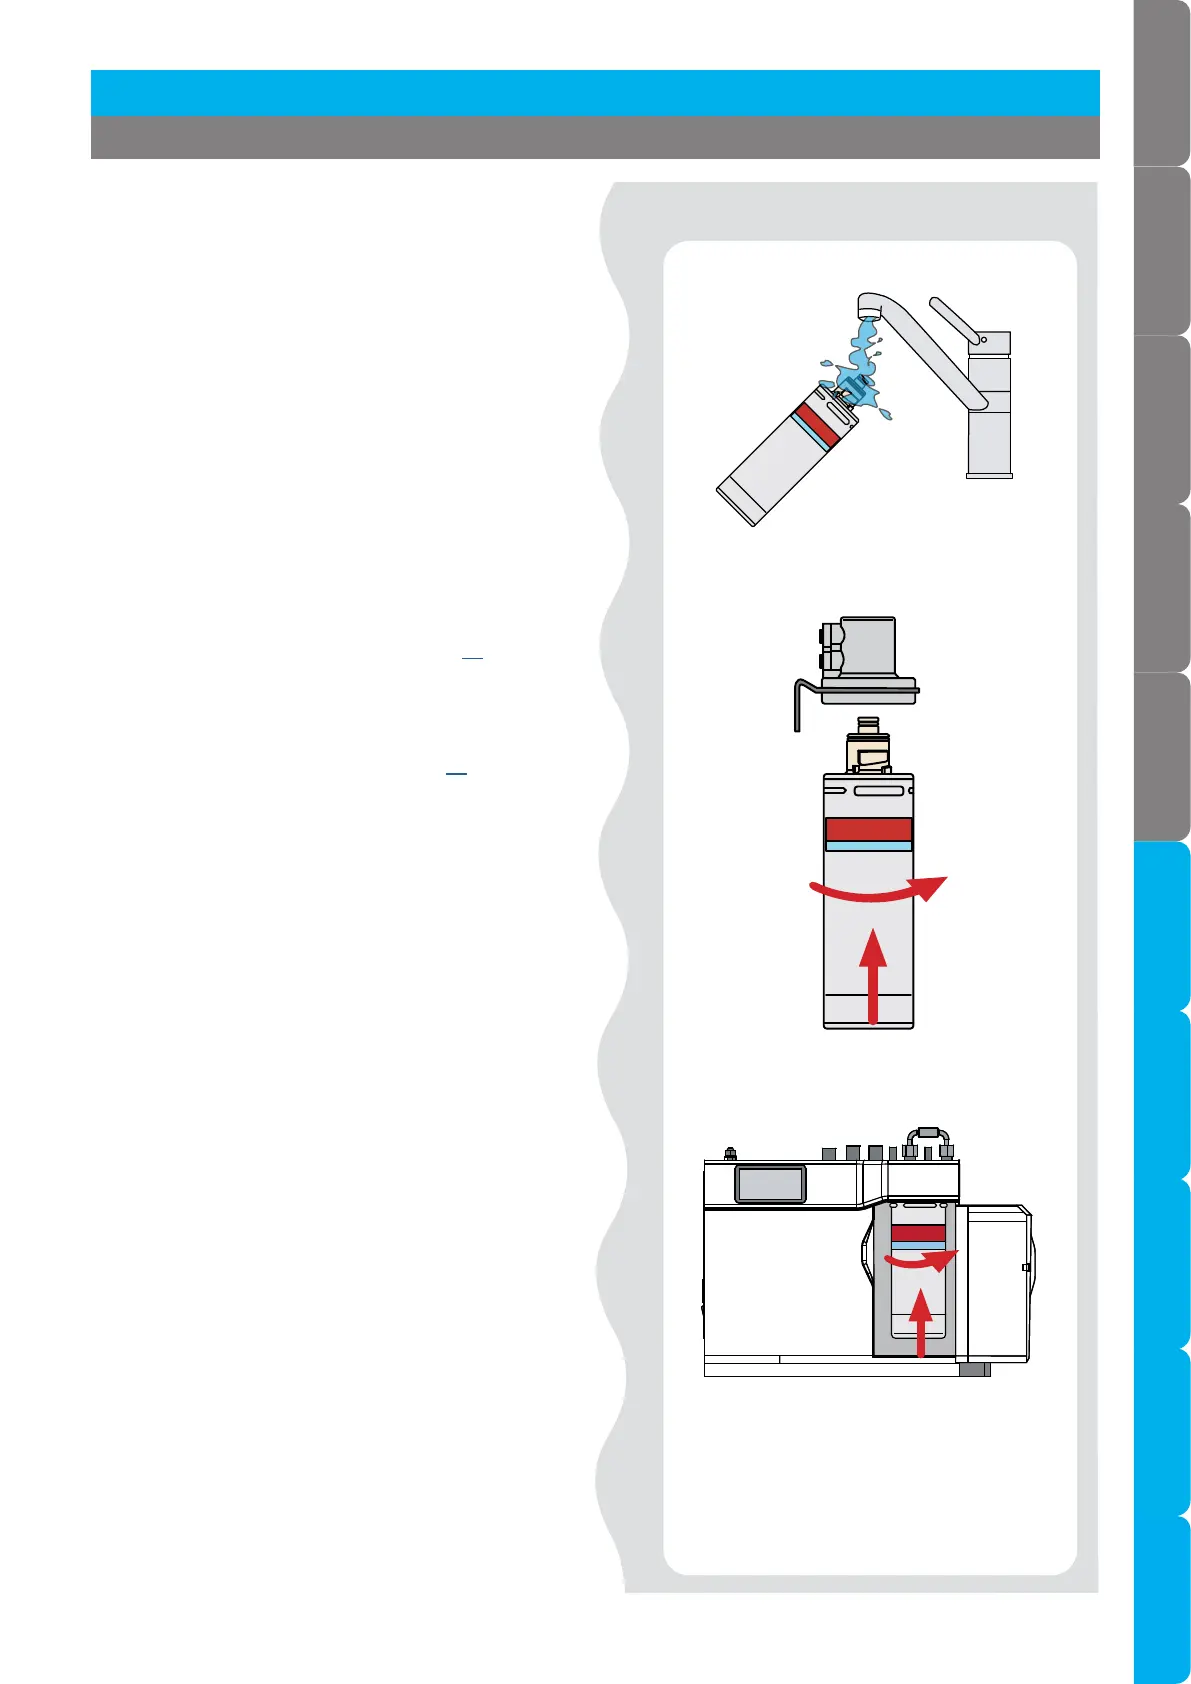
Fit new filter.
Moisten connector o-rings.
Rotate
Push up
• Unpack replacement filter cartridge and remove
sanitary cap,
• Write today’s date where shown on the label.
• Avoid touching the filter o-rings and
filter opening as this may cause bacterial
contamination of the cartridge.
• Moisten the o-rings with water.
• Align the front cartridge label to the left, and
push the new cartridge up into the filter head.
• Turn the cartridge a quarter turn anticlockwise
until it comes to a complete stop and locks, with
the front label facing forward.
• Initiate the filter flush programme by scrolling
through the menu screen (see page 85).
• When completed, clean up and dispose of old
cartridge and packaging.
• Close the door to secure the appliance.
• Adjust the filter settings (see page 87) litres and
days.
• If the HydroTap G5 is switched off for a long
period of time (e.g. more than a weekend), run
water through the chilled water outlet for at least
60 seconds before consumption.
4.1.1 Internal filter change continued
Section 4 User maintenance
 Loading...