44 78-9000-5020-0 Rev C
Step 6. From the main screen, select the country in which the unit will be operating. (If
the country is not listed, select ‘All other countries’.)
Step 7. A communication window will appear. (Baud rate 38400 / Com Port x; select
PC COM Port that is connected to the locator.)
Step 8. Click Menu/OK[6].
Step 9. Press Initial Conguration .
Step 10. Press Download .
Step 11. The prompt line will display: Download Completed Successfully, when nished.
The marker types legally allowed in the country selected in Step 6 above will be
activated at this time.
Step 12. Multiple units may be congured at this point by simply connecting the next
receiver, powering it on, and pressing download.
Step 13. Press Exit when all receivers have been updated.
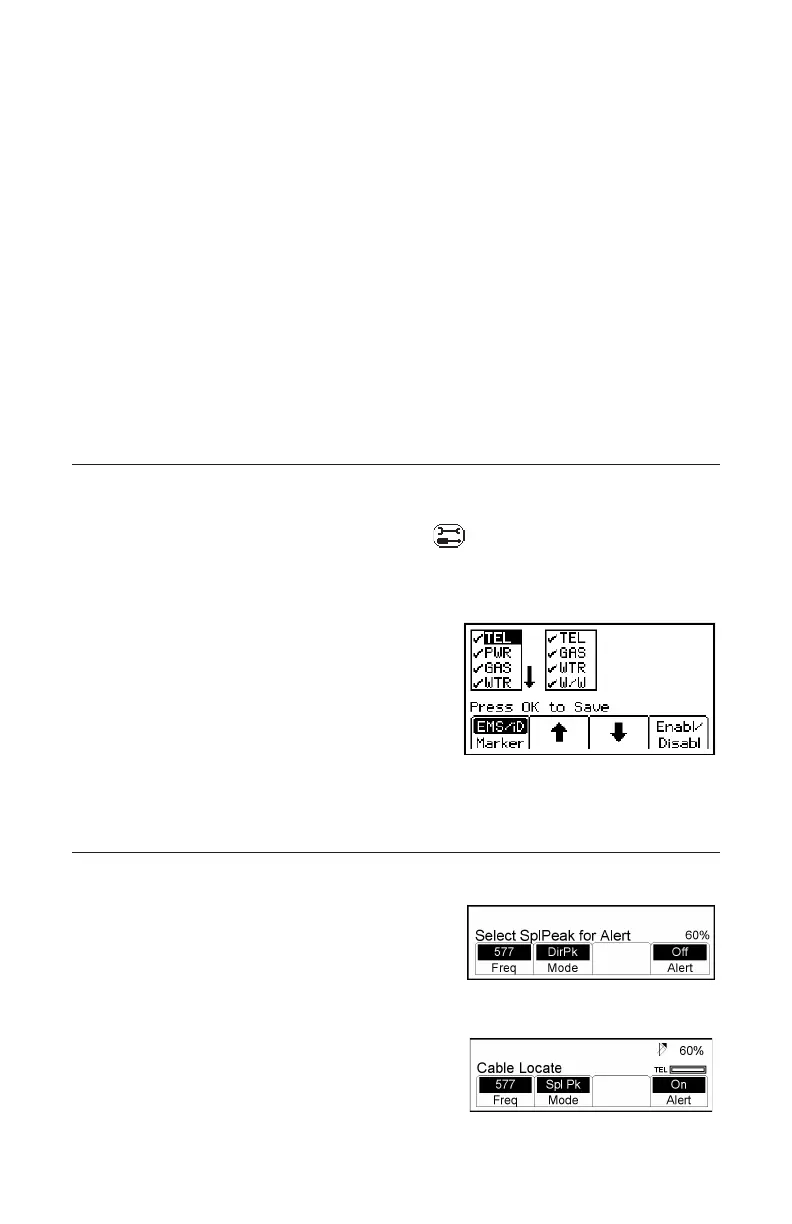
C. Enabling/Disabling Marker Types
Markers can be enabled or disabled allowing a user to add or remove marker choices from the EMS/
iD Marker and the Path Marker options.
Menu/OK [6:Toggle to MAIN MENU] + >>More [SK:4] + [SK:5] + >>More [SK:d] + >>More
[SK:h] + MarkerType [SK:j]
The unit will default with all markers enabled ().
Step 1. Press the up/down arrows [SK] to highlight
a utility to enable or disable.
Step 2. Press Enabl/Disabl [SK].
− Only the markers that are enabled (√)
will be available in the locate mode.
Step 3. Press Menu/OK [6] to save settings or Exit
[SK] to cancel.
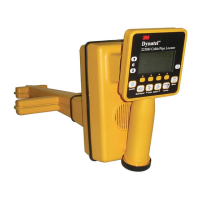
D. Alert Mode for Cable or Pipe Locating
While tracing a cable or pipe, it is possible to search for point markers with or without iD.
Step 1. Press Alert [SK].
− If the unit is in Dir Pk, DirNull, Ind Pk
or T-View modes, a prompt will notify
the operator that alert mode only
functions in Special Peak (Spl Pk) mode.
Step 2. Press Mode [SK Toggle] for Spl Pk.
Step 3. Press Alert On [SK Togg le].
 Loading...