NoteAction
CAUTION
The lower arm weighs 75 kg
(gearboxes axes 2-3 ex-
cluded)!
8
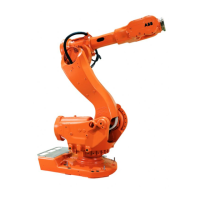
Shown in the figure Location of lower arm on page 228.Remove the attachment
screws and washers securing
the lower arm to gearbox axis
2.
9
Remove the lower arm.10
Refitting
The procedure below details how to refit the lower arm.
NoteAction
Secure the lower arm with a roundsling and lift
it to its mounting position.
1
CAUTION
The lower arm weighs 75 kg (gearboxes axes
2-3 excluded)!
2
Make sure the o-ring is fitted to the gearbox.3
Lightly lubricate the o-ring with grease.
Fit guiding pins in two of the holes in gearbox
axis 2.
4
Lift the lower arm on to the guiding pins.5
Shown in the figure Location of lower
arm on page 228.
Refit the attachment screws and washers secur-
ing the lower arm to gearbox axis 2.
6
M16x50, quality 12.9 gleitmo (16 pcs).
Tightening torque: 300 Nm.
Remove the guiding pins.7
Secure the upper arm with a roundsling and lift
it to its mounting position.
8
Detailed in the section Replacement
of the upper arm on page 222.
Refit the upper arm.9
Detailed in the section Replacement
of cable harness, upper end on
page 192.
Refit the cable harness axes 3-6.10
Pendulum Calibration is described in
Operating manual - Calibration Pendu-
lum, enclosed with the calibration
tools.
Recalibrate the robot.11
Axis Calibration is described in Calib-
rating with Axis Calibration method on
page 319.
General calibration information is in-
cluded in section Calibration on
page 305.
Continues on next page
Product manual - IRB 6620 231
3HAC027151-001 Revision: T
© Copyright 2006-2018 ABB. All rights reserved.
4 Repair
4.4.4 Replacement of lower arm
Continued
 Loading...
