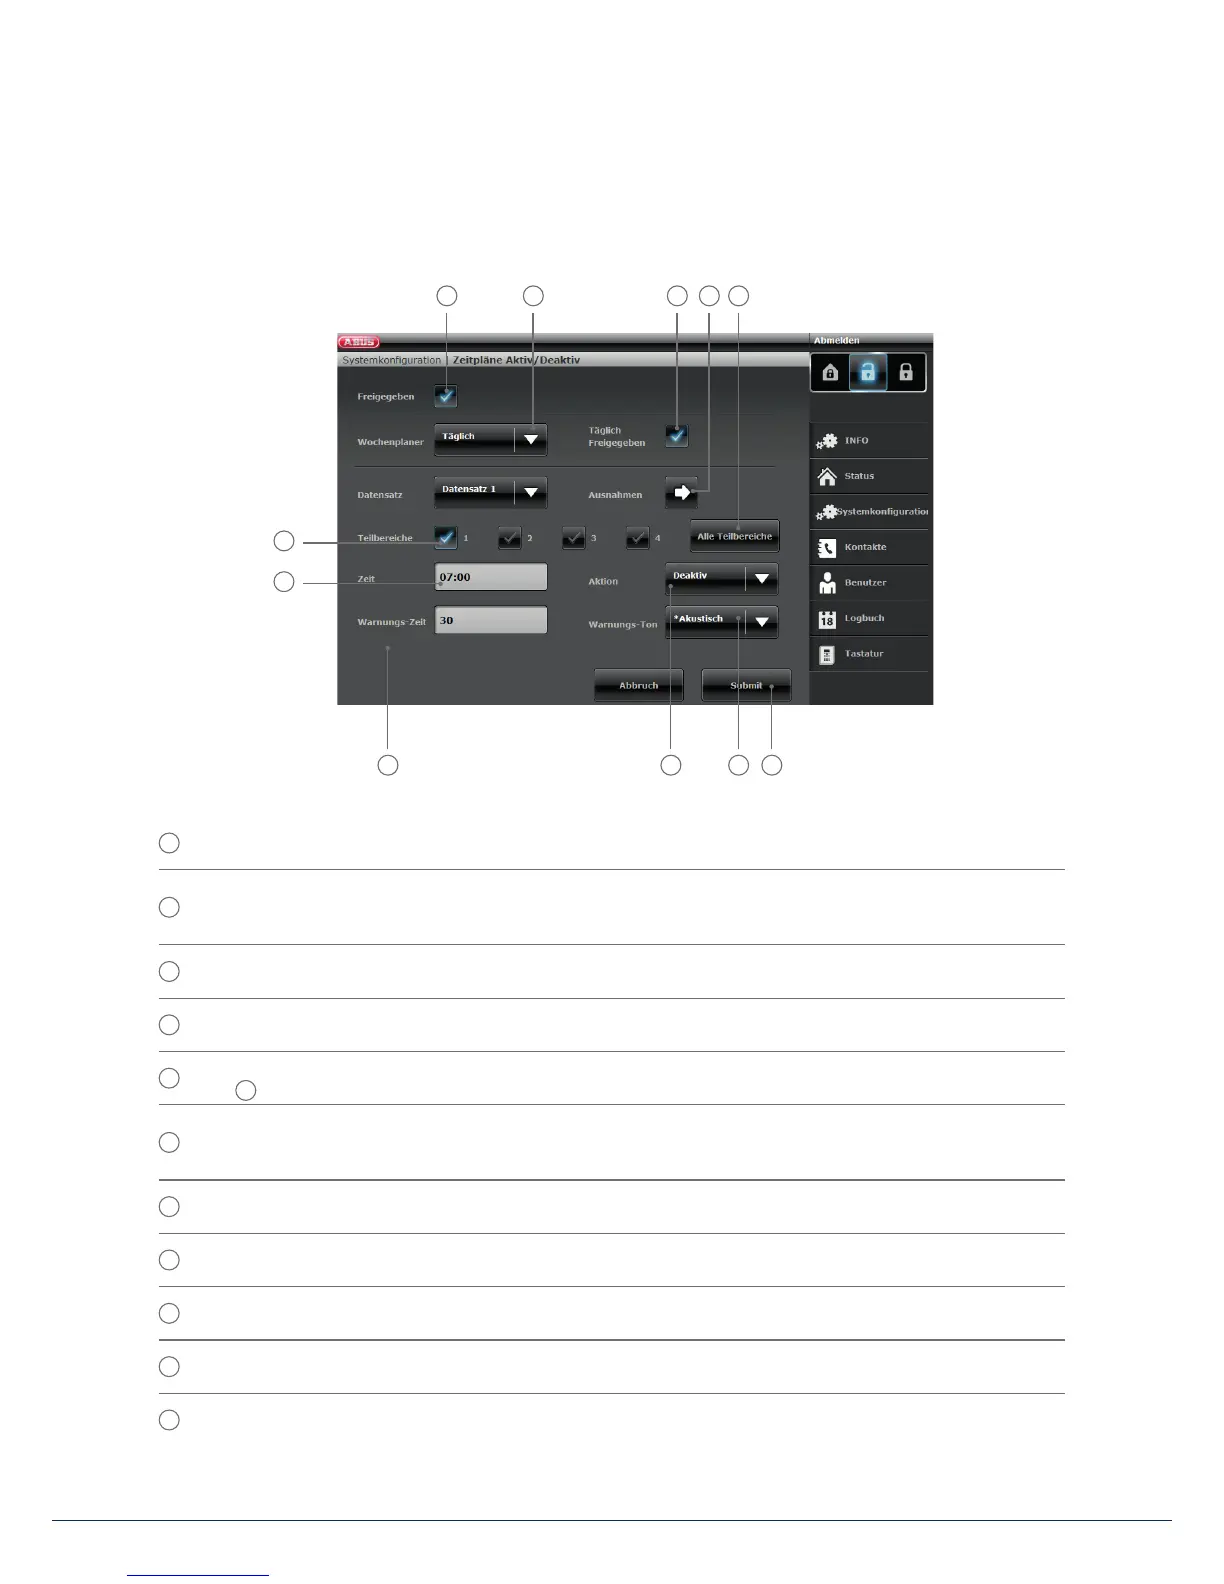
Carry out the following steps:
1
For a time schedule to be active, it must rst be "Enabled".
2
De ne when the time schedule should be active. The following options are available: Monday/Tuesday/
Wednesday/Thursday/Friday/Saturday/Sunday/Monday – Friday/Saturday to Sunday/Daily/
Exceptions. In this
example we are choosing "Daily".
3
You can also lock individual time schedules if one is no longer required but you wish to retain the data
for future use. If you wish to add the time schedule, click on "Enabled".
4
If you wish to de ne exceptions (such as holidays), adjust your time schedule accordingly. Moreinformation
on con guring exceptions is provided on the next page.
5
If you wish to use the time schedule for all 4 sub-areas, enable this eld. For individual sub-areas
use the
eld
10
6
The alarm panel can warn you before it automatically arms. Choose "Acoustic" to receive an acoustic
warning signal before the alarm panel arms. Choose "Silent" for the alarm panel to arm without
providing an acoustic warning signal beforehand.
7
De ne what should happen: Arm/Disarm/Internal/“No”. In this example we are choosing "Disarm".
Thismeans that nothing happens.
8
Set the "Warning time" (in minutes).
9
De ne the time at which the time schedule is active.
10
If you wish to arm individual sub-areas, click on the sub-areas in question here.
11
The rst "dataset" (time schedule) is created and can be saved by clicking "Transmit". More information on
datasets is provided on the next page.
8 7 6 11
54321
10
9
13. Operation via web browser