17|16
8. Arming and disarming the system
8.6 Individual sub-areas
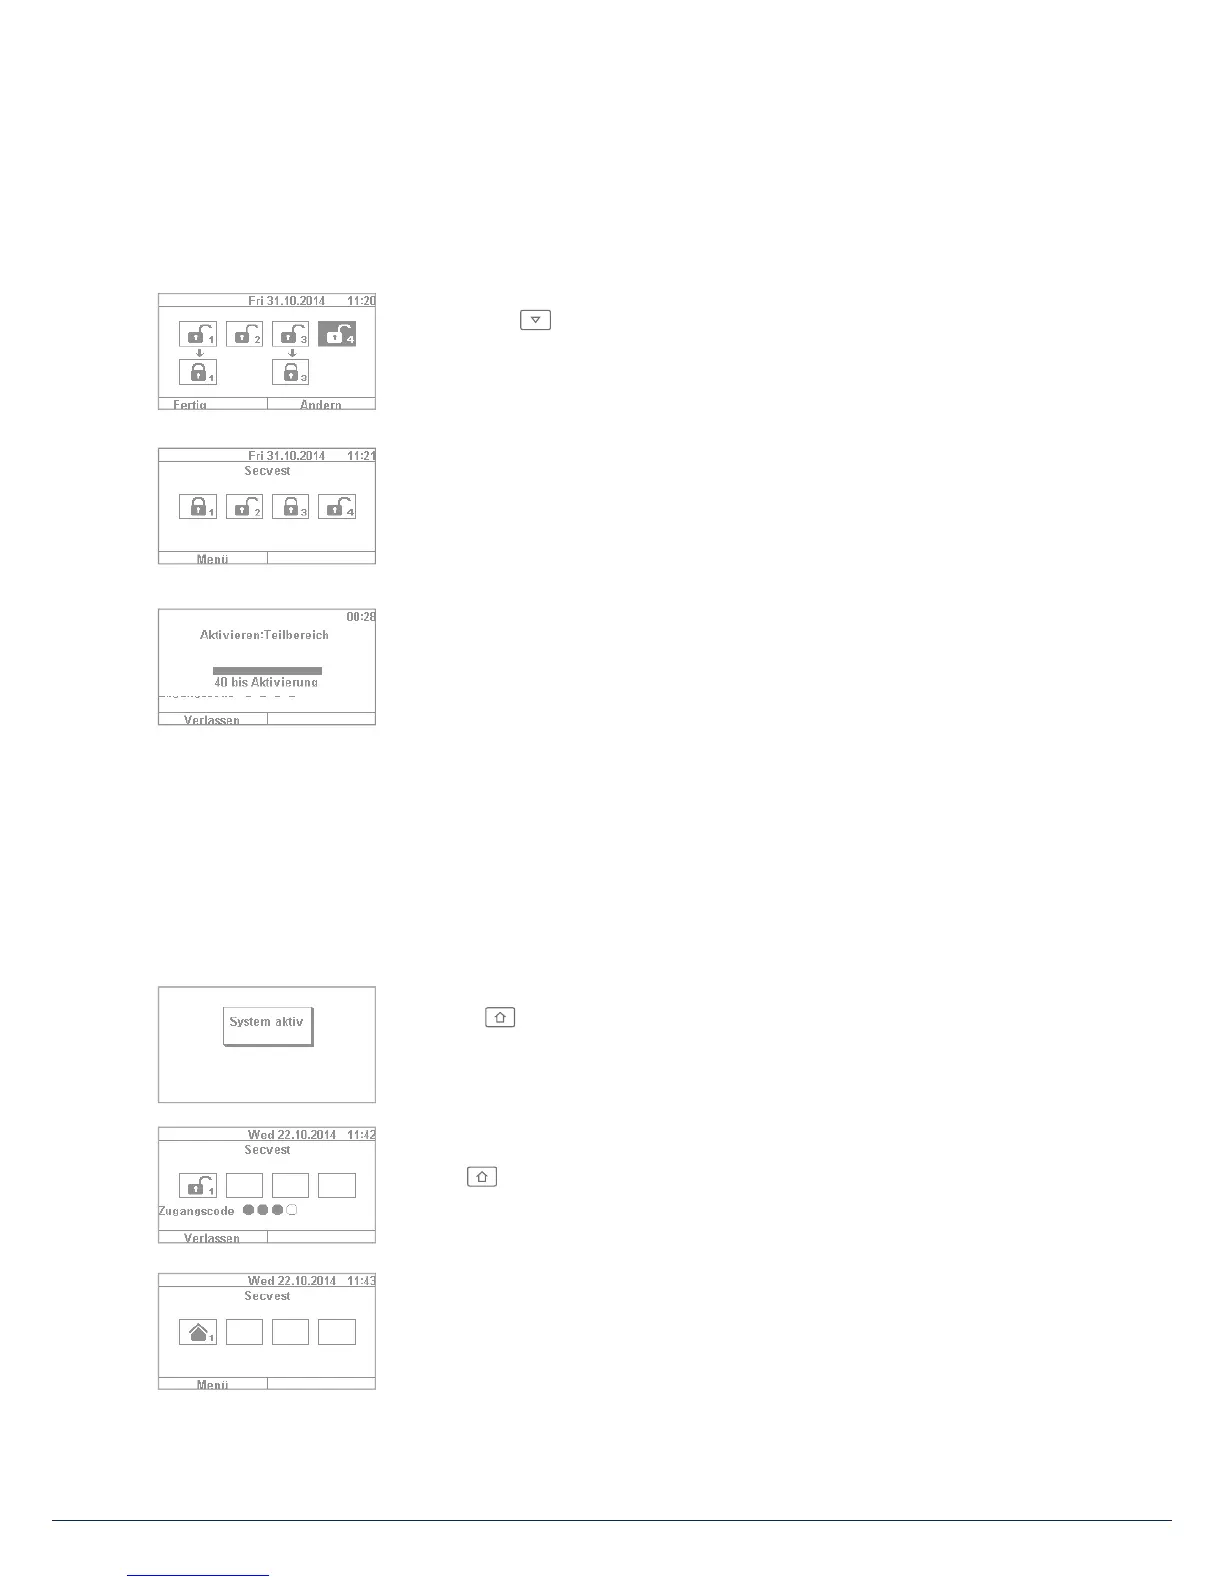
1. If you wish to arm two sub-areas, proceed as follows: enter your user code.
Using the arrow keys, select the two sub-areas to be armed. The
selections are visually highlighted. Set the selected sub-areas to the
open padlock symbol via the "Change" function. Leave the sub-areas you do
not wish to arm "empty". In this case the menu looks like the example given
in the gure on the le .
2. Click on "Done" and system sub-areas 1 & 3 are armed, while sub-areas 2 & 4
remain disarmed. A er the arming time, the Secvest display then looks like
the example given in the gure on the le .
3. To arm only sub-area 2, repeat the steps as described above. Select the
individual sub-areas, click on "Change" and set the value for the sub-area to
"empty" as shown in the gure. The sub-area to be armed (sub-area2 in this
case) should be set to "active" using the "Change" function. Click on "Done"
to arm just this sub-area.
8.7 Internal arming
In addition to the option of arming the complete system and sub-areas, the system also o ers the option
of "internal arming". This type of arming is preferred when occupants are home and wish to arm just the
perimeter of the premises. Certain detectors indoors (such as motion detectors) are disabled so that occupants
can move freely within the building. A practical example here is application in a private home.
The following options are available for internal arming:
Option 1:
Press the key to internally arm the system with just one touch. The quick
arm option must be enabled in advance by the specialist installation contractor.
Option 2:
Enter a user code to arm the system. Click and hold "Change" until the house
symbol appears. Click on "Done" and the system is "internally armed".
You can now move freely around the house even though motion detectors
may be installed. The perimeter of the premises is armed, so that an intruder
attempting to break in from outside triggers an alarm.