Chapter 2, Installing the Accu-Chek Smart Pix system
Accu-Chek Smart Pix user's manual
2-5
2.4 Configuring the Accu-Chek Smart Pix system
The Accu-Chek Smart Pix system enables you to customise
the appearance and default parameters (e.g. language,
default setting English) of the reports to suit your
requirements. To perform this configuration (before using the
system for the first time) open the “user interface” of the
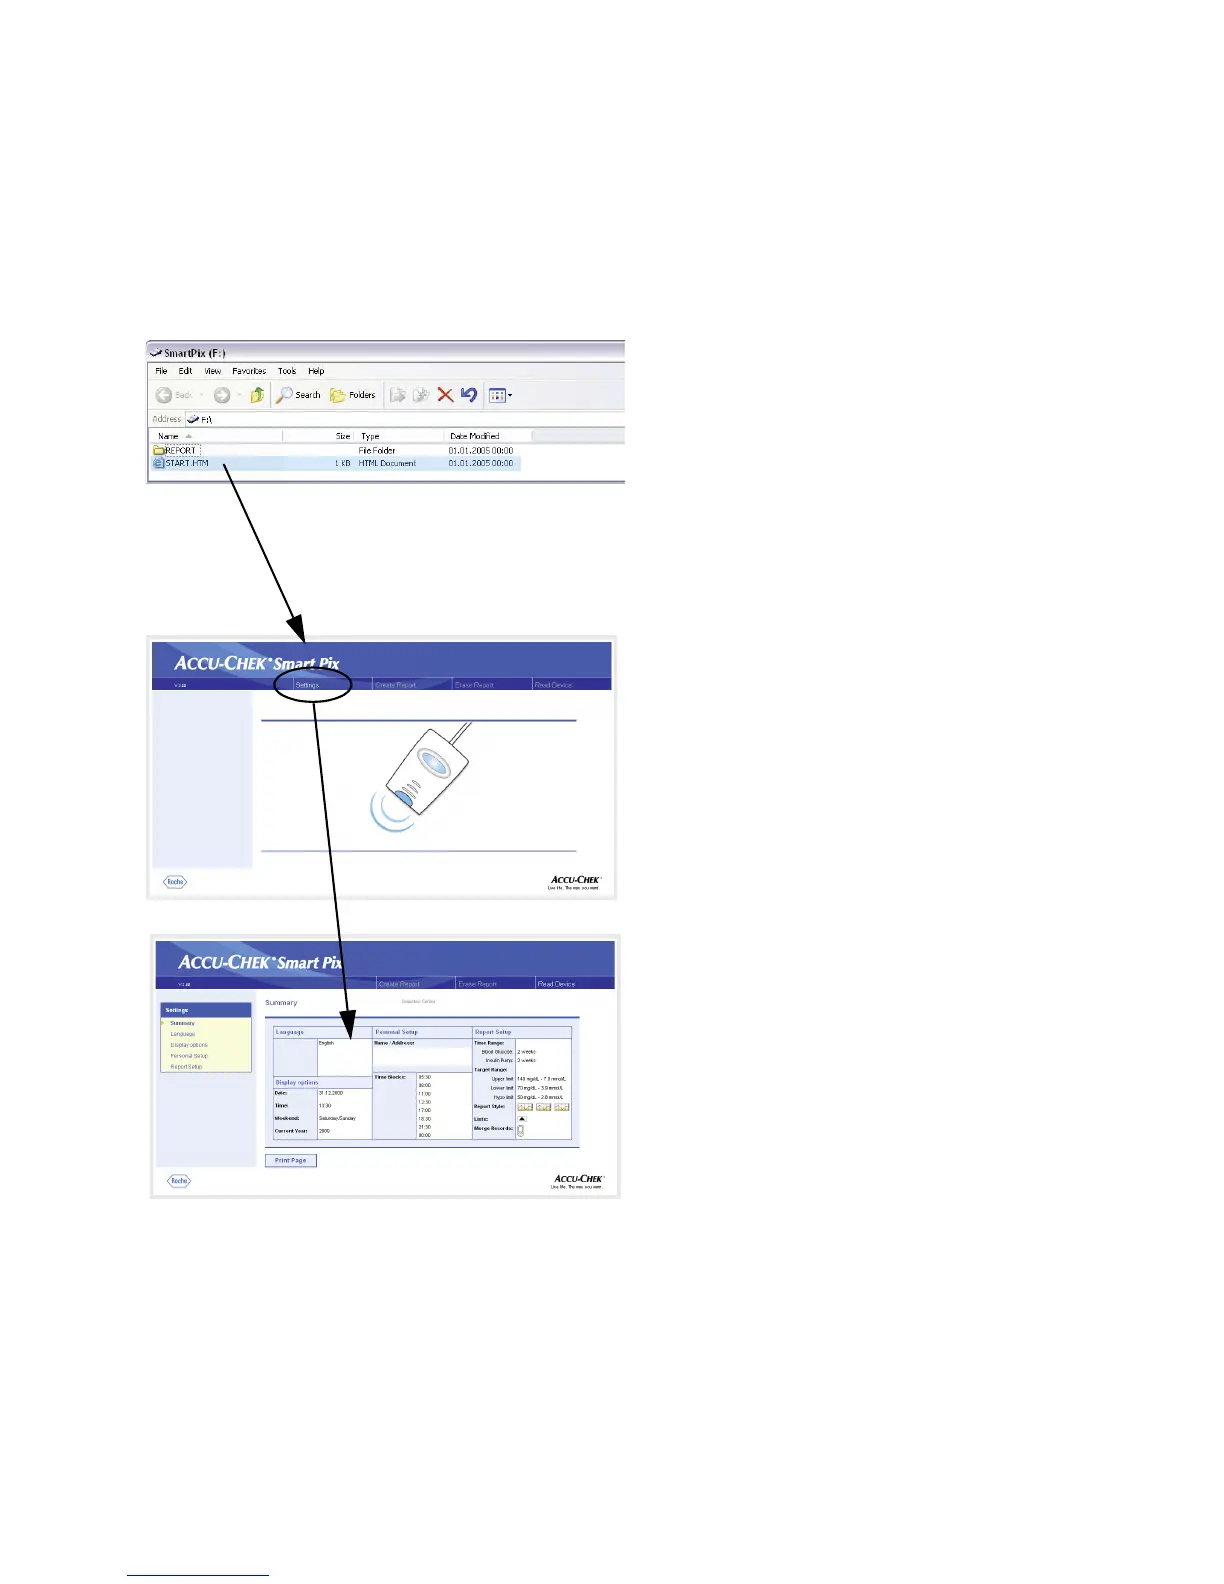
Accu-Chek Smart Pix system, which is stored in the
START.HTM
file on the removable disk.
• Open the
START.HTM
file with a double click. The
default Internet browser on your computer is launched
and, at the same time, the Accu-Chek Smart Pix user
interface is loaded.
• Click (once, as is usual in browsers) on the
Settings
button. The Accu-Chek Smart Pix device now quits
search mode (the centre of the status indicator is lit
continuously).
You will now see the page showing a
Summary
of the current
settings (on the right) and the navigation bar with the links to
the various setup areas (on the left). The following setup
options are available
• Language
•
Display Options
for setting up display formats and year
•
Personal Setup
for name and time blocks
• Report Setup
The following pages provide detailed descriptions of the
various setup areas. First of all you should set the language
you prefer so that the user interface for all other settings is
displayed in that language.
 Loading...