Chapter 2, Installing the Accu-Chek Smart Pix system
Accu-Chek Smart Pix user's manual
2-11
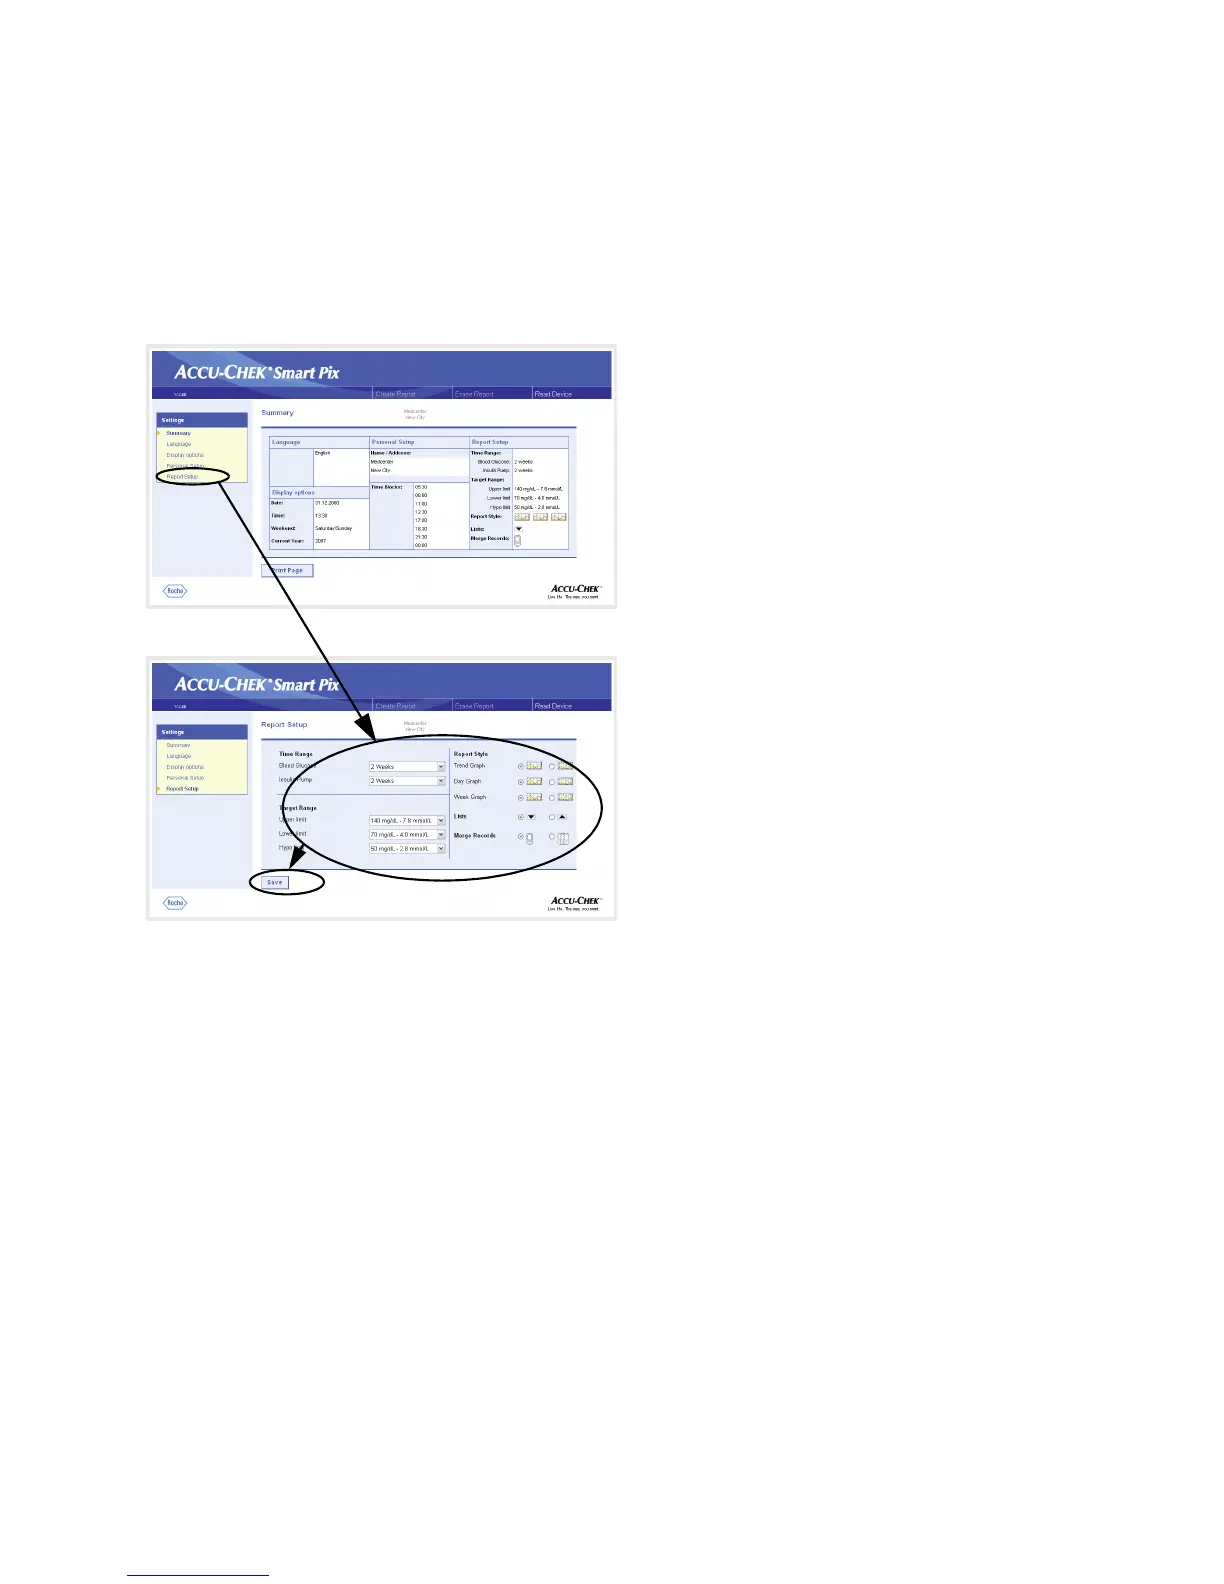
Report Setup
On the navigation bar, click on the
Report Setup
link. The
display pane now shows the options for reports to be created
in the future. Select the following settings here:
•
Time Range
for the reports to be created, for blood
glucose meters (1, 2, 4, 6, 8, 10 or 12 weeks) and
insulin pumps (1, 2 or 4 weeks) separately.
•
Target Range
for blood glucose results, defined by an
upper and lower limit and by the hypo(glycemic) limit.
These values may have also been configured
externally in smaller intervals. In this case, the values
are displayed in grey. If you want to change these
kinds of values, you can only choose from the normal
(and limited) selection of predefined values.
•
Report Style
of the analyses. This selection influences
the level of detail for the chart.
• Sort order of displayed
Lists
(sorted in ascending or
descending order).
• Use of one or more meters to perform a combined
analysis of data.
Selecting a time range
• Click on the arrow pointing down to open the
selection list, for blood glucose meters and insulin
pumps separately.
• Click the desired time range to select it.
 Loading...