RETRIEVING TEST RESULTS - 7
VerifyNow System User Manual Page 61 14340.J
• Advance to the next character by pressing the (←
←←
←) or (→
→→
→) and repeat
steps to select additional characters.
After the Patient ID is entered, press the Next key.
NOTE: If you make a mistake while entering a text character, press the Next
key to return to the Patient ID Entry Screen. Use the (→
→→
→) key to move the cursor to
the end of the Patient ID entered, then press the (←
←←
←) key to erase character(s)
until the mistaken character is deleted. Press (TEXT) to go back to the Text
Entry Screen and select the correct character using the directions from above.
See Section 7.1.3 for a description of the assay results log.
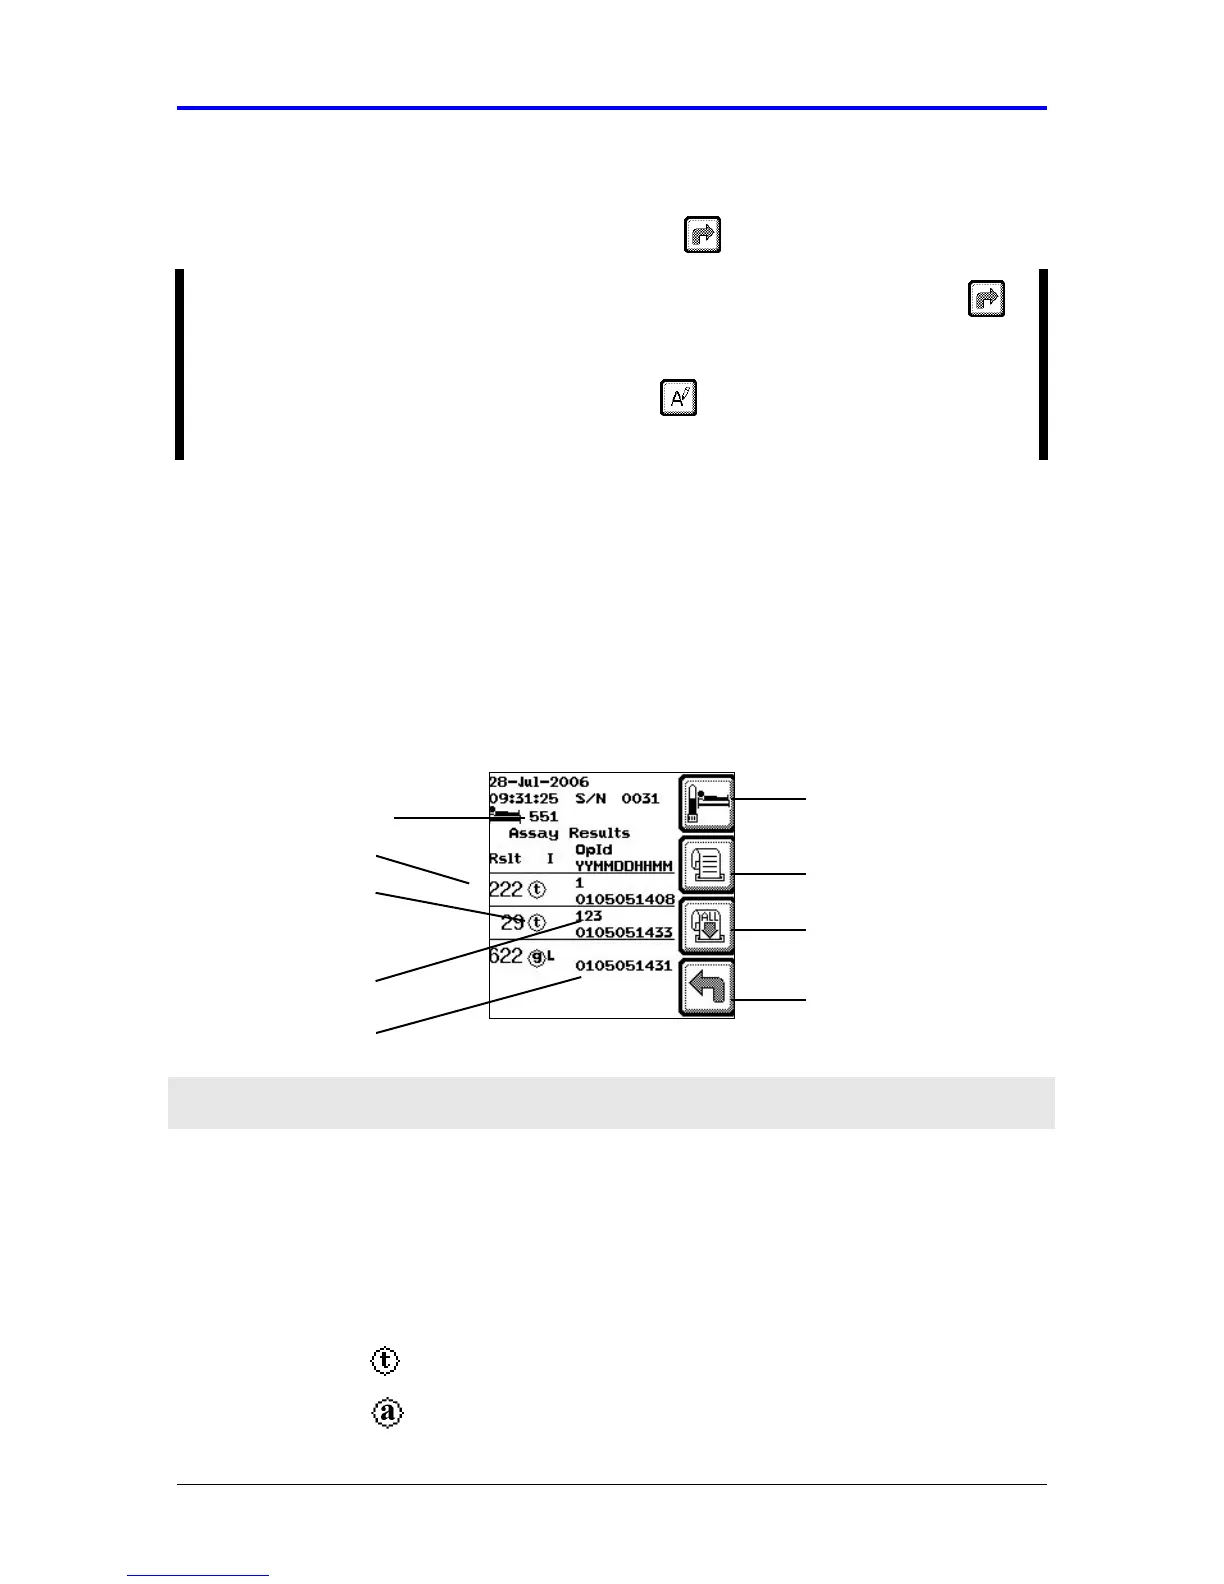
7.1.3 Assay Results Log
The screen displays a scrollable log of the last 150 patient results arranged
chronologically. If the instrument is configured to use patient identification, then the
instrument will retrieve all assay results for a particular patient. The cursor is
positioned on the most recent assay result. Navigate up and down the list using the
(←
←←
← , →
→→
→) keys.
Figure 7-3 Assay Results Log
Feature Description
Patient ID Displays the patient identification and filters the stored results so
that only results for the selected patient are displayed. This feature
is available when patient identification is activated.
Assay Result Displays the numerical result.
Displays a symbol indicating the type of assay performed.
IIb/IIIa assay (PAU result)
Assay Type
Aspirin assay (ARU result)
New Assay
Assay Result
Assay Type
Date and Time
Patient ID
Back
Print All Results
Print Result
Operator ID