INSTRUMENT SETTINGS - 8
VerifyNow System User Manual Page 82 14340.J
2.
Press the Maintenance key.
3.
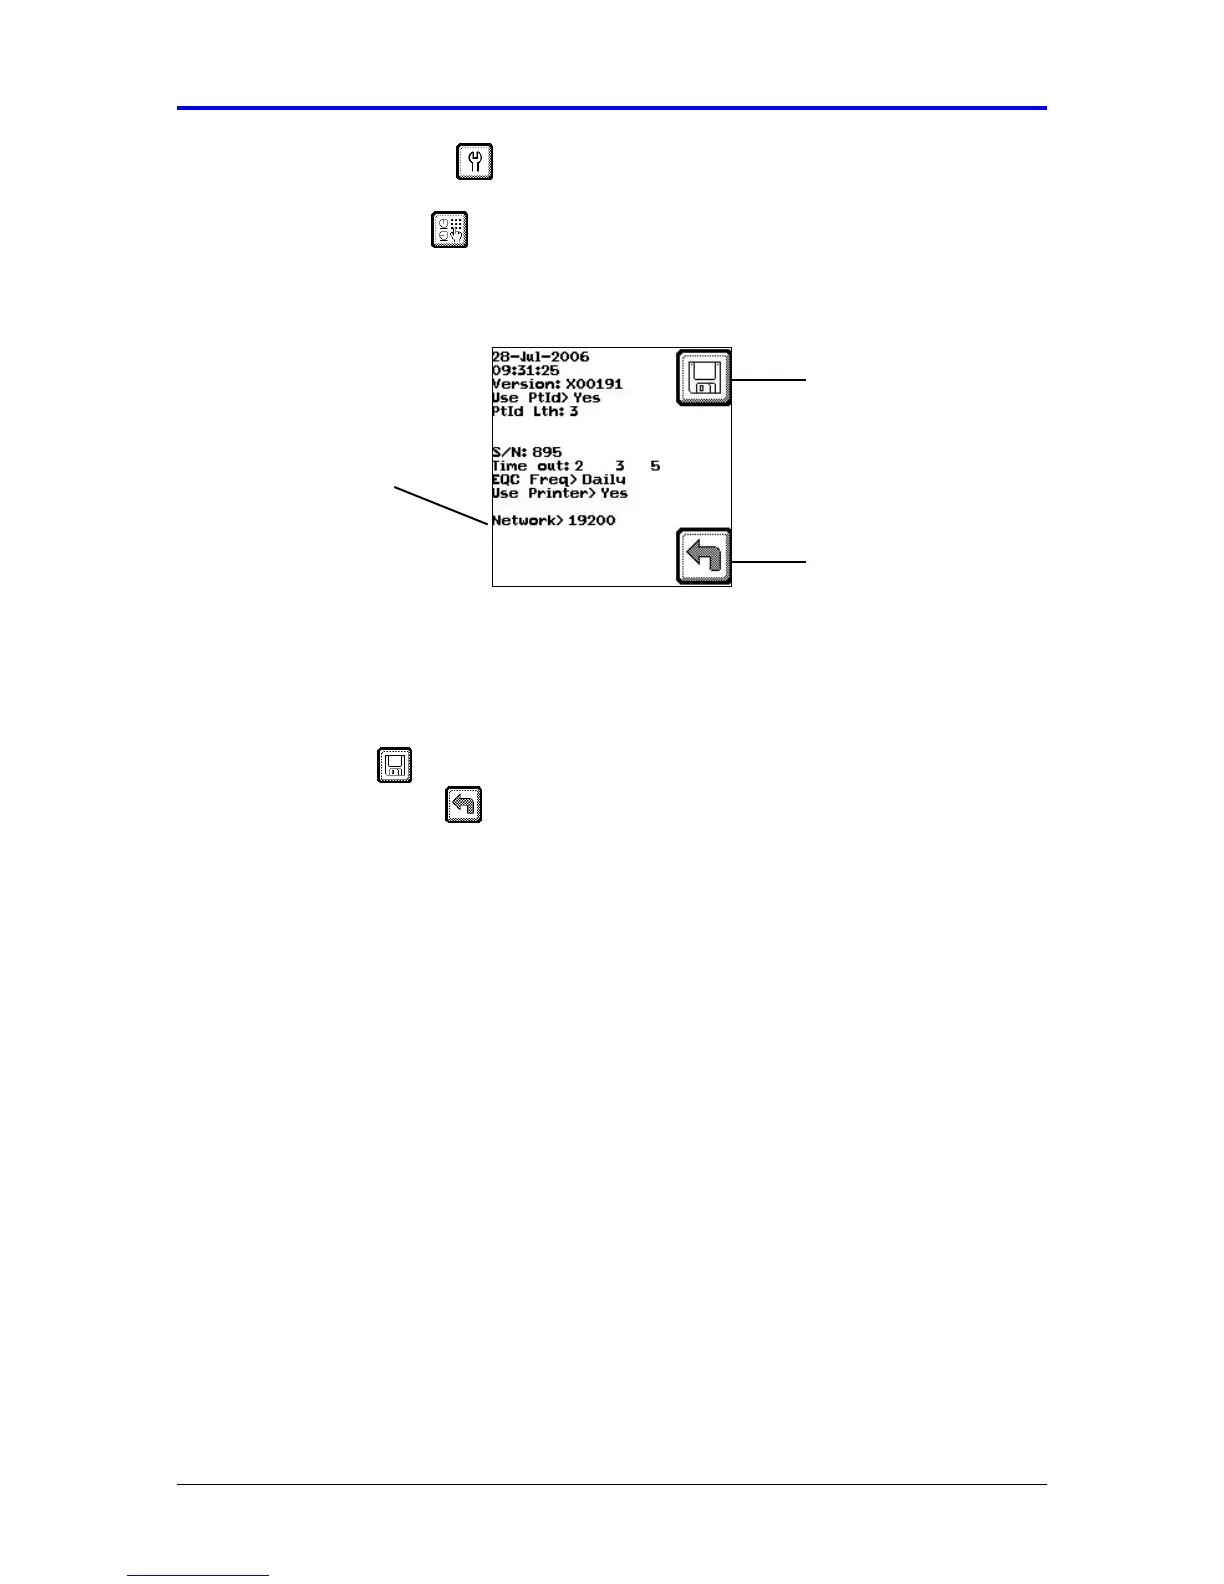
Press the Parameter key to display the network setting (Figure 8-9). Refer to
the Appendix for information on navigating within the Maintenance section.
Figure 8-9 Network Setting
4.
Press the Tab key 9 times to advance the cursor to the Network setting. At the
Network prompt, press either the (←
←←
←) or (→
→→
→) key to change the setting between
NONE and a specific baud rate. If configuring a network, change the setting to
the rate that matches the capabilities of the network being used.
5.
Press the Save key to keep the new setting and return to the Maintenance
menu. Press the Back key twice to return to the Main Menu without saving
the changes.
6.
In order to activate the saved baud rate, turn the VerifyNow instrument off and
then on again.
NOTE: Unless a Network connection has been established, the network setting
should always be set to NONE.
Network Setting
Back
Save Setting