CONFIGURATION AND TAKING AN
X-RAY EXPOSURE
The “X-MIND unity“ x-ray system is factory congured in “standard mode”.
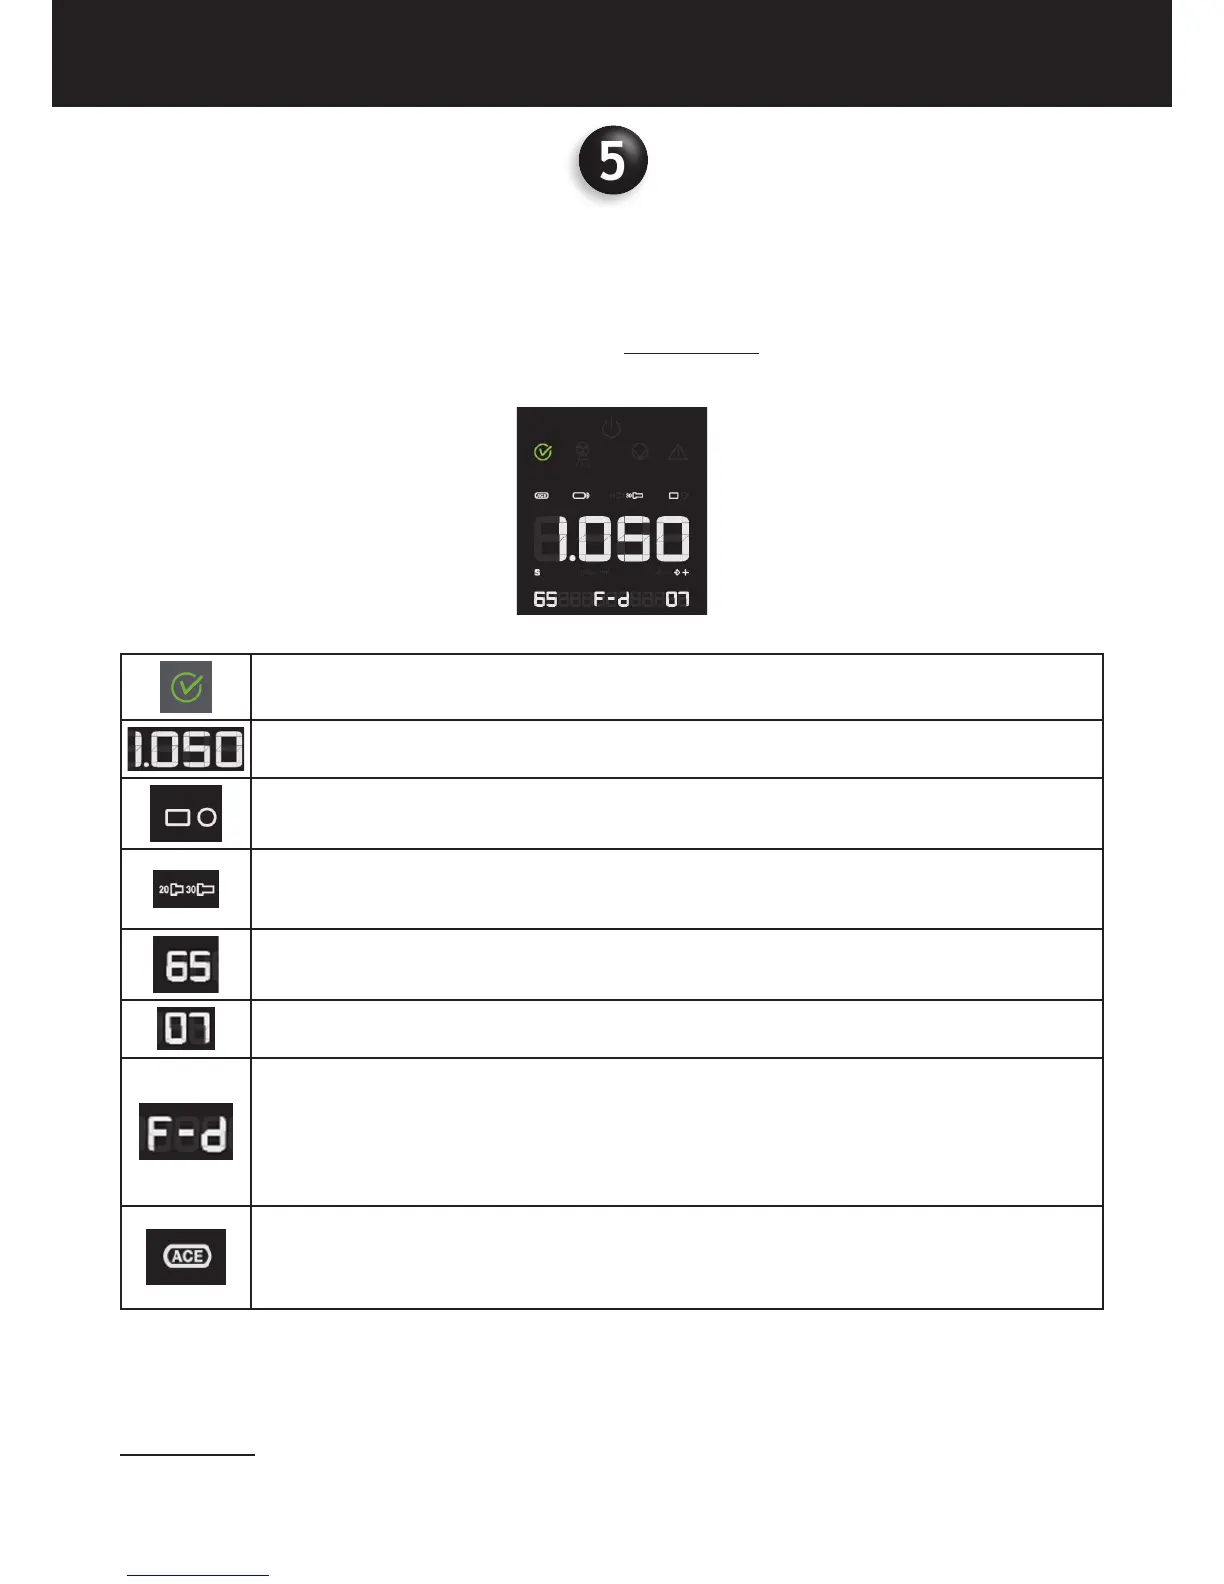
On the control panel, the led relevant to the following exposure parameters will light up:
Ready for x-ray exposure (Armed mode)
X-Ray Exposure Time selected
Type of cone installed (rectangular or circular shaped x-ray beam output)
SSD distance
20 [cm] (8”) = SHORT CONE (circular or rectangular)
30 [cm] (12”) = LONG CONE (circular or rectangular)
X-ray tube voltage
Selection between: 60kV / 65kV / 70kV
X-ray tube current
4mA-7mA (typical suggested : 6 mA / 7mA)
Selection of the x-ray detector type :
F-d : FILM, D Speed
F-e : FILM, E Speed
F-f : FILM, F Speed
Dig : Digital X-Ray Sensor
PSP : Phosphor plates
When the integrated Sopix/Sopix2 Inside sensor is installed and properly connected you can run the X-MIND unity
with the ACE system activated.²
the “ACE” code inside the list of selected type of supported detector (F-d, F-e, F-g, F-f, DIG) is available only when a
Sopix/Sopix2 Inside is installed and properly connected.
2
2 Refer to the operator’s manual of the Sopix/Sopix2 Inside x-ray sensor for more or contact the technical support of Sopro. : ZAC Athé lia IV • Ave-
nue des Genévriers • 13705 LA CIOTAT cedex • FRANCE • Tél +33 (0) 442 98 01 01 • Fax +33 (0) 442 71 76 90 • E-mail: info@sopro.acteongroup.com • www.
sopro.acteongroup.com