Chapter 2: Installation and Setup
OsmoPRO MAX Automated Osmometer User Guide
33
Set Up Networking Communications (optional)
The OsmoPRO MAX connects to a network over an Ethernet
cable connected to the Ethernet port on the rear of the
instrument (see Rear Power Module).
Your network
administrator can help you set up your instrument to
connect to a network.
NOTE: Access to Settings > Networking depends on the
Change Network checkbox setting on the
Operator Permissions tab (see Configure
Operator Permissions).
Configure a LAN Connection
Connect the OsmoPRO MAX to a computer or other
device over a local area network (LAN). An Ethernet port
is available on the back of the instrument.
To set up a LAN connection from the Home screen:
1. Connect the Ethernet network cable to the Ethernet
port on the back of the instrument.
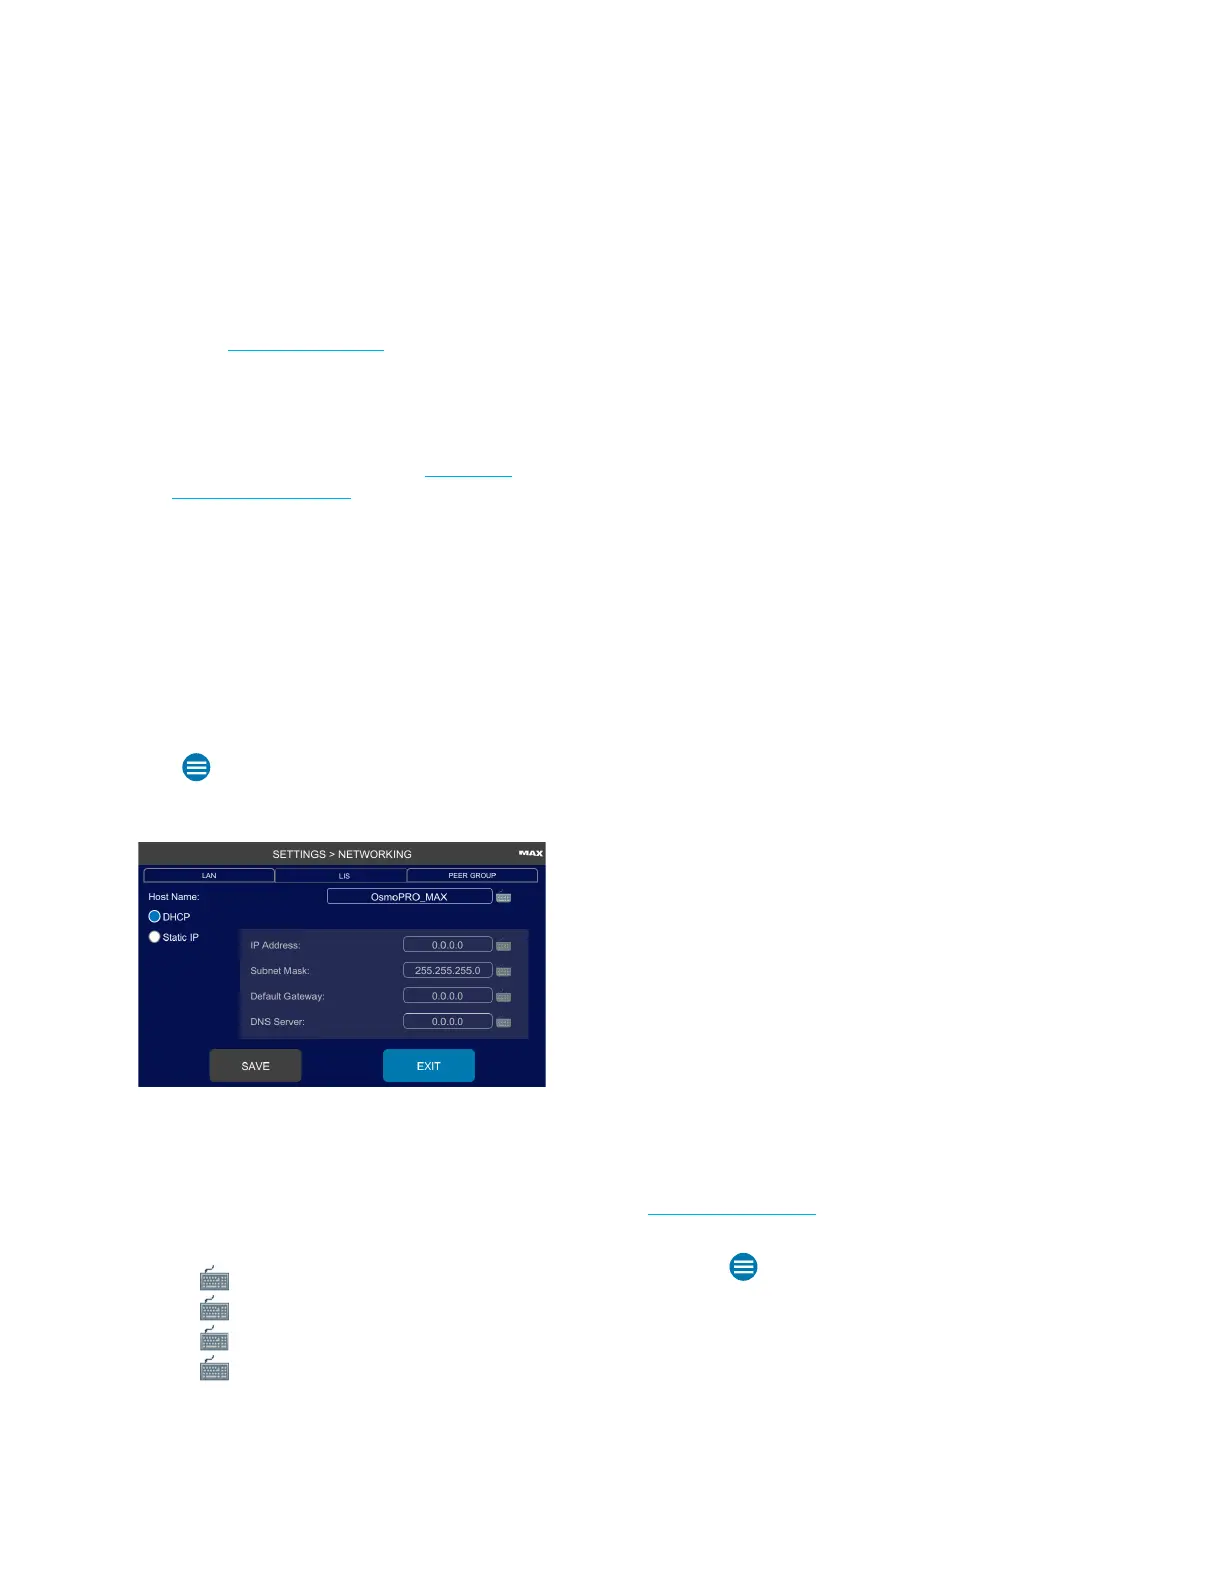
2. Press > Settings > Networking and log in.
The Networking screen opens with the LAN tab
selected.
3. Select DHCP (Dynamic Host Configuration Protocol)
to have a connected DHCP server dynamically assign
and automatically enter theIPAddress, Subnet Mask,
and Default Gateway. These parameters can change
each time the instrument connects to the network.
Otherwise, select Static IP and enter these parameters:
a. Press and enter the IP Address.
b. Press and enter the Subnet Mask.
c. Press and enter the Default Gateway.
d. Press and enter the DNS Server.
4. Press Save to save your LAN settings.
5. Press Exit to return to the Settings menu.
Configure a LIS Connection
If your lab uses a Laboratory Information System (LIS),
you can configure the OsmoPRO MAX to communicate
with it.
The OsmoPRO MAX can function either as a client or
server with a LIS, and communication can be set to
undirectional or bidirectional.
Bidirectional mode: Users can configure the instrument
to expect download of sample work orders from the LIS.
In this mode:
1. The Instrument receives work orders at any time and
stores them for matching with a sample presented for
test.
2. If no order is found, the instrument still sends a result
record even if no matching work order is found.
The instrument also responds to queries from the LIS in
this mode. It sends back work orders and result records
matching the appropriate fields in the query record.
Unidirectional mode: Users can configure the instrument
to send a result record without matching it to a sample
work order. A default work order is made up just to
satisfy the LIS2-A2 protocol.
Automatic mode: Users can configure the instrument to
send a result record as soon as a test is completed
without operator intervention. This mode works with
either bidirectional mode or unidirectional mode as
explained above.
Manual mode: Users can configure the instrument to
require an operator to verify a result before it is sent to
the LIS system. The operator uses the Results screen to
verify the result and initiate the sending operation. This
mode works with either the bidirectional mode or
unidirectional mode as described above.
The LIS status icon [B] indicates connection status (see
LAN/LIS Status Icon) Green indicates a successful and
ready LIS connection.
1. Select > Settings > Networking and log in.
2. Press the LIS tab.
3. Press the LIS Enabled checkbox [C].