Hardware Reference Guide 55
MOUNTING THE AP340
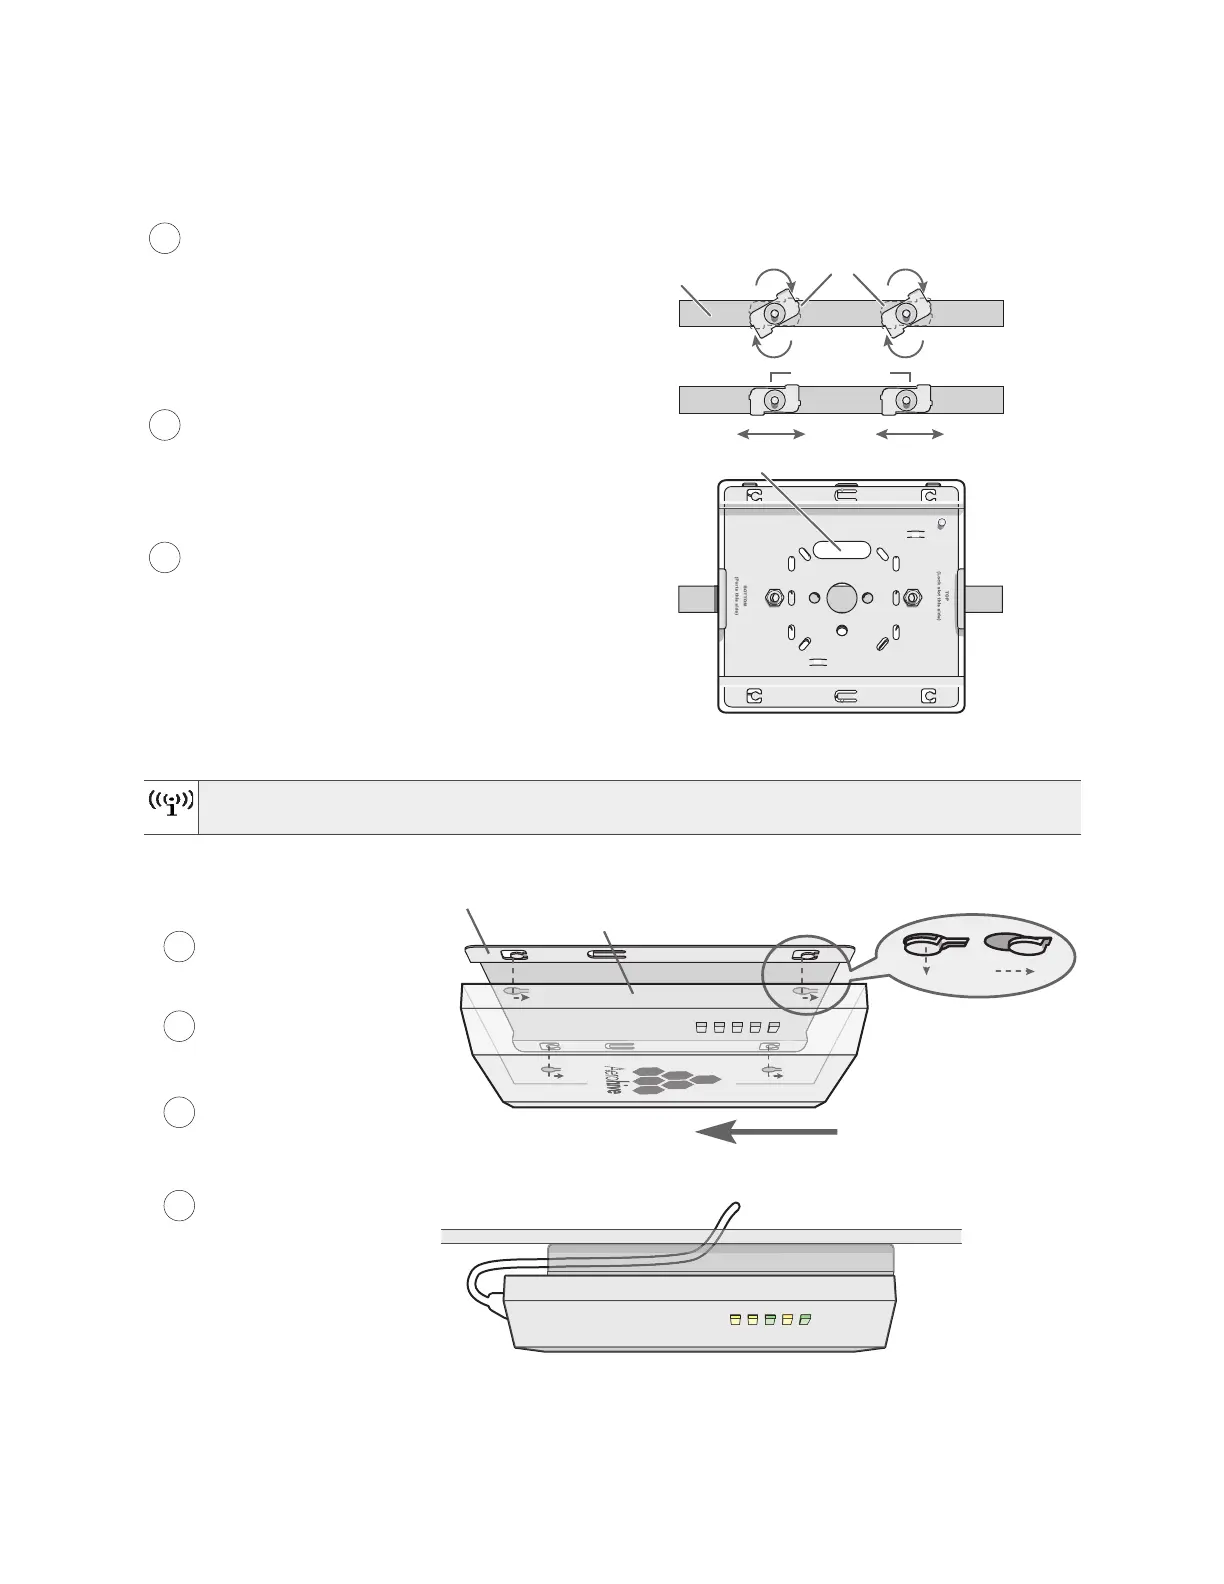
Figure 4 Attaching the track clips and mounting plate to the ceiling track
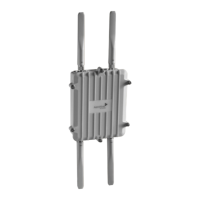
Attach the AP340 to the mounting plate and connect the cables, as shown in Figure 5.
Figure 5 Attaching the AP340 to the mounting plate and connecting cables
When you are done, adjust the ceiling tiles back into their former position.
You can tie the cables to the tie points (small arched strips) on the mounting plate to prevent them
from being pulled out of their connections accidentally.
Mounting plate
Drill a hole in the ceiling tile and feed cables
through here.
Ceiling track
Track clips
(Worms’s eye view with ceiling tiles removed for clarity)
2 1/4 “ (7 cm)
1
2
Press the track clips against the ceiling
track and swivel them until they snap into
place, gripping the edges of the track.
If necessary, slide one or both of the clips
along the track to position them at the
proper distance (2 1/4” or 7 cm) to fit
through the holes in the mounting plate.
Insert the mounting plate over the screws attached
to the track clips, and use the Keps nuts to fasten
the plate firmly to the screws on the clips.
Use a wrench to tighten the nuts firmly to the
bolts and secure the plate to the track.
3
Through the oblong opening in the plate, drill
a hole in the ceiling tile (not shown). Then
pass one or both Ethernet cables through the
hole, and if you plan to supply power from an
AC power source rather than through PoE,
pass the power cable through as well.
With the AP upside down, align
its port side with the bottom
end of the plate.
Push the AP upward, inserting
the four tabs on the plate
into the four slots on the AP.
Slide the A toward the bottom end
of the plate, locking the tabs
inside the slots.
Attach the antennas and
connect the cables to
complete the installation.
4
6
7
5
Tab inside
slot
Tab locked
in place
Mounting plate
AP (shown as transparent for clarity)
Tab
Slot
Mounting plate
AP
Ceiling
Cables pass through the hole in
the mounting plate and ceiling