Chapter 3 The AP170 Platform
36 Aerohive
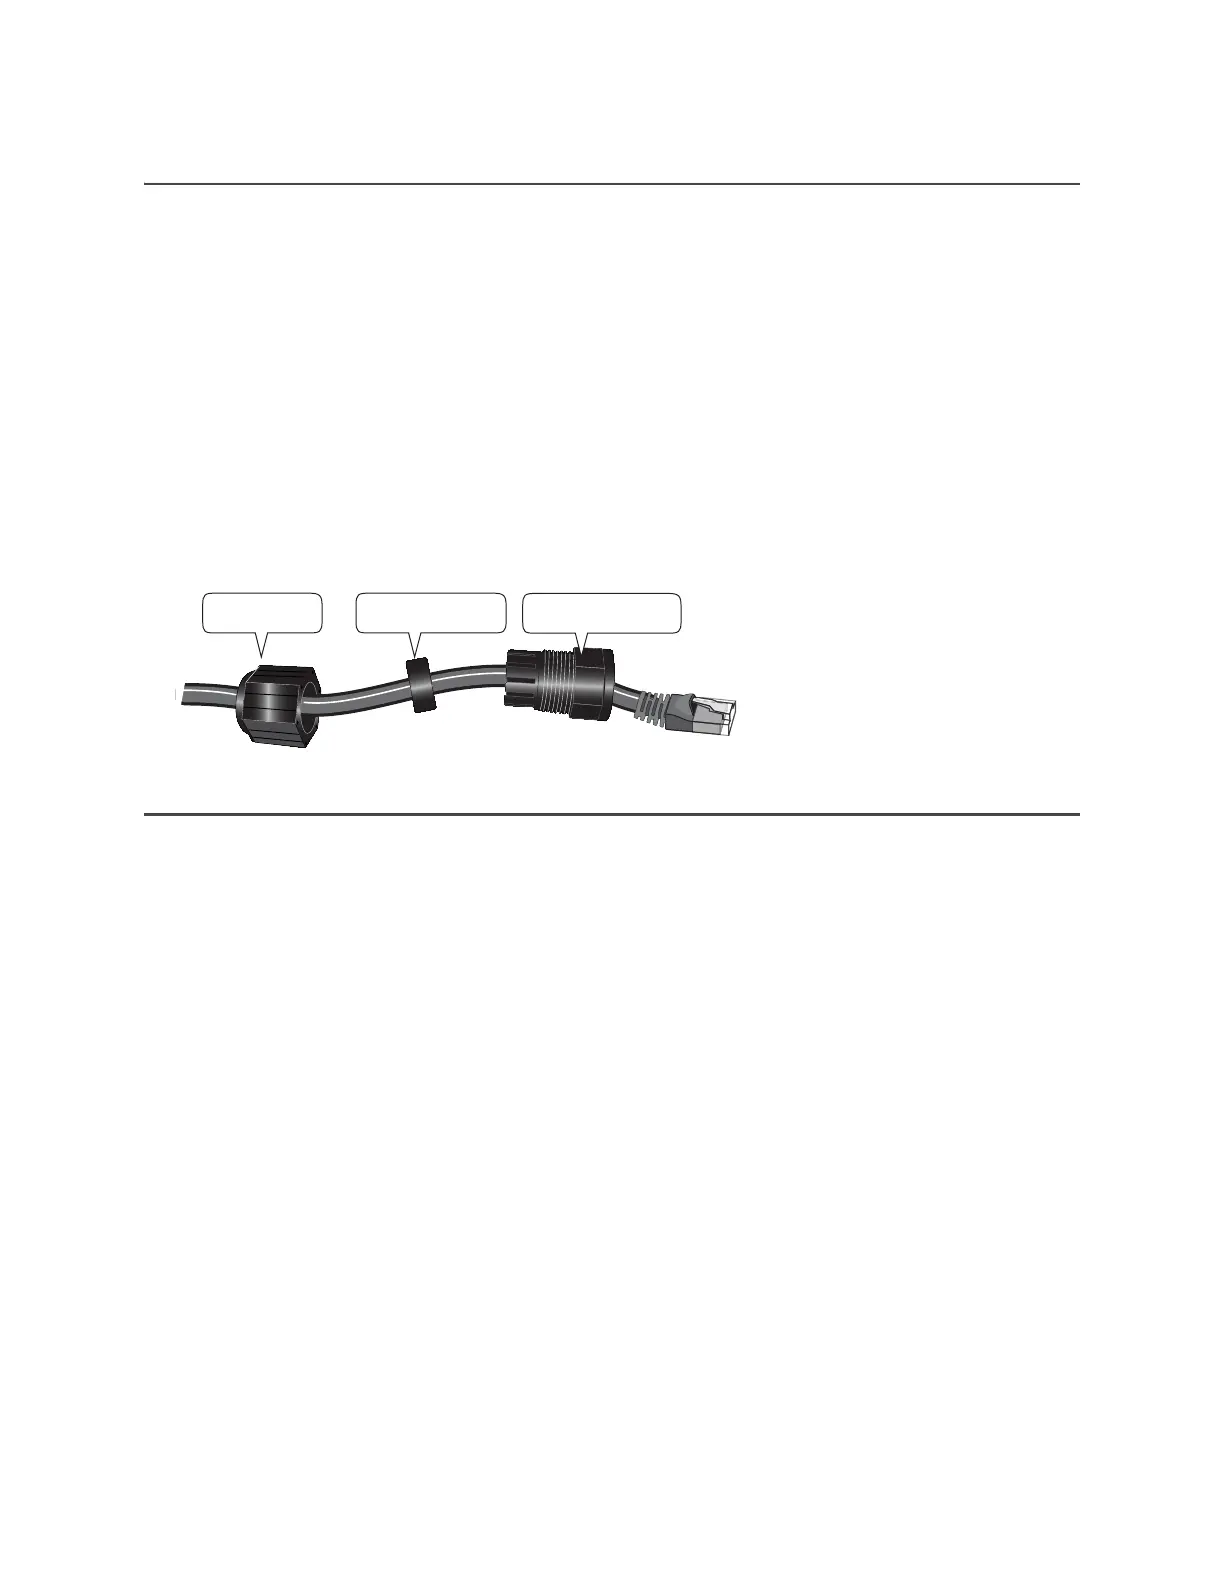
ATTACHING THE ETHERNET CABLE WATERPROOF HOUSING
The following steps explain how to ensure a weatherproof seal for the Ethernet cable using the waterproof
housing assembly shown in Figure 6.
1. Disassemble the waterproof housing.
There are three pieces: a threaded nut, a slotted cable grip, and a threaded housing.
2. Slide the threaded nut over the Ethernet cable.
3. Slip the slotted cable grip onto the Ethernet cable in front of the threaded nut.
4. Slide the threaded housing onto the cable and over the cable grip (the grip fits inside the housing).
5. Screw the threaded nut onto the threaded housing.
6. Plug the Ethernet cable into the connector. Screw the assembled housing onto the threaded connector
cover.
7. Connect the other end of the Ethernet cable to a PoE injector or Ethernet protector.
Figure 6 Ethernet housing assembly
POE AND ETHERNET PROTECTION
In most cases, you can connect an Ethernet cable directly from the AP170 to a PoE-enabled switch or to a
PoE injector (SKU AH-ACC-INJ-30W-XX) inside the building. In some cases, you might need to install an
outdoor waterproof PoE injector, available separately (SKU AH-ACC-OINJ-30W).
The AP170 and outdoor PoE injectors have built-in surge protection to guard against lightning strikes.
However, the network where the Ethernet cable enters the building requires protection as well. To prevent
the indoor network from power surges caused by lightning, place an Ethernet protector (SKU
AH-ACC-1G-ETH-PROT) inline between the AP and the rest of the network as shown in Figure 7 on page 37.
Slotted cable grip
Threaded housing
Threaded nut