Chapter 5 The AP340 Platform
54 Aerohive
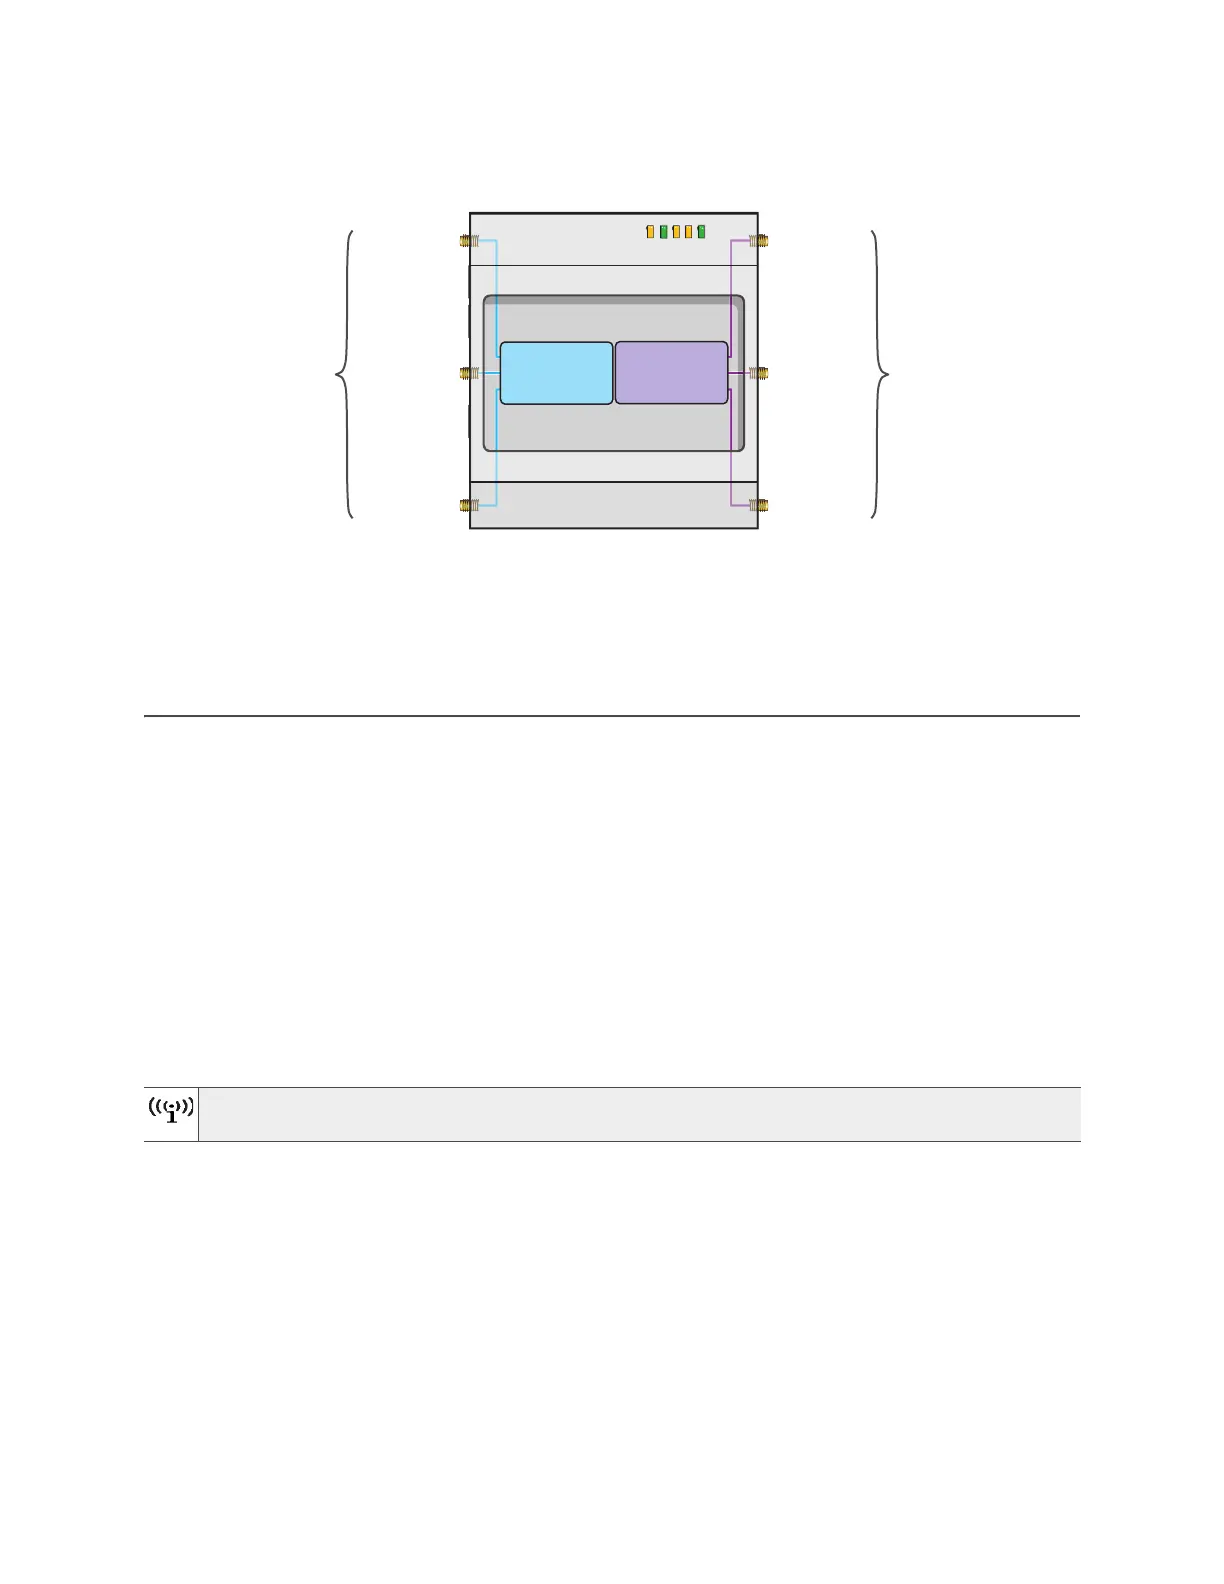
Figure 3 Antennas and radios in the AP340
The wifi0 interface links to radio 1 (frequency range = 2.4 GHz for IEEE 802.11b/g), and the wifi1 interface links
to radio 2 (frequency range = 5 GHz for IEEE 802.11a). These interface-to-radio relationships are permanent.
When deciding how many antennas to use, consider the types of wireless clients—802.11n only, 802.11g/n,
802.11b/g/n, or 802.11a/n—the area needing coverage, and the RF environment.
MOUNTING THE AP340
Using the mounting plate and track clips, you can mount the AP340 to the tracks of a dropped ceiling grid.
Using the mounting plate, you can mount the AP340 to any surface that supports its weight (3.3 lb., 1.5 kg).
his document covers the following methods for mounting the AP340:
• "Ceiling Mount" - Using the mounting plate and track clips, you can mount the AP340 to the tracks of a
dropped ceiling grid so that it is suspended upside down against the ceiling.
• "Plenum Mount" on page 56 - Using the mounting plate, hanger clip, and hanger frame, you can mount
it in the plenum above a dropped ceiling.
• "Suspended Mount" on page 59 - Using the mounting plate, cable, quad-toggle, and locking device,
you can suspend the device from a beam, bracket, or any object that can support its weight (3.3 lb., 1.5
kg)
• "Surface Mount" on page 61 - Using just the mounting plate and some screws or nails, you can mount the
AP directly to any surface that can support its weight.
Ceiling Mount
To mount the AP340 to a standard 1"-wide track in a dropped ceiling, you need the mounting plate, two
track clips, and two Keps nuts that ship with the AP340. You also need a drill, a wrench, and—most likely—a
ladder.
Nudge the ceiling tiles slightly away from the track to clear space. Attach the clips to the ceiling track, and
fasten the mounting plate to the clips, as shown in Figure 4 on page 55. When you have the mounting plate in
the correct location, cut or drill a hole in the ceiling through which you can then pass the Ethernet and power
cables.
You can also mount the AP340 on a table using the four rubber feet that ship with the product. Peel
the feet off the adhesive sheet and press them against the four underside corners of the device.
Radio 1
RF 802.11b/g/n
2.4 GHz
Radio 2
RF 802.11a/n
5 GHz
2.4 GHz (A)
2.4 GHz (B)
2.4 GHz (C)
5 GHz (A)
5 GHz (B)
5 GHz (C)
RP-SMA
connectors
RP-SMA
connectors
Cut-away view of the AP340 to show the relationship of the
antennas and the two internal radios