Agilent N5181A/82A MXG Signal Generators User’s Guide 89
Basic Digital Operation (Option 651/652/654)
Using Waveform Markers
Press Last Mkr Point > 17 > Enter > Apply To Waveform > Return.
This turns off all marker points for
the active marker within the range
set in Steps 2 and 3, as shown at
right.
How to view markers is described
on page 88.
Clearing a Single Marker Point
Use the steps described in “Clearing a Range of Marker Points” on page 88, but set both the first and
last marker point to the value of the point you want to clear. For example, if you want to clear a
marker on point 5, set both the first and last value to 5.
Setting Marker Points in a Waveform Segment
To set marker points on a segment, the segment must reside in BBG media (page 71).
When you set marker points, they do not replace points that already exist, but are set in addition to
existing points. Because markers are cumulative, before you set marker points within a segment, view
the segment (page 88) and remove any unwanted points (page 88).
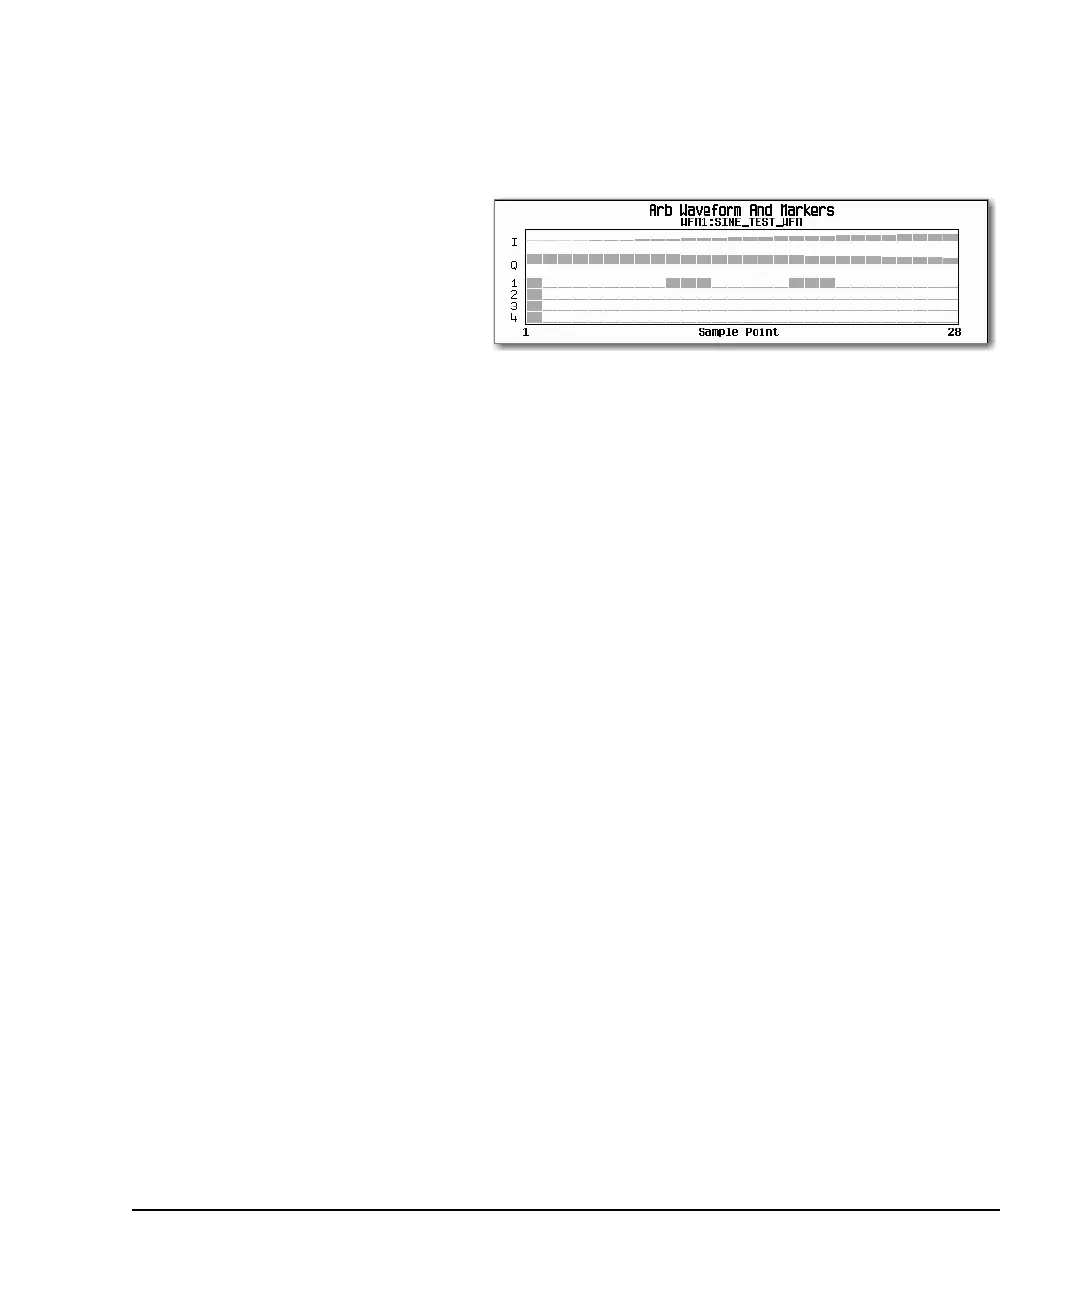
Placing a Marker Across a Range of Points
1. In the second Arb menu (page 87), press SetMarkers.
2. Highlight the desired waveform segment.
3. Select the desired marker number: Press Marker 1 2 3 4
4. Set the first sample point in the range (in this example, 10):
Press Set Marker On Range Of Points > First Mkr Point > 10 > Enter.
5. Set the last marker point in the range to a value less than or equal to the number of points in
the waveform, and greater than or equal to the first marker point (in this example, 20):
Press Last Mkr Point > 20 > Enter.
6. Press Apply To Waveform > Return.
This sets a range of waveform marker points. The marker signal starts on sample point 10, and ends
on sample point 20, as shown in the following figure.
 Loading...