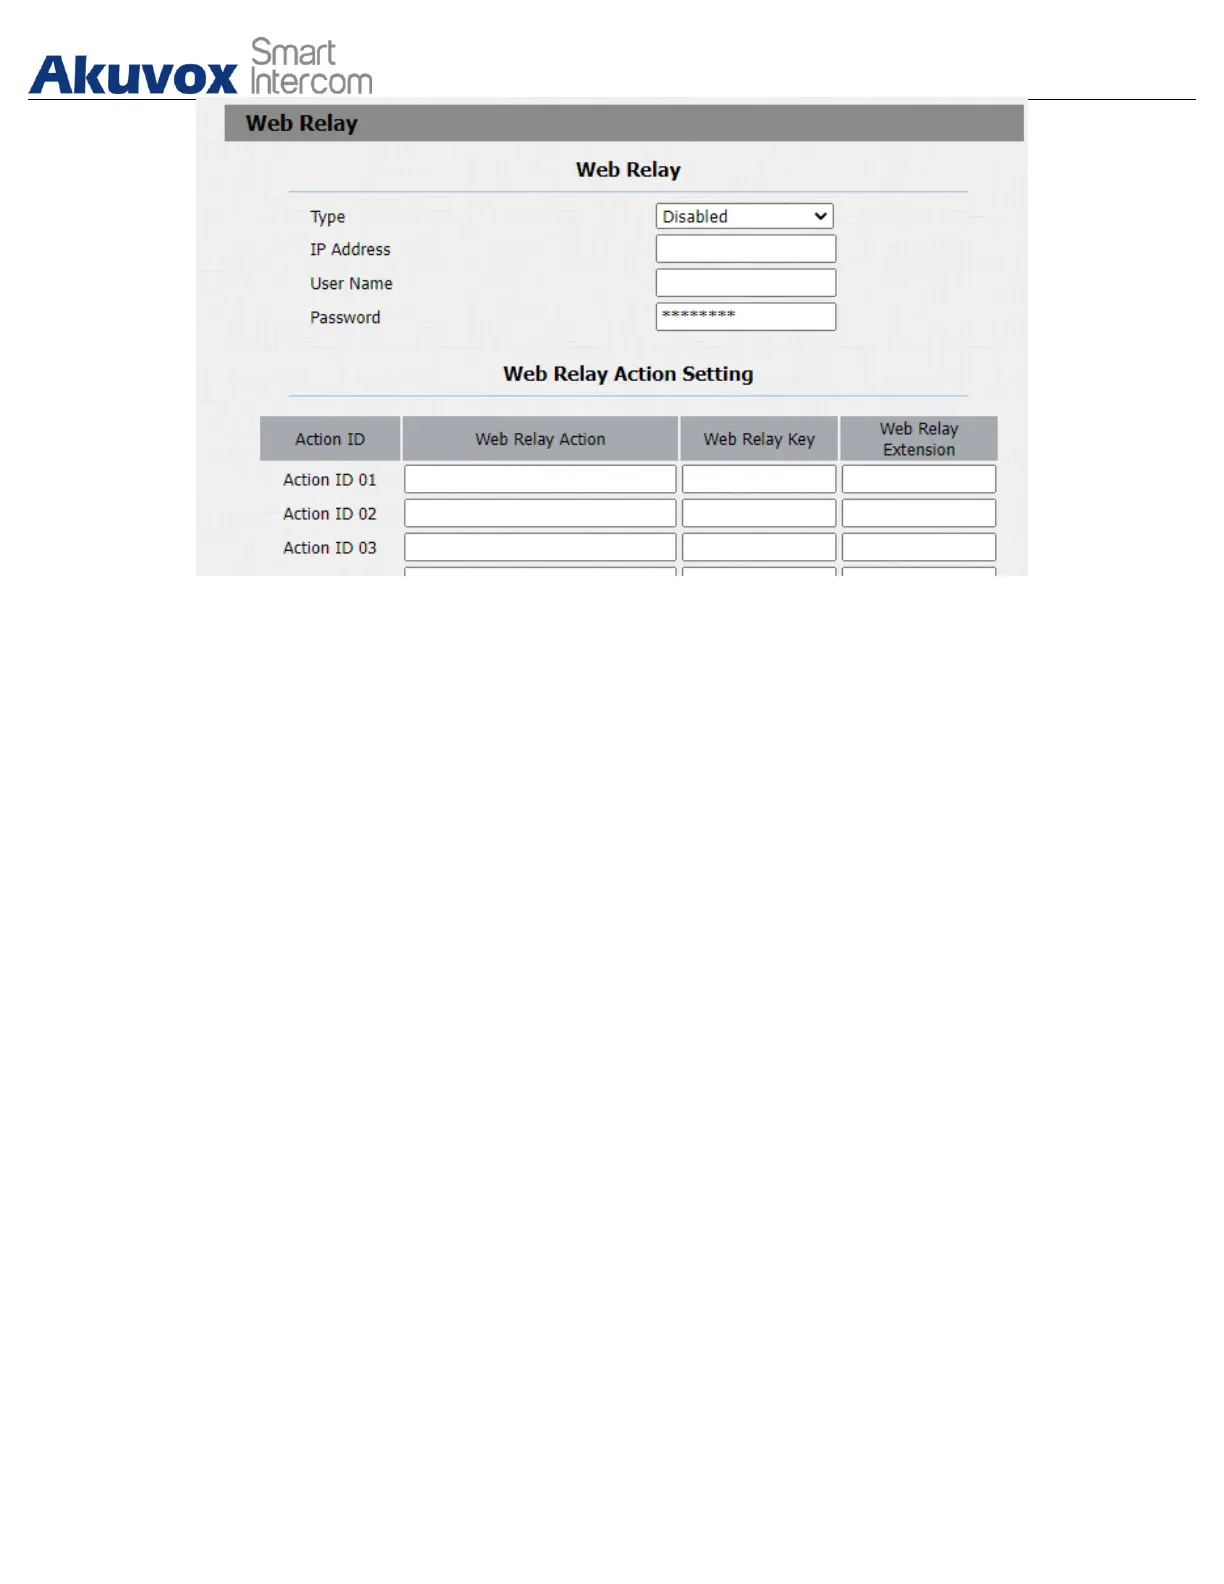
Parameter Set-up:
● Type: select among three options “Disabled” “Web Relay” and “Both”.
Select “Web relay” to enable the web relay. Select “Disable” to disable the
web relay. Select “Both” to enable both local relay and web relay.
● IP Address: enter the web relay IP address provided by the web relay
manufacturer.
● User Name: enter the User name provided by the web relay manufacturer.
● Password: enter the password provided by the web relay manufacturer. The
password is authenticated via HTTP and you can define the passwords using
“http get” in Action.
● Web Relay Action: enter the specific web relay action command provided by
the web manufacturer for different actions by the web relay. Without adding
IP, username, pwd, you can fill in the HTTP command in the web relay
action, so you can configure multiple web relays. See the HTTP command
example below:
a. If you do not fill in IP address in the IP Address Field above, fill in a
complete HTTP command.
For example, Http://admin:admin@192.168.1.2/state.xml?relayState=2.
( HTTP://:@IP address>/state.xml?relayState=2)$
b. If you have already filled in the IP address above, fill in the omitted HTTP
command, eg. state.xml?relayState=2.
● Web Relay Key: it can be null or enter the configured DTMF code, when the
door is unlock via DTMF code, the action command will be sent to the web
relay automatically.
 Loading...