HP106/HP406 Programmer software guide
Ver. 1.0 Page 14
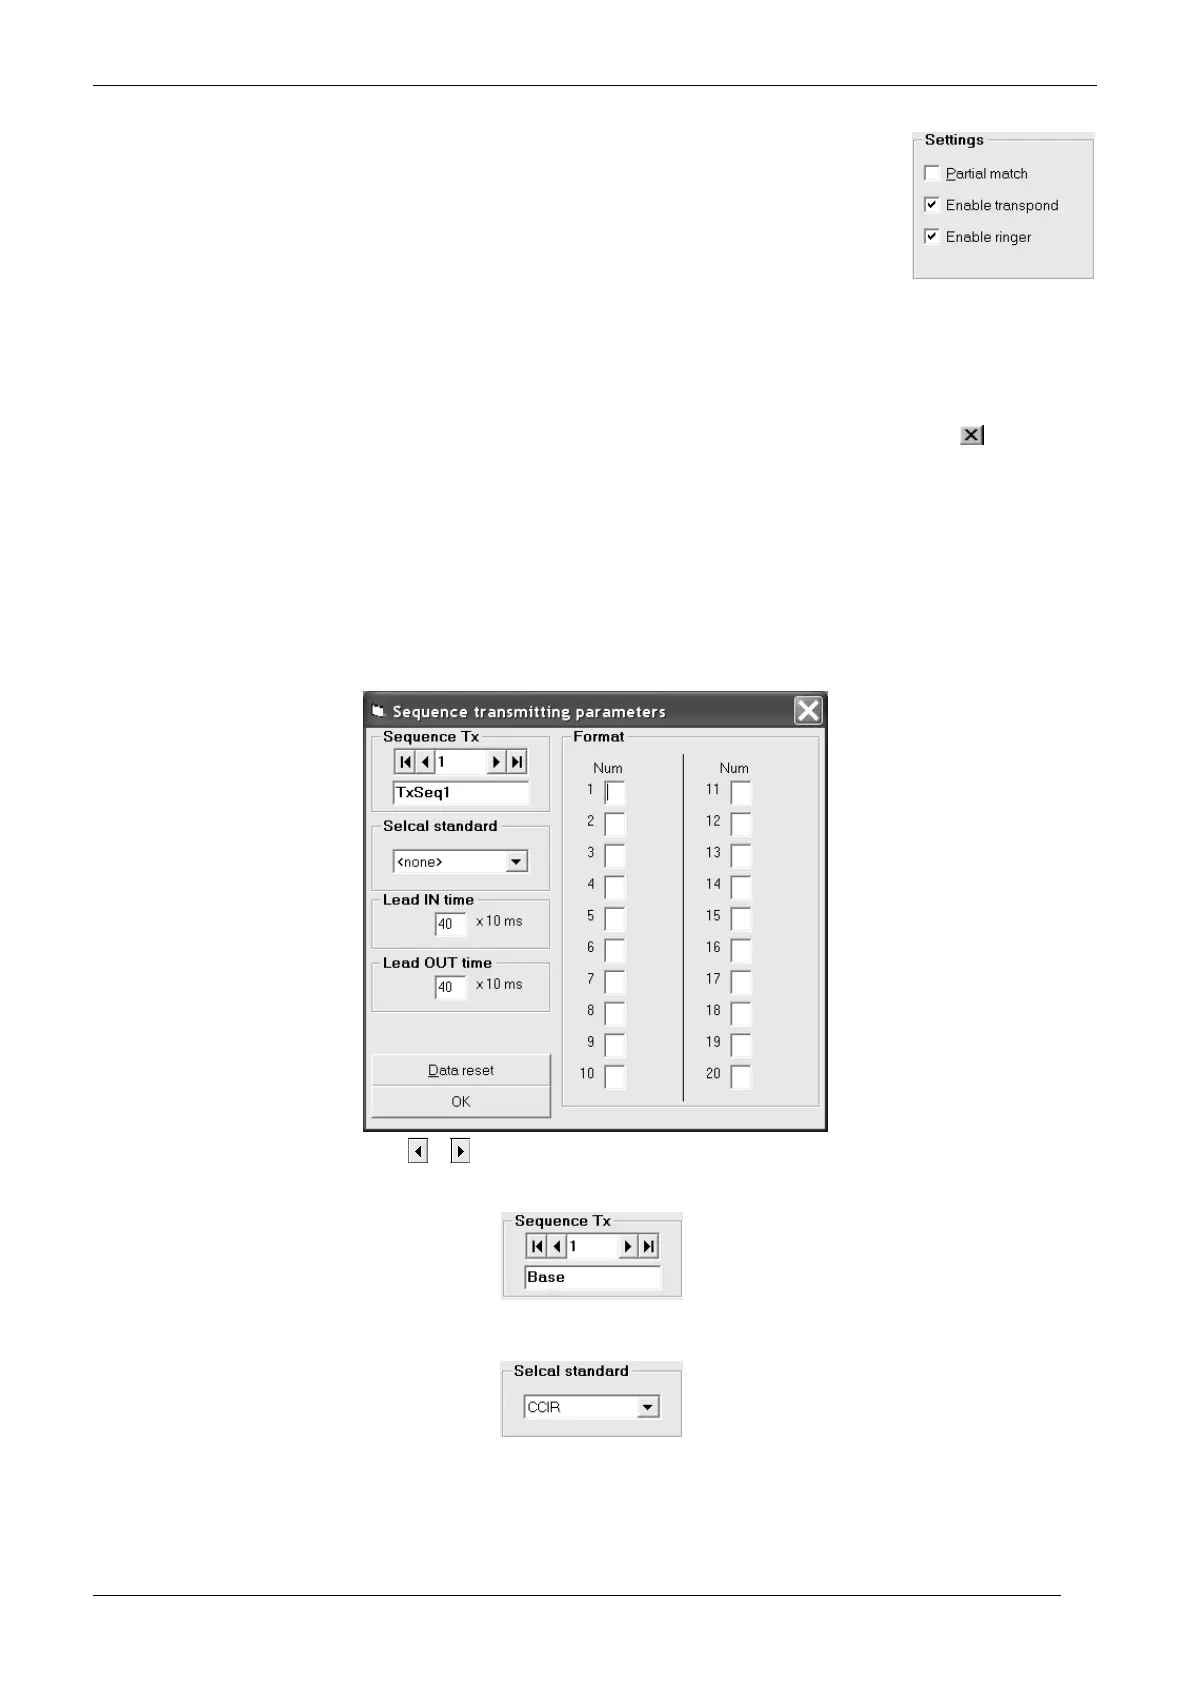
7) You have now other available options:
if you check Partial Match you will enable to decode the sequence if it partially matches as well. In other
words receiving just the tones with a tick in the ID checkbox are sufficient for a full decode operation. With
the over stated example, you will accept any sequence beginning with 3 4 0 1 1.
Enable transpond is checked by default. It enables the transpond function (emission of a sequence that
will be defined later on) at the reception of the appropriate selective call. Remove the tick if you don’t need
it.
Enable ringer is checked by default. It will make the ringer sounding every time a selective call is properly
decoded. Remove the tick if you don’t need it.
You can set up different rings (acoustic signals) according to the decoded Selcall. For further detail please the par. 6.6
8) You can now:
Keep on setting up new Rx sequences in this case go back to step 4).
Enter the settings and close the Rx sequence set up. In this case click the OK button and go straight to the next paragraph
Close the Rx sequence set up without entering all the settings (in case of big mistakes). In this case click the
button (located
in the uppermost right corner) and start from the beginning of this paragraph.
If you composed a completely wrong sequence set up, you can also reset the screen by clicking the Data reset button: all the settings of
the selected sequence will be canceled.
5.2 Defining Selcal TX parameters
You can define 15 Tx sequences (up to 20 tones each) and rename them with alphanumeric labels. The setup of the Tx
sequences is similar to the one described for the Rx ones.
1) From the Channel Data window, press Global Data button: the Global Data window will open.
2) From the Global Data window press the Tx tone sequences button: the Sequences transmitting parameters window will open.
3) Go to Sequence Tx area and press the
or button to select the Tx sequence you need to setup.
4) If you want to assign an alphanumeric name to the selected Tx sequence go to the bottom box of the Sequence Tx area and type the
new name over the TxSeq.x one (in the example we renamed the sequence 1 as Base call).
5) Select the TX selcall standard by clicking on the Selcal standard drag down button and clicking again on the standard you need (we
choose CCIR in the example). If you like, you can select PERSONAL in order to later set a non-standard Selective call (we’ll describe
how to set it up in the chapter 6.1).