3 Maintain the ATCA Subrack
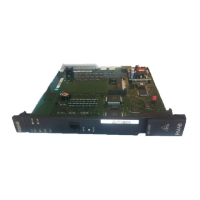
To insert the JAXSMM:
1. Insert the board into the shelf by placing the top and bottom edges of the
board in the card guides of the shelf. Ensure that the guiding module of
shelf and board are aligned properly. The alignment protrusion facilitates the
insertion and prevents bent pins.
2. Slide the board into the shelf until you feel resistance.
3. Wait until the blue LED is lit.
4. Tighten the screws at the top and the bottom of the board. In this way the
ejector handle is closed and the board can be powered. The blue LED blinks.
5. Unlock the JAXSMM board.
6. Wait until the blue LED is switched OFF. The switched OFF blue LED
indicates that the board is activated.
7. Connect the Ethernet cable to the JAXSSW1 (port ETH8)
8. Open a telnet session on the active station
# telnet 172.17.y.x
where:
y is 3 for ATCA shelf 3
y is 4 for ATCA shelf 4
x is 30 if JBXOMCP1 is active
x is 40 if JBXOMCP2 is active.
9. From the telnet session window, open a connection on the active JAXSMM
# telnet 172.z.y.x
where:
z is 17 for JAXSMM1
z is 18 for JAXSMM2
y is 3 for ATCA shelf 3
y is 4 for ATCA shelf 4
x is 8 for JAXSMM1
x is 9 for JAXSMM2.
10. Type the username:
root
and the password:
root
11. Get the resource number:
hpiupgrade | grep M100
Below is given an output example for this command:
resource: 30, {RACK,0}{ADVANCEDTCA_CHASSIS,3}
{SHELF_MANAGER_SLOT,1}
{SHELF_MANAGMENT_CONTROLLER,8},
ATCA-M100
resource: 58, {RACK,0}{ADVANCEDTCA_CHASSIS,3}
{SHELF_MANAGER_SLOT,2}
56 / 90
3BK 21281 AAAA PCZZA Ed.13
 Loading...


