113ALI-DVR3000H Series 960H DVR User Manual
APPENDIX C HDD Installation
The following procedures illustrate hard disk drive (HDD) installation in a ALI-DVR3000H series DVR without an HDD. If you
purchased your DVR without a HDD, or you want to replace the HDD installed in your DVR, use this procedure as a guideline.
C.1 DVR compatible HDDs
For the best performance of your system, install only a high-reliability security grade HDD. Security grade HDDs are designed to
stream video eciently.
C.2 HDD Installation
The the will accommodate only one internal HDD. The HDD attaches to the chassis with four screws inserted up through the
underside of the chassis.
Cables and screws needed to install the HDD are provided.
CAUTION
Follow recommended electrostatic discharge (ESD) guidelines while performing this procedure. Install the HDD in a static-free
environment, wearing a certied ESD wrist strap. If a static free environment and ESD wrist strap is not available, touch the bare
metal of the DVR chassis frequently when installing the drive to dissipate the static charge naturally generated on your skin and
clothing and avoid touching electronic components.
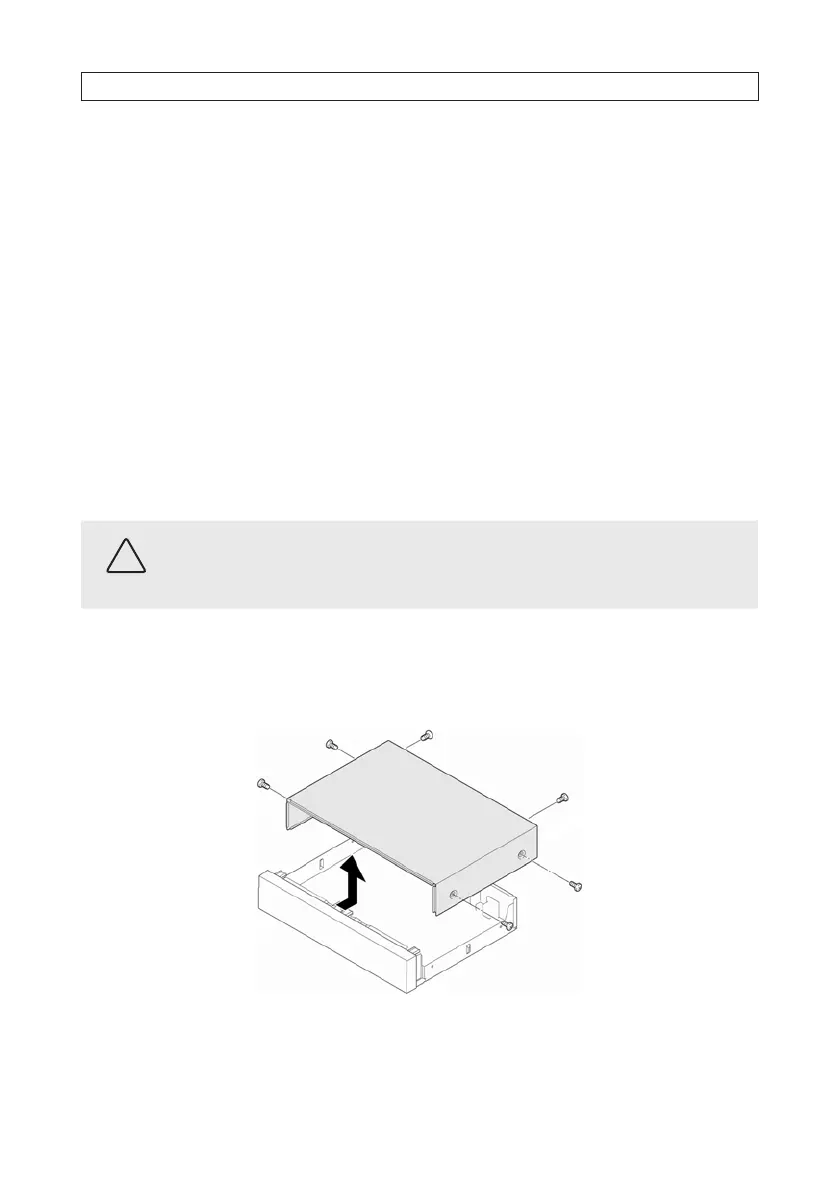
1. Power o the DVR, if necessary, then disconnect the power adapter from the back of the DVR.
2. Remove the top cover from the DVR by removing the six cover screws. Two cover screws are located on each side, and two are
located on the back panel. See the drawing below. Save the screws for use later.
3. Attach the SATA data and power cables provided to the mating connectors on the HDD. See below.
APPENDIX C: HDD INSTALLATION
 Loading...