1. Disconnect electrical power from tumble dryer. Close gas
shut-off valve to tumble dryer. Refer to Figure 18 .
WARNING
When converting the tumble dryer to a different
gas or pressure, first verify that the supply inlet
pressure is equipped with a pressure regulator
(located ahead of the tumble dryer) that will main-
tain the gas supply at the inlet pressure specified.
W430R1
2. Remove orifice holder. Unscrew orifice holder nut near gas
valve. Remove the burner orifice(s) from orifice holder. Refer
to Figure 19 .
3. Install the new, correct burner orifice(s). Refer to Figure 20
and Table 1. Torque each to 9 – 10 Nm.
4. Reinstall orifice holder assembly to gas valve, making certain
burner orifice(s) are in line with burner tube opening. Refer to
Figure 20 .
5. Commission tumble dryer for use.
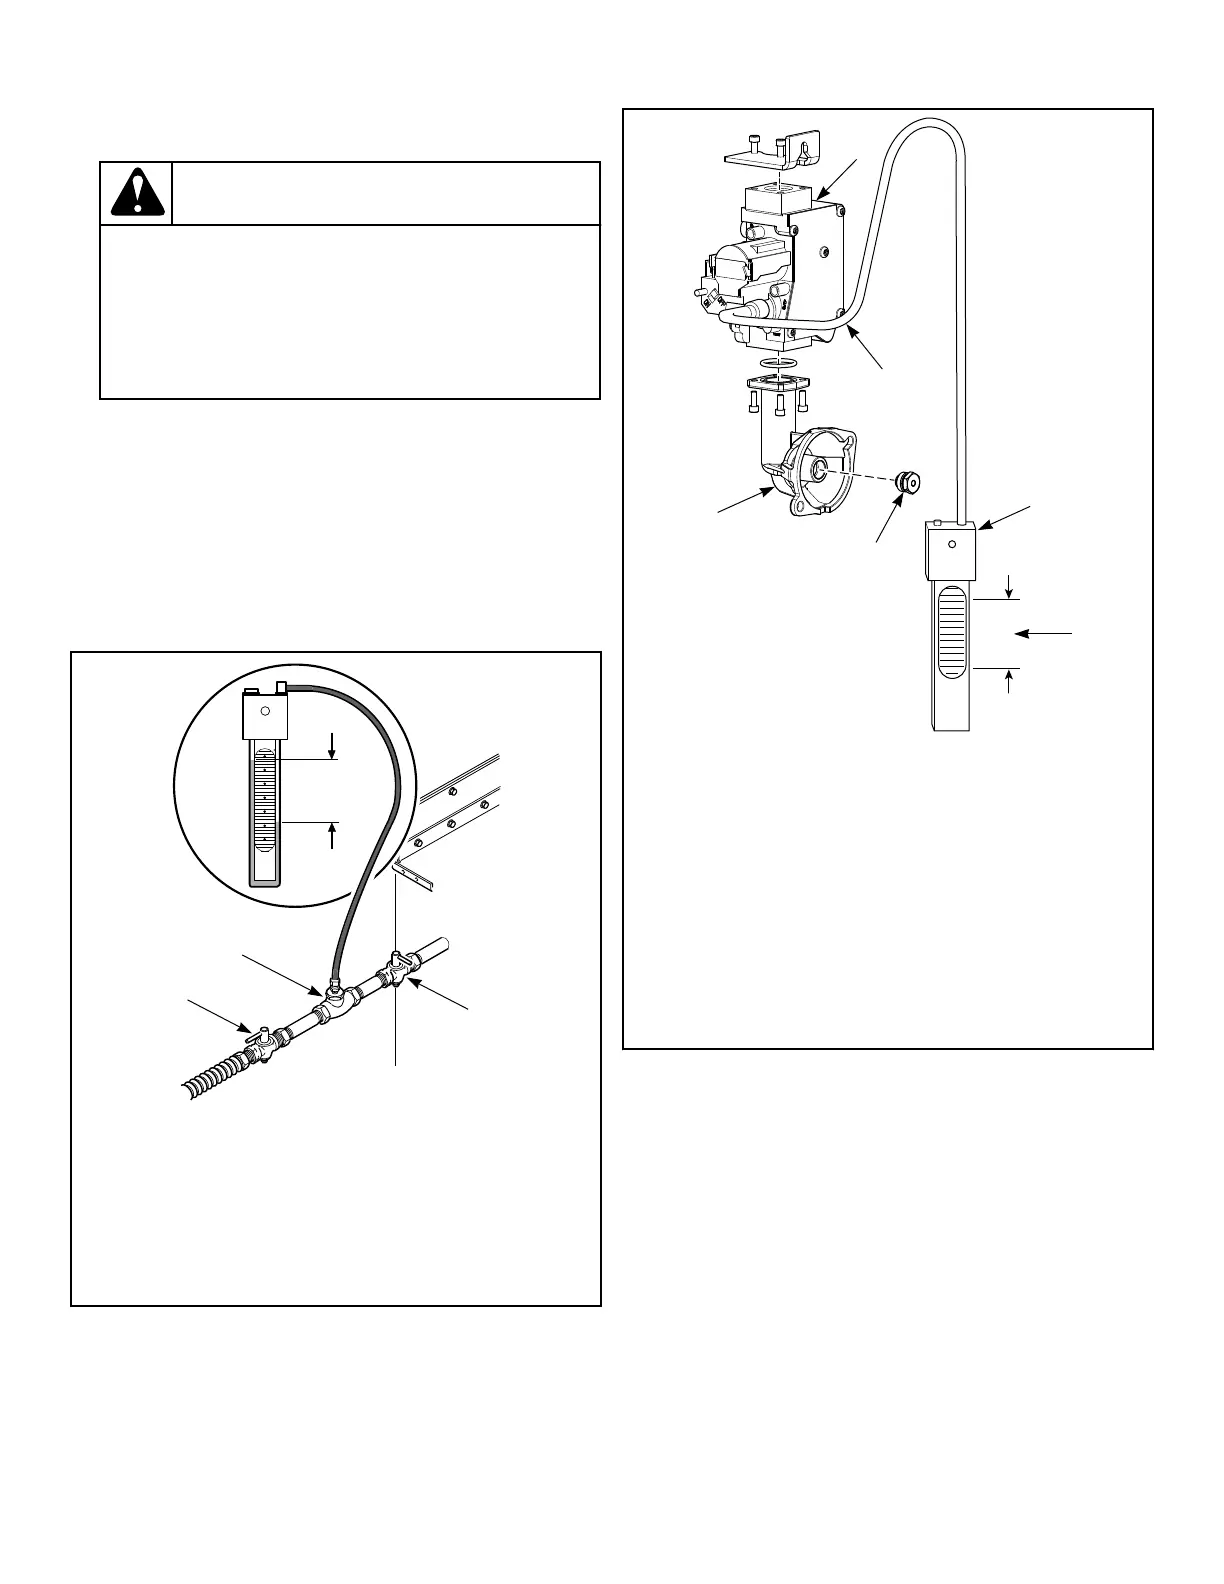
1. Gas Shut-Off Valve (Ahead of pressure tap) (Shown in
open position) (Not Supplied)
2. Pressure Tap
3. Gas Shut-Off Valve (Shown in closed position) (Not Sup-
plied)
4. Specified Local Inlet Pressure
Figure 18
NOTE: For IEC gas valves, attach manometer to end
of orifice holder. For Australia and North America
gas valves, attach manometer to the outlet pressure
port on the gas valve.
1. Gas Valve
2. Manometer
3. Required Burner Manifold Pressure
4. Connect Over Loosened Hex Pressure Tap Screw
5. Orifice Holder
6. Burner Orifice
Figure 19
How to Adjust Gas Valve Governor/Regulator
1. Check gas burner orifice (manifold) pressure as follows. Re-
fer to Figure 2 .
2. Remove screw plug from pressure tap.
3. Connect a “U”-tube manometer (or similar pressure gauge) to
the burner orifice (manifold) pressure tap.
4. Start tumble dryer and note pressure once flame is burning.
Remove regulator cap and adjust regulator screw until the
burner orifice pressure per applicable table is achieved. Re-
place regulator cap. Refer to Figure 2 .
5. Commission tumble dryer for use.
Gas Requirements
©
Published by permission of the copyright owner -
DO NOT COPY or TRANSMIT
50 Part No. 70686701ENR4
 Loading...