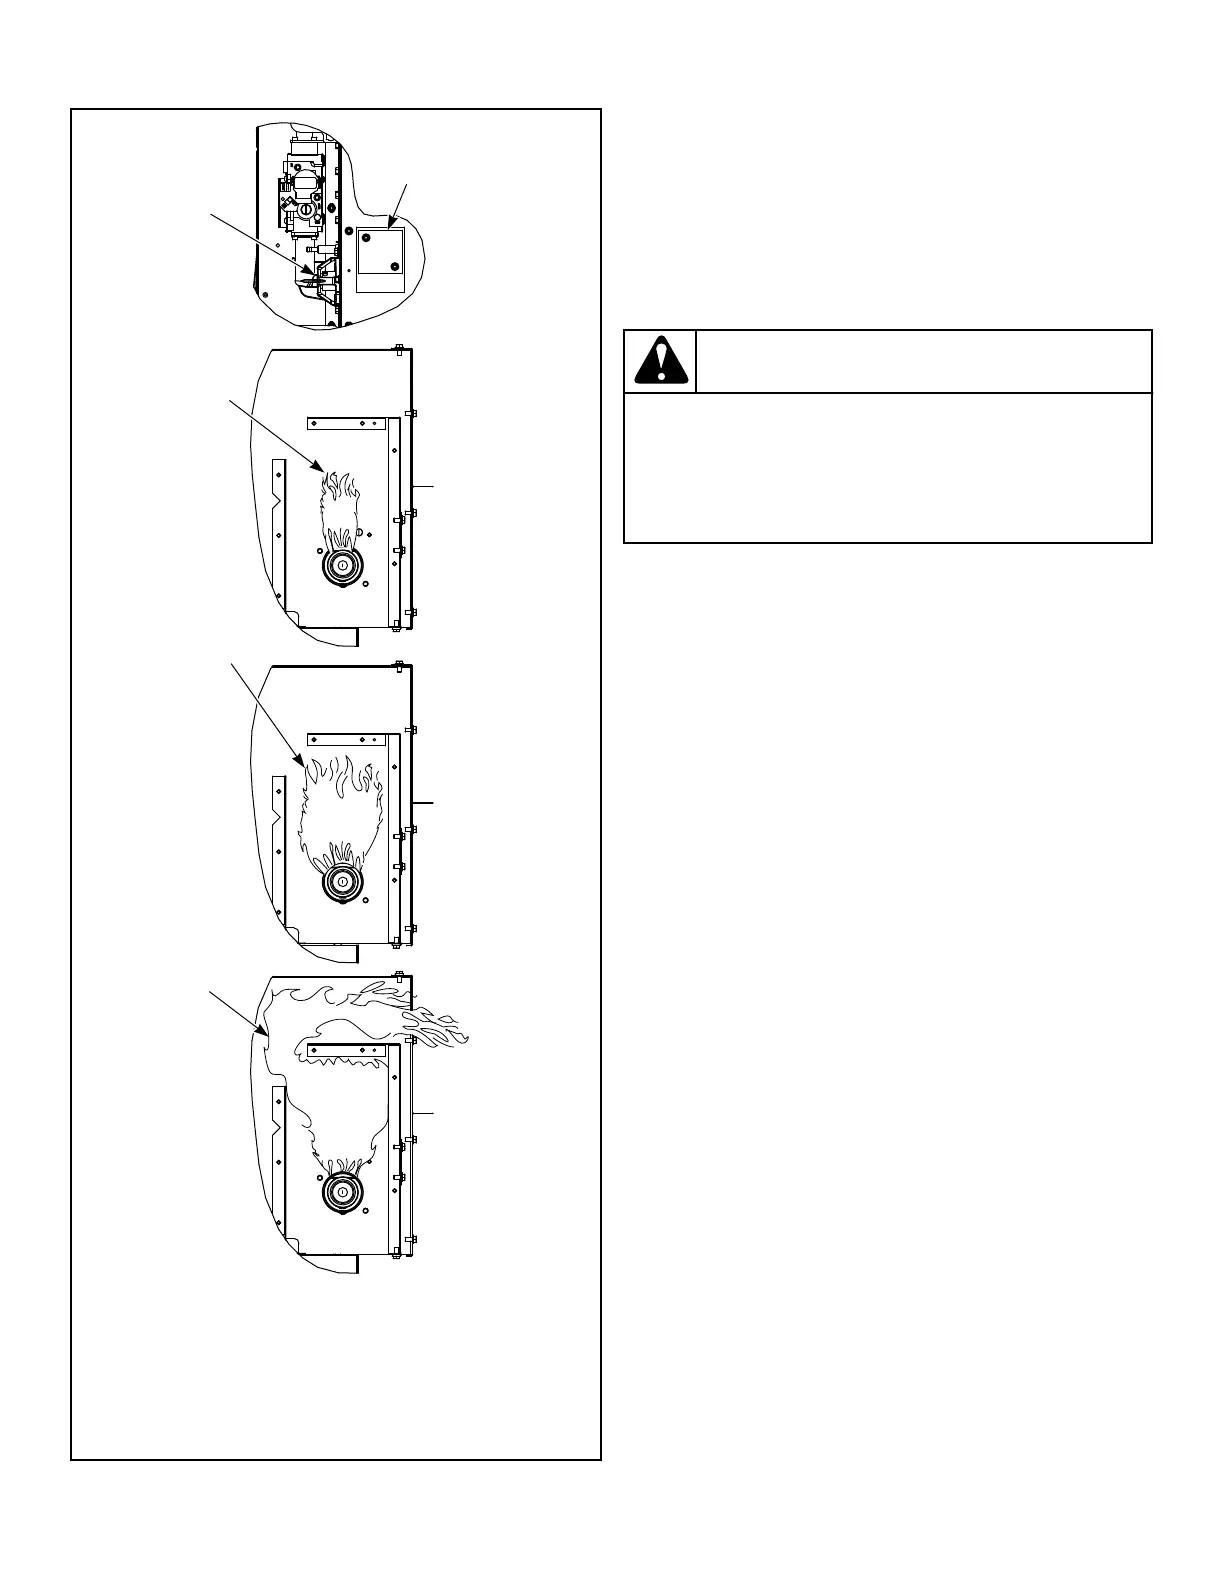
1. Proper Airflow
2. Insufficient Airflow
3. No Airflow
4. Air Shutter Adjusting Screw
5. Burner Inspection Hole
Figure 25
Airflow Switch
The airflow switch is set at the factory for proper operation. No
adjustment necessary.
The airflow switch operation may be affected by shipping wire
tie still in place, lack of make-up air, or an obstruction in the ex-
haust duct. These should be checked and the required corrective
action taken.
WARNING
The tumble dryer must not be operated if the airflow
switch does not operate properly. Faulty airflow
switch operation may cause an explosive gas mix-
ture to collect in the tumble dryer.
W072R1
IMPORTANT: Airflow switch vane must remain closed
during operation. If it opens and closes during the dry-
ing cycle, this indicates insufficient airflow through the
tumble dryer. If switch remains open, or pops open and
closed during the cycle, the heating system will shut
off. The cylinder and fan will continue to operate even
though the airflow switch is indicating insufficient air-
flow.
NOTE: To properly mount the airflow switch bracket, or
in case of a load not drying, the airflow switch bracket
may need to be checked for proper alignment. Be sure
the locator pins are securely in their respective holes
before tightening the bracket mounting screws. This
will assure proper alignment of the airflow switch arm
in the channel of the airflow switch bracket and prevent
binding of the arm.
Loading Door Switch
The door switch should be adjusted so the cylinder stops when
door is opened 0.79 inches [20 mm] . This switch is a normally
open switch and is closed by the switch actuator when the door is
closed. If adjustment is required, refer to Figure 26 and proceed
as follows:
1. Close door and start tumble dryer, slowly open loading door.
Cylinder and heat system should shut off when door is open
0.79 inches [20 mm] .
2. Slowly close the loading door. When door is 0.79 inches [20
mm] or less from being fully closed, the door switch actuating
bracket (located on the door) should depress the button and
the switch arm with an audible “click.”
3. If the actuating bracket does not operate the switch at the ap-
propriate door closure, bend the actuating switch arm in or out
to achieve proper actuation.
Adjustments
©
Published by permission of the copyright owner -
DO NOT COPY or TRANSMIT
81 Part No. 70686701ENR4
 Loading...