IMPORTANT: Restore power to tumble dryer and
test for proper operation of loading door switch. Re-
fer to Loading Door Switch section for adjustment pro-
cedure. Tumble dryer should not start with door
open; an operating tumble dryer should stop when
door is opened.
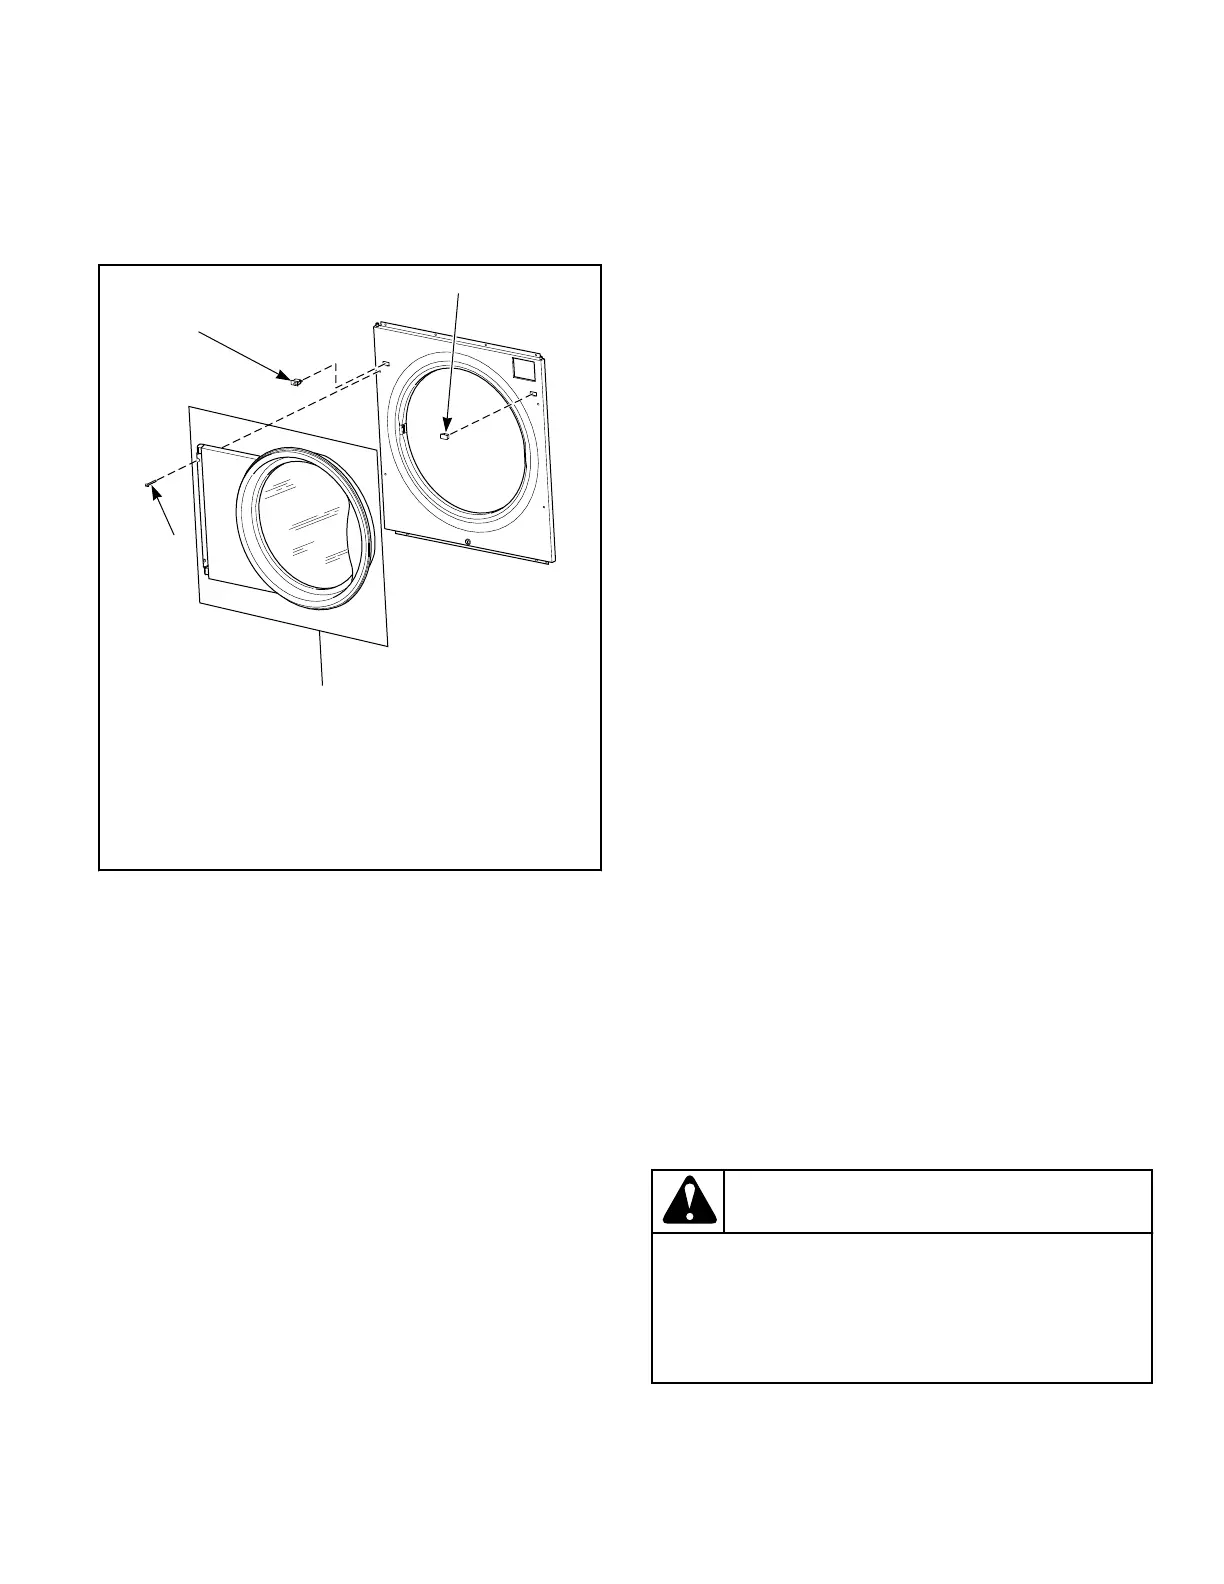
1. Switch (New location)
2. Plug (New location)
3. Door Assembly
4. Side Screw
Figure 11
NOTE: If machine is converted back to right hand hinge
operation, the door switch harness must be rerouted.
Harness must be rebundled with the lint panel switch
harness. Wire ties must be used to secure harnesses.
Wire ties (Part No. 55881) can be ordered from Genuine
Parts.
Before Placing Tumble Dryer into
Service
1. Ensure all panels and guards are in place.
2. Remove and discard wire tie from the airflow switch so it can
swing freely.
3. Pull out emergency stop button, if applicable.
4. Turn on electrical supply to tumble dryer.
5. Open the supply valve for gas or steam heated tumble dryers.
6. After performing the previous checks, start the tumble dryer
by pressing START. (Refer to the Operating section for de-
tailed instructions.) Release the start button and open the
loading door. The cylinder should stop rotating within seven
seconds after the door is opened a maximum of 0.79 inches
[20 mm] . If it does not, adjust the loading door switch. Refer
to Adjustments section.
7. Gas Tumble Dryers: Start the tumble dryer and check the
burner flame. Adjust the air inlet shutter as required. Refer to
Adjustments section.
IMPORTANT: The electronic ignition system will at-
tempt to light the gas by sparking for the “trial for
ignition” period. If gas does not ignite within this
period, the ignition control will go into a safety lock-
out and the valve will no longer open until the con-
trol is reset. On North America and OPL IEC models,
the electronic ignition system is automatically reset.
On Australia and vend IEC models the electronic ig-
nition system must be manually reset. The control
will pause the cycle and indicate that the ignition
control needs to be reset. To reset the ignition con-
trol, press start key on the control while the access
panel is open. The control will then prompt for the
start key to be pressed again to restart the cycle. On
all models, ignition lockout may occur due to air in
the gas line or the gas shut-off valve being in the
OFF position. If the air is bled out of the gas line, the
gas shut-off valve is in the ON position, the gas
service is properly connected and the tumble dryer
continues to have heater errors and/or prompts for
the ignition control to be reset, remove the tumble
dryer from service.
8. Load the cylinder with a full load of clean rags and run to re-
move oil or dirt from cylinder.
9. Check the airflow switch operation by opening the lint panel;
be sure to remove shipping wire tie from airflow switch prior
to operation. Temporarily tape down the lint panel safety
switch located behind the upper left corner of the lint panel.
The heating systems should shut off when the lint panel is
opened a maximum of 1.5 inches [38 mm] .
The airflow switch operation may be affected by shipping wire
tie still in place, lack of make-up air, or an obstruction in the ex-
haust duct. These should be checked. If there is a problem, con-
tact an authorized service person.
IMPORTANT: Remove tape from the lint panel safety
switch before proceeding to the next step.
WARNING
Do not operate tumble dryer if airflow switch is
faulty. An explosive gas mixture could collect in
tumble dryer if airflow switch does not operate
properly.
W407R1
10. Clean cylinder by running a load of wet rags on one maxi-
mum heat cycle.
Installation
©
Published by permission of the copyright owner -
DO NOT COPY or TRANSMIT
38 Part No. 70686701ENR4
 Loading...