DE-3000 IOI 7-17
All rights reserved © ALTRONIC, LLC 2017
43
22.2 The normally-open sensors do not cause a fault:
•
Make sure the power supply minus terminal is grounded to the panel and the
panel is grounded to the engine block. They must all be at the same potential
for normally-open sensors that use the engine block as a return path. Use an
ohmmeter and measure between the power supply minus terminal and the
panel and engine block — this reading should be less than 2 ohms.
22.3 The output LED’s are changing state but the relays or solenoid valves connected
to the outputs are not tripping:
•
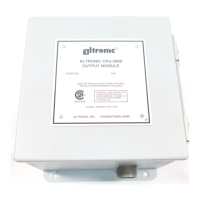
Check that the wiring is correct and check the output module fuse.
22.4 The power LED’s are lit as well as the LCD backlighting but the LCD is blank or
shows WARNING: THE DE-3000 Controller MUST BE CONFIGURED PRIOR TO
USE ON AN ENGINE:
•
The controller system needs to be configured.
See programming instructions to configure the system.
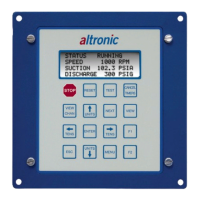
22.5 The home screen displays NO COMM. message for either the speed, suction or
discharge:
•
Communications from the terminal PCB to the DE-3000 controller have been
broken. Check cable connections.
22.6 The home screen displays dashes for the speed, suction or discharge:
•
A channel was not configured in the initial configuration for that parameter.
See programming instructions to reprogram the controller system.
22.7 The fault screen shows that outputs one and two should be tripping the fuel
valve and shorting the ignition but the fuel valve and ignition do not trip:
•
Make sure the fuel valve and ignition shutdown lead are wired to power supply
terminals FV1 and FV2 for the fuel valve and IGN+ and IGN- for the ignition
shutdown lead.
•
Make sure that Altronic output module 691124 is in power supply output slots
OUT 1 and OUT 2.
22.8 The time and date, after being set (see section 15.13), are not correct after
removing and reapplying the input power:
•
The real time clock/RAM module (U10) needs replaced.
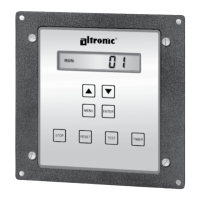
22.9 LCD contrast ratio on the Display Module is either too light or too dark:
•
The contrast ratio needs to be adjusted. See section 17.0
22.10 The external modem does not commence dialing:
•
A null modem cable or adapter is not used and is required from the RS-232
port to the modem.
•
The modem was not configured properly. Make sure that DTR is always on and
that configuration 0 (zero) is being used and the phone numbers are program-
med into the modem.
23.0
AUTO START OPTION
23.1 To automatically start the engine, the AUTO START option must be selected
when programming the system from the PC and the starting procedure sequence
defined.
STATE 0: SHUTDOWN
The AUTO START sequence must begin from an engine stopped condition, this
means that the measured RPM has been at zero for at least 5 seconds. This is
the system STATE 0 on the sequence chart.
NOTE: AUTO START IS INHIBITED BY
SENSING ANY RPM ABOVE 0 RPM.
AUTO START IS ABORTED BY THE
DETECTION OF ANY MONITORED FAULT.
CLASS B AND CLASS C TIMERS BEGIN
AT CRANKING. A LOCAL WARNING
SIGNAL AT THE ENGINE SITE PRIOR TO
CRANKING SHOULD BE PROVIDED.
NOTE: IF A CLASS A SETPOINT SHOULD
FAULT AT ANY TIME DURING AN AUTO
START SEQUENCE, THE SYSTEM WILL
TERMINATE THE SEQUENCE AND
DISPLAY THE APPROPRIATE FAULT
MESSAGE RETURNING THE SYSTEM TO
STATE 0.