Installation and Start Up
| 3-5
Installation Guidelines
1. If using an existing sample tap, make sure that it is internally free of
solidified sulfur.
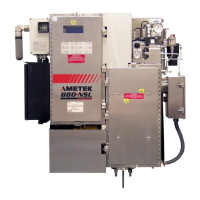
The Model 888 returns the sample to process through the annular
space around the O.D. of the probe tube. In most cases, the 1/2-inch
O.D. probe tube will be running through a 1-inch bore, leaving a 1/4-
inch annulus for sample return. If this annular space is blocked with
sulfur, the analyzer’s aspirator cannot function properly and may
impede sample flow.
2. The analyzer’s mounting flange has threaded studs (flat washers and
nuts provided), welded to the flange. Leave adequate clearance under
the analyzer for ease in re-installing the nuts. When lowering the
analyzer onto the sample tap, guide the studs into the corresponding
holes on the sample tap flange, then attach the flat washers and nuts.
Make sure that fittings or other objects do not interfere with rotation
of the nuts.
A gasket is recommended between the analyzer flange and process
valve to prevent process gas leaks.
3. The analyzer is shipped with the demister, sample valve and probe
packaged separately from the cell oven enclosure to protect the demis-
ter during shipping. Installation instructions provide assembly details.
4. Install the probe only after the analyzer is already in place on the
sample tap to minimize escape of process gas.
It will be necessary to open the steam-jacketed ball valve on the sample
tap during the probe installation process; be sure the valve handle is
accessible after probe installation.
5. Be careful when removing the demister temperature sensing probe
(RTD) from the cell oven when installing the probe. The RTD is not
designed to be repeatedly bent back and forth or forced into small
radius bends. If it must be bent at all, do so slowly and gently, and in a
greater than a one-inch radius.
6. When installing the demister assembly, fully insert the tubing in the
fitting before attempting to thread the nuts and be careful not to cross
thread the Teflon nuts on the stainless fittings. AMETEK will not be
responsible for damage to these fittings.

 Loading...
