Installation
11
ACR-5100 Acendo Core Administrators Guide
Installation
Overview
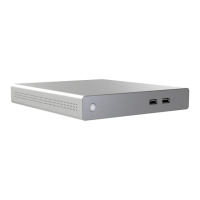
The Acendo Core (ACR-5100) is passive cooled without the need for fans and constructed of silver powder-coated sheet metal. Its
dimensions are
1.37” x 7.06” x 7.937” (34.8mm x179 mm x 201.6 mm) H x W x D and requires 1RU slot when mounted in a 19" rack.
The device is equipped with feet for tabletop usage. See Installation on page 11 for mounting instructions. The recommended
installation locations are:
Wall mounted behind a display
Mounted underneath a table
Inside credenza
Out on top of the credenza
In a rack shelf.
Installing Acendo Core is a quick and simple process. Before connecting the ACR-5100 to its peripheral devices and powering the
device, be sure to mount the device using the desired method detailed below.
Installation
What’s in the Box?
The Acendo Core Meeting Collaboration System includes the following accessories:
Power supply/cord
1 Mounting Plate and 2 Stand-off Screws
Safety Instructions and a Quick Start Guide
Physical Installation
To install Acendo Core, the following items are needed:
1 HDMI cable (Type A male)
Ethernet cable
1 HDMI touch screen or HDMI monitor with USB keyboard and/or mouse
Mounting screws are needed for wall or under desk mounting options
Acendo Core can be mounted using the included mounting plate for wall or under desk mount or can be used as a table-top device.
Attach Mounting Plate
1.
Using the mounting plate as a template, place it into the desired position and mark four of the wall screw holes with a pencil.
Note: If mounting on a wall, a level can be used to set the plate level for aesthetics.
2. Pre drill the holes for your wall screws.
Note: Use a drill bit smaller in diameter than your wall screws.
3. Place the plate back onto the mounting surface, insert wall screws and tighten.
Attaching to Mounting Plate
1.
Insert the included stand-off screws into two adjacent holes on the bottom. Align the stand-off screws on the Acendo Core unit with the slotted
holes in the plate and push through. Slide to lock.
FIG. 14 BACKPLATE - INSERT SCREWS AND TIGHTEN
X
X
X
X
wall screws and tighten.
Pre drill holes then insert
 Loading...