Installing and Configuring Your AV Equipment
19
N1000 Series User Manual
Changing IP Addresses
There are two ways to assign new IP addresses to your N1000 units using N-Able:
Option 1: Log in to each unit individually and make the changes on the Settings page.
Option 2: Export a comma-separated value (CSV) file, make changes to all units in the resulting file, and import the CSV file
into N-Able to apply the changes.
Option 1: Assigning IP Addresses Individually (using the Settings page)
1. Find the unit you wish to change in the control matrix (either on the Unit Management tab or the Video Matrix > N1000 tab).
2. Double-click the unit and log in.
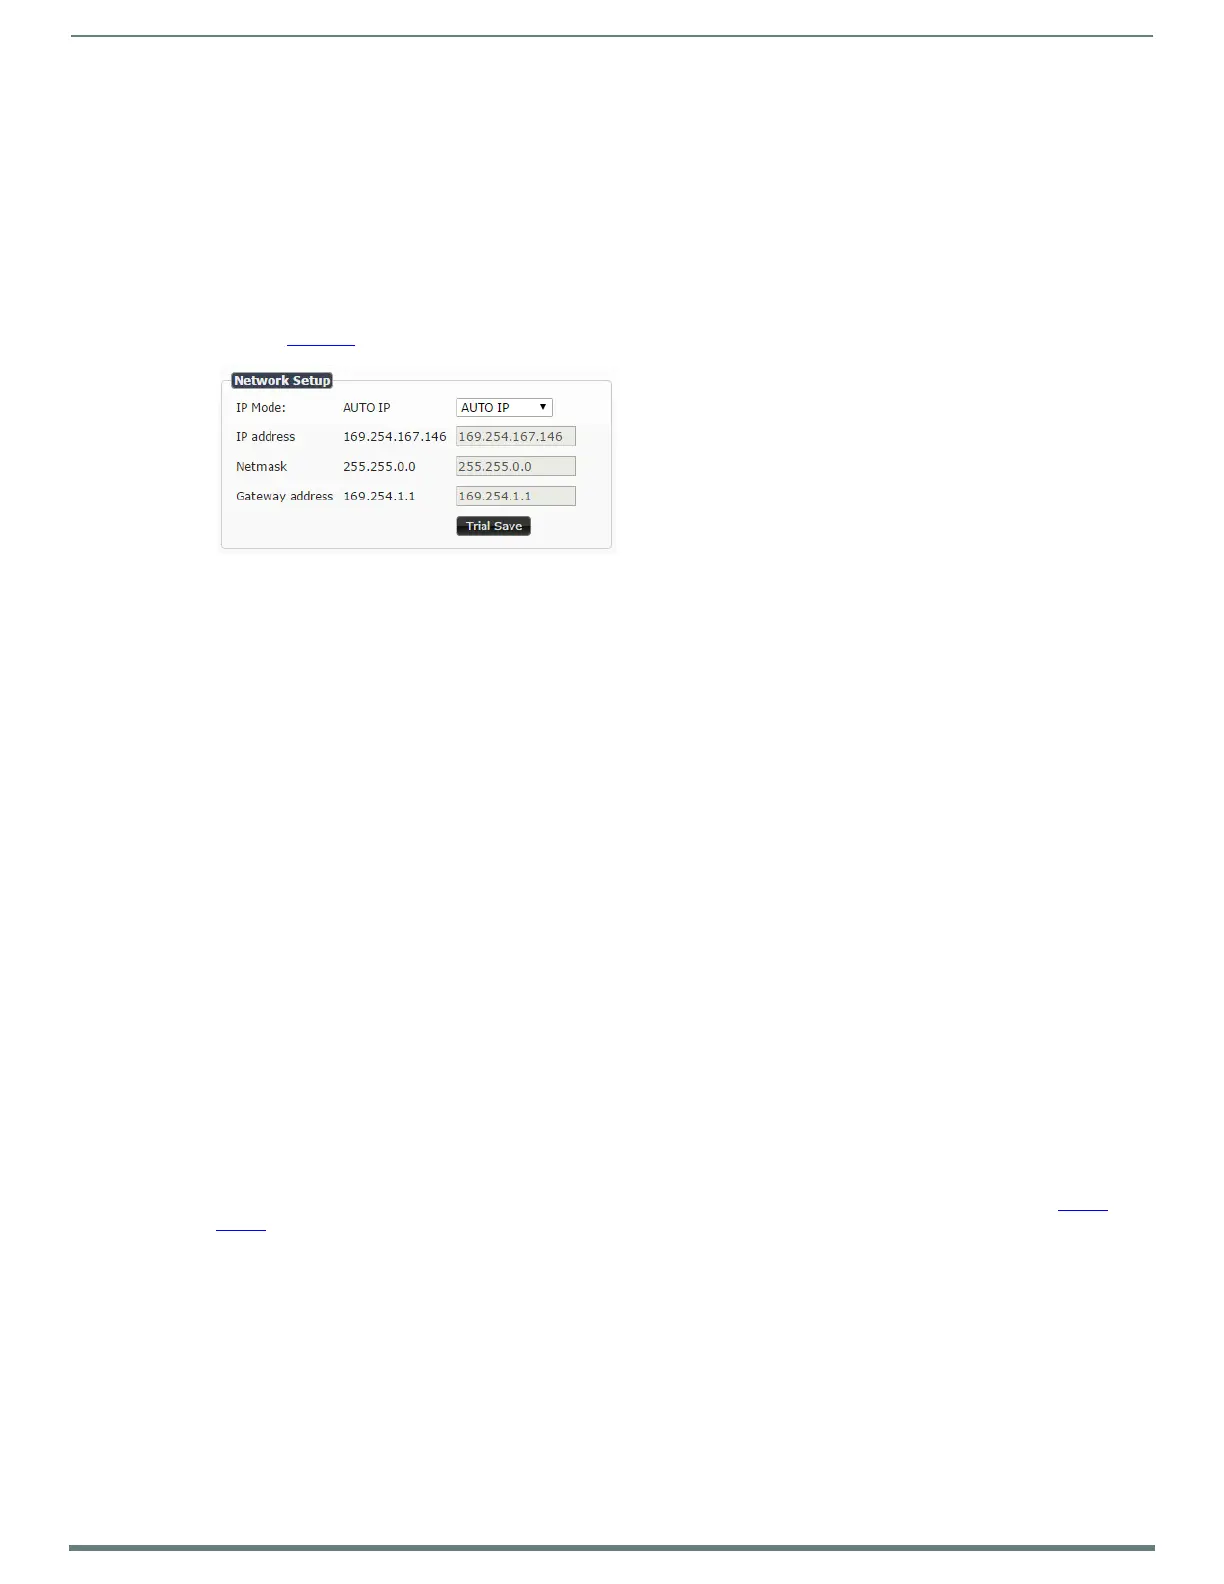
3. Go to the Settings page and make IP address changes for that unit either by setting a STATIC address or by enabling DHCP
(see Figure 16
).
FIG. 16 Network Setup Section of the Settings Page
4. Click the Trial Save button.
5. Return to the Settings page through the newly-configured IP address.
6. Once the Settings page appears (successfully using the new IP address) click the Conf irm button to lock in your changes.
NOTE: If you lose communication for any reason, unplug the N1000, wait one minute, and plug it back in. This restores the unit to the
original IP address.
Option 2: Assigning IP Addresses to Multiple Units (using CSV f iles)
N-Able has the ability to export and import CSV f iles. Once units are auto-discovered in N-Able, the CSV file can be exported and
then opened as an Excel spreadsheet. Here you can configure parameters such as IP address, subnet mask, gateway, stream
number, audio settings, etc. Once configured, import the CSV file back into N-Able to assign those parameters to the appropriate
devices. Reboot the devices to activate the new settings. This procedure can be used to configure multiple networked AV devices at
the same time. It can also provide valuable diagnostics by allowing you to see the last known device configuration as well as scan
the network for new devices (regardless of IP configuration).
To configure units using a CSV file, follow these steps:
1. Make sure that you have performed an Auto Discover (on the Unit Management tab of N-Able) since connecting all of the new
units to the network.
2. From N-Able’s main menu bar, select N-Able > Export CSV.
3. Click Yes on the pop-up box informing you that a CSV file is about to be generated.
NOTE: A CSV file editor (e.g., Microsoft Excel) is necessary to proceed.
4. The folder containing your CSV f ile displays. Double-click the file to open it.
5. You can use this file to edit the IP mode, IP address, subnet mask, gateway IP address, stream number, etc. Once all changes
have been made, save the file.
6. Go back into N-Able and select N-Able > Import CSV.
7. Browse to your saved CSV file and click Import.
Step 5. Connecting Encoders to an Input Source
Having already connected the Encoder(s) to the network and made the appropriate settings changes (as described in Step 3. and
Step 4.
), you can now connect to the appropriate AV source(s).This connection from an Encoder HDMI IN port (female) to an input
source is accomplished using either an HDMI cable or DVI-I (through adapter).
1. Connect the source you would like to use for the Encoder (camera, laptop, etc.) to the Encoder’s HDMI IN port using an HDMI
cable. For analog sources, use the VGA IN port.
2. Repeat until all Encoders are connected to their sources.