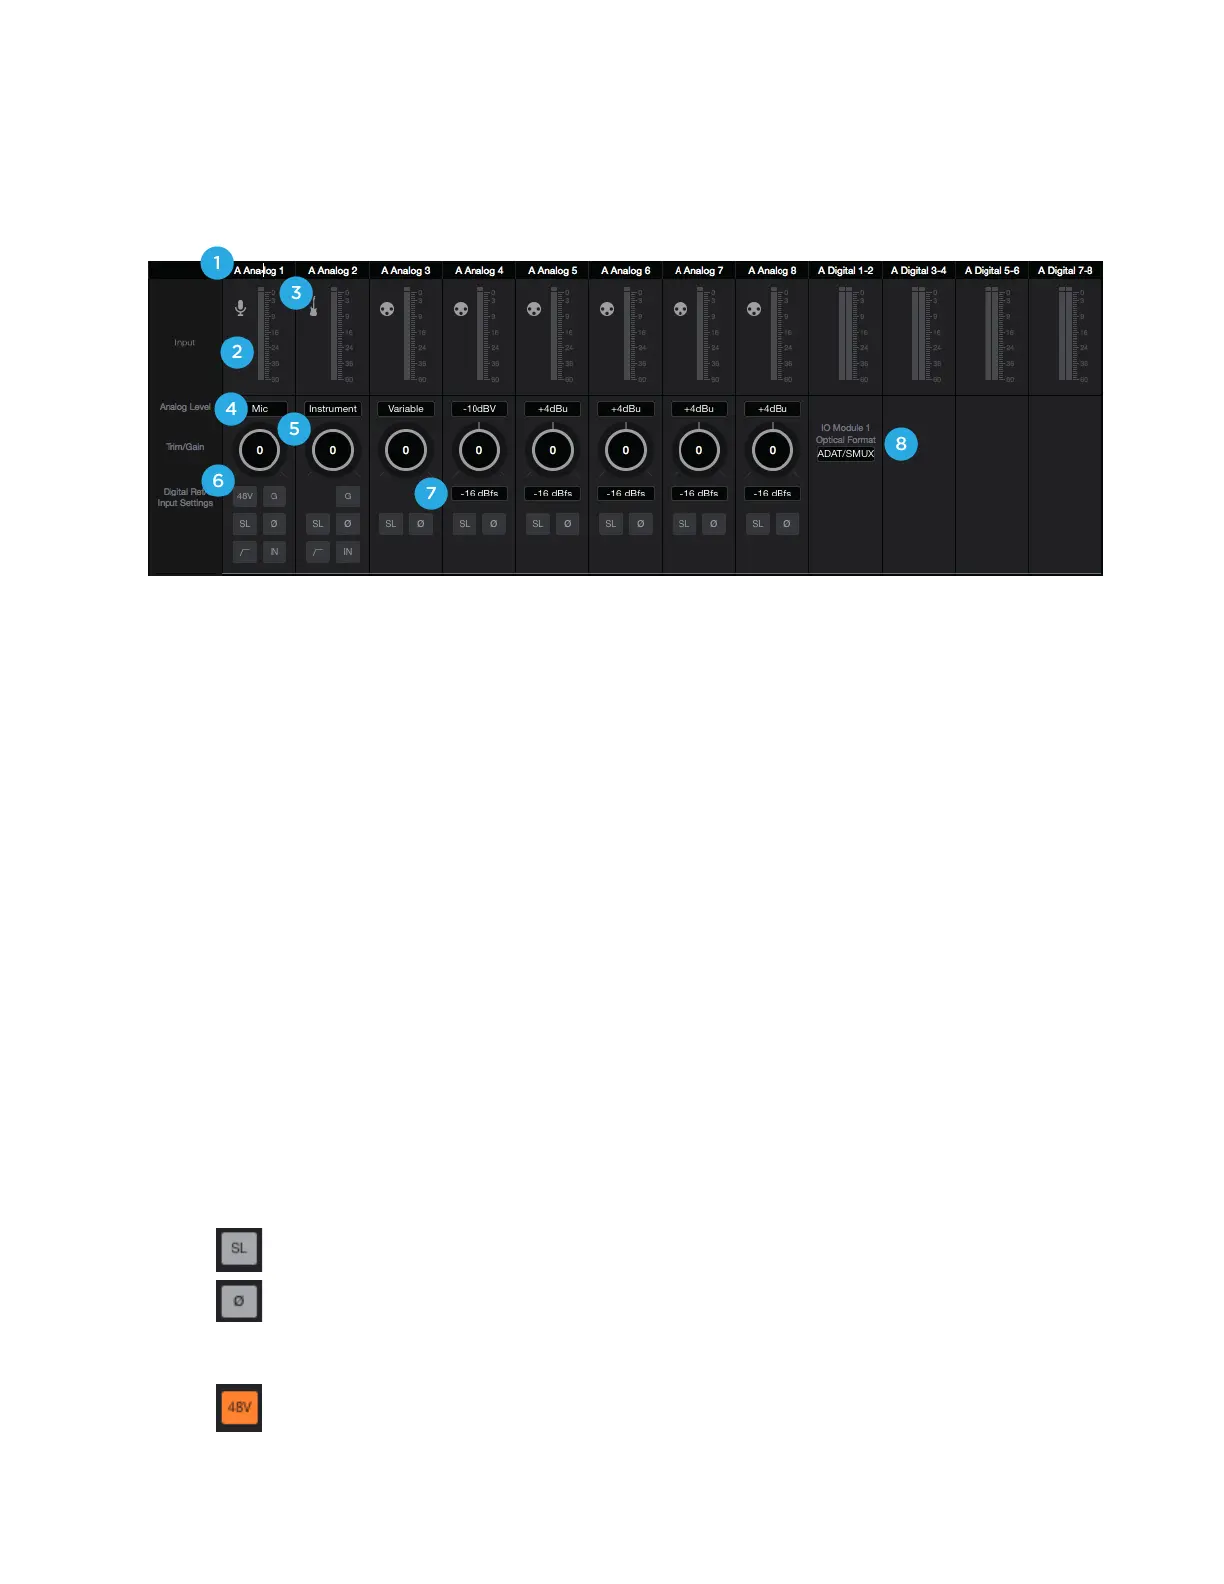
I/O Channel Section - INPUT
This portion of the Primary Window displays Channels for Analog input, Digital input, and Playback from audio
software.
1.
Hardware Input Label - Indicates the analog or digital hardware input. Can be renamed by clicking the label and
typing a user-customized label. If you’ve customized the labels and want to return to the default text, simply delete
the text and press Return.
*These labels are transmitted to your DAW
2.
Hardware Input Level Meter - Shows the post-gain digital signal level coming into the channel.
3.
Input Icon - Shows the input type selected from the Analog Level drop-down
4.
Analog Level Type Selector - Set the Analog input type for each channel. Command-click to set all channels
simultaneously
•
Choose +4dBu when connecting to professional line level equipment such as an external mic pre, compressor, or EQ that
has outputs at the +4dBu nominal level.
•
Choose -10dBV when connecting to “semi-pro”, hi-fi, or musical instrument gear with outputs at a -10 dBV "
nominal level.
* When the 8MP (mic pre) module is installed, additional entries for Microphone and Instrument appear:
•
Choose Mic when connecting microphones or direct boxes, or any devices that needs to run through a "
microphone preamplifier. -XLR Input only
•
Choose Instrument when connecting a guitar or keyboard, or any high impedance (Hi-Z) instrument to the 1/4”
input (balanced TRS or unbalanced TS). The signal is sent through a Hi-Z to Low-Z conversion circuit before sent "
through the microphone preamplifier circuit.
5.
Input Trim / Gain Control -
•
When Analog Level is set to +4dBu/-10dBV, trim the analog input stage for precise calibration.
•
When the 8MP (mic pre) IO Module is installed, set Microphone or Instrument input gain.
*
Option + Click to reset to 0. Command + Click to reset all channels to 0.
6.
Input Settings - Provides options for the various inputs:
•
# Soft Limit: This option begins to attenuate transient peaks at a threshold of -4dBfs.
•
# Polarity Invert: Use this button to invert the polarity of the input signal
*When the 8MP (mic pre) module is installed, the following input settings become available:
•
# Phantom Power: Use this button to enable 48 volt phantom power on the corresponding Analog In channel.
Condenser microphones require 48 volt phantom power to operate
 Loading...