DRAFT
September 25, 2007 1:07 am, 4376782_Maintain_the_System.fm
Chapter 6 Maintain the System
Regular Maintenance
Applied Biosystems StepOne
™
and StepOnePlus
™
Real-Time PCR Systems
Installation, Networking, and Maintenance Guide
112
Notes
3. In the Setup screen of the Dye Calibration dialog box, select a custom dye from the
list or create the custom dye as follows:
a. Click New Dye.
b. In the Dye Manager dialog box, click New.
c. Complete the New Dye dialog box, then click OK.
d. Click Close.
4. In the Setup screen of the Dye Calibration dialog box, enter a temperature setting for
the calibration.
Note: Set the temperature to match the temperature at which you intend to collect
data. For example, the temperature for all Applied Biosystems system dyes is 60 ° C
because data collection for TaqMan
®
reagents occurs during the 60 ° C extension
step of the PCR.
5. Select The custom dye plate is loaded in the instrument, then click Next.
6. In the Run screen, click Start Run, then wait for the instrument to complete the dye
calibration.
Note: If the StepOne
™
software displays messages during the run, troubleshoot the
errors as described in
“Dye Calibration Failure” on page 134
.
7. When the instrument displays the Main Menu, unload the custom calibration plate.
8. Analyze the custom spectral calibration plate as explained in “Analyze the
Calibration Data” on page 106.
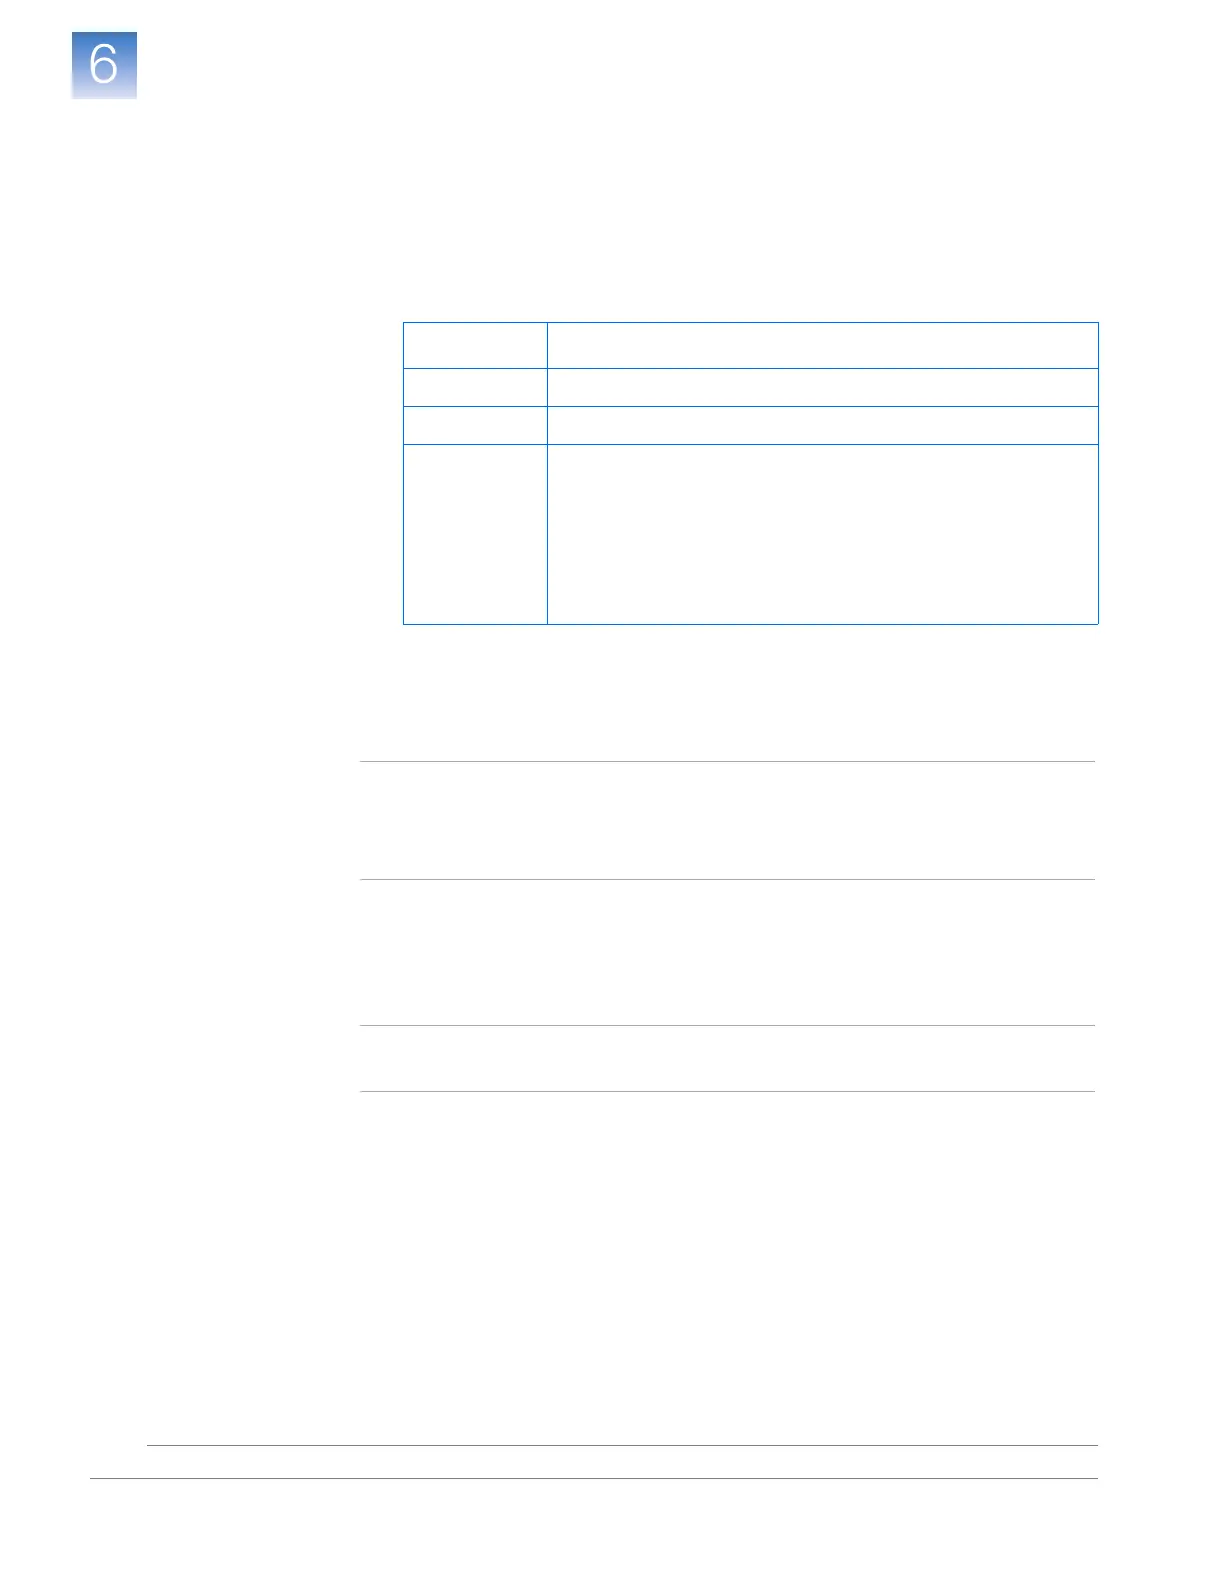
Field/Option Action
Name Enter a name for the custom dye.
Wavelength Enter the wavelength at which the dye fluoresces.
Type Sel ec t:
• Reporter if the dye works in conjunction with a quencher dye
to report an increase of PCR product.
• Quencher if the dye suppresses the fluorescence of a reporter
dye until amplification of PCR product.
• Both if the dye reports an increase of PCR product without the
aid of a quencher dye.