WorldCast Equinox - Release 3.1 - user manual – 07/2011
Page 97
Whiterock Business Park - 729 Springfield Road - Belfast BT12 7FP - Northern Ireland
Tel.: +44 28 9067 7200 | Fax: +44 28 9067 7201 | http://www.aptcodecs.com | contact@aptcodecs.com
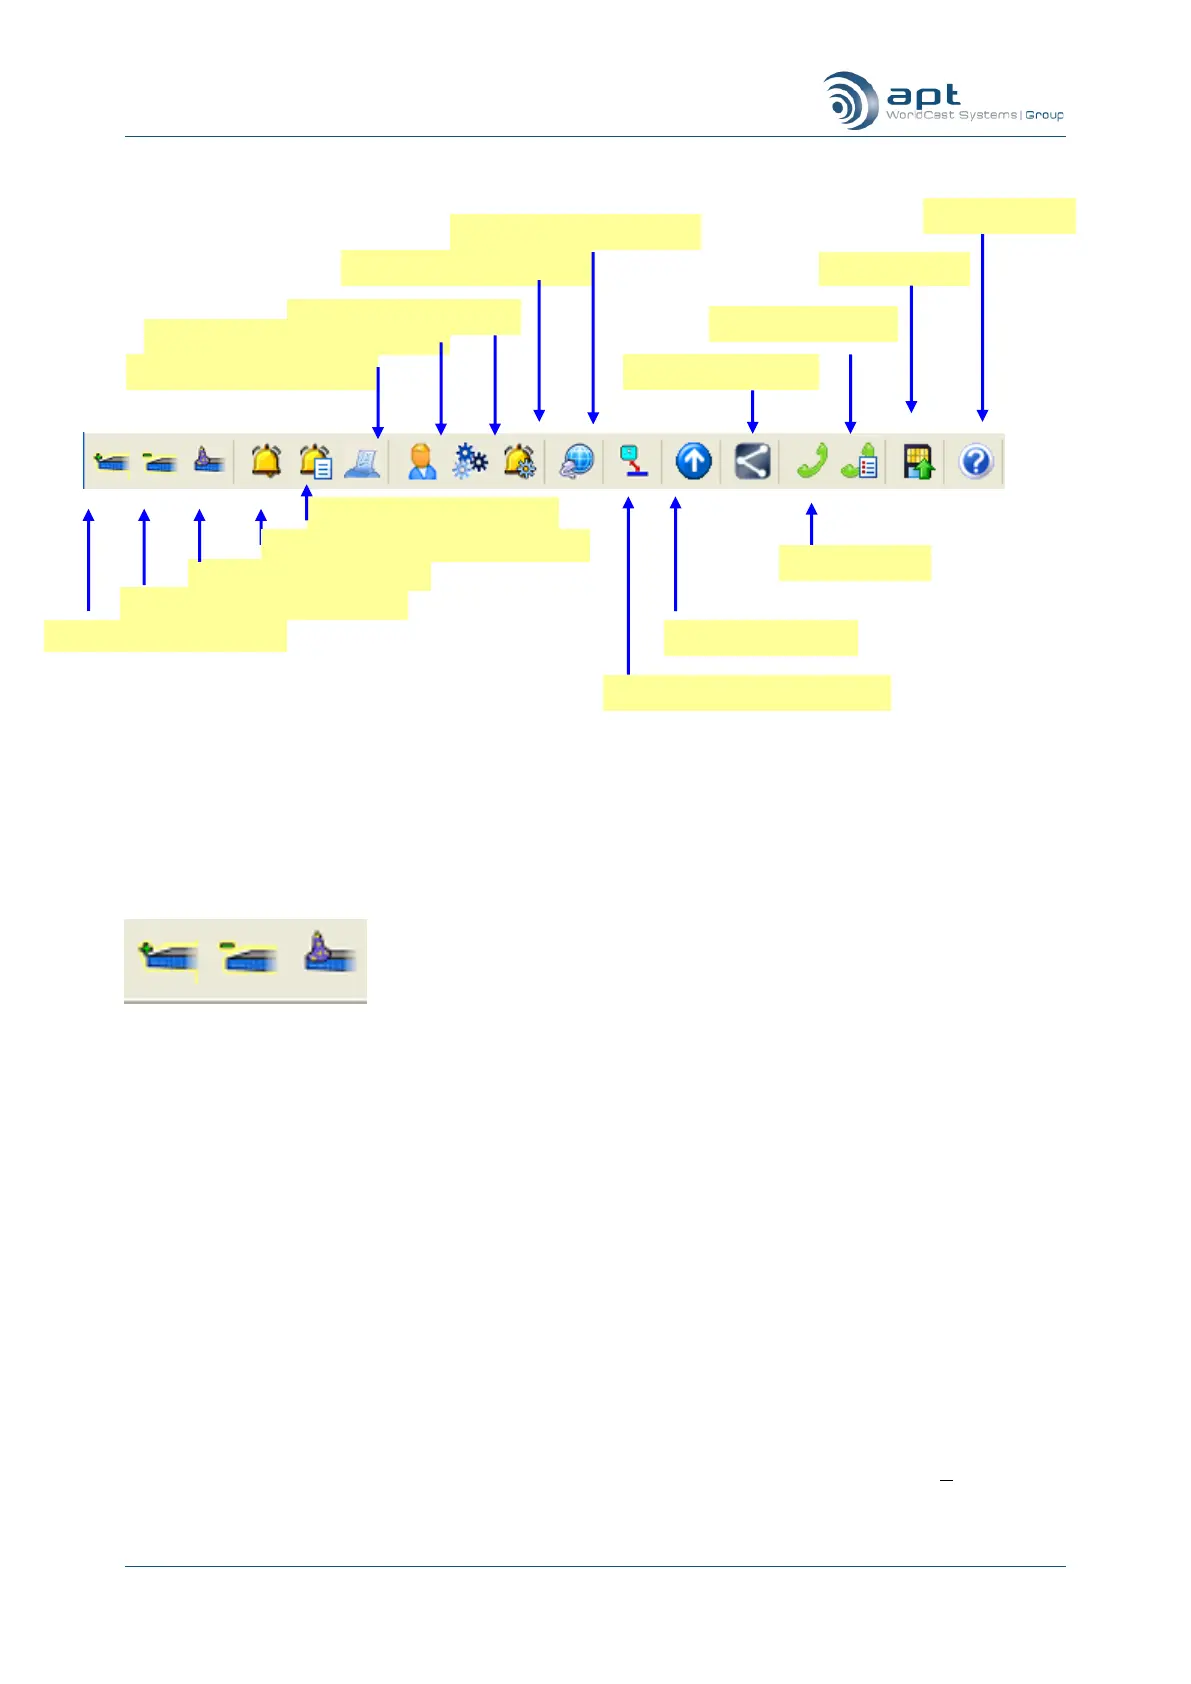
6.3.1. The Main Tool Bar
Main Screen Tool Bar – functional overview
6.3.2. Add and Delete WorldCast Equinox Units
The CMS allows you to add units to and remove units from the Family Tree.
Add a WorldCast Equinox Unit with a known IP
address to the CMS or Delete it from the CMS.
Run the Net Wizard for the auto-detection of
any WorldCast Equinox Unit (or any other
WorldCast codec) on the network.
The first option provides a quick way to attach a WorldCast Equinox unit with a known IP address to
the CMS. Click the “Add Unit” and enter the IP address of the WorldCast Equinox unit you wish to
connect. Deleting a WorldCast Equinox unit is done with the “Delete” button. Select the particular
WorldCast Equinox and click “Delete Unit”.
The second option starts the Net Wizard, which scans an IP address range in order to auto-detect
any reachable WorldCast codecs on the network. Click “Net Wizard” to start the net scan.
6.3.3. Add Equinox Units with a known IP address
The Main Screen will appear for the first time without any WorldCast Equinox unit attached to the Family Tree.
Click on “Add Unit” to enter a known IP address of the WorldCast Equinox unit you want to add to the Family
Tree. If the unit you are connecting to is on line then you can use the “Autodetect” radio button and the CMS
will automatically add the correct type of unit. Alternatively click on the WorldCast Equinox button (you can
manually select the type of unit you are connecting to) and then complete the task by clicking on Add.
Click to configure Alarms
Click to access User Management
Click to add a known unit
Click to remove a selected unit
Click to examine Alarm Log
Click to start Net Wizard
Click to examine Event Log
Click for Connection Wizard
Click to open active alarms window
Click to switch to Family Tree