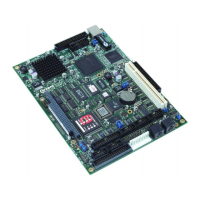
SBC-GX1 Windows XP Embedded Quickstart Unpacking and connecting up
5 Plug one end of the Ethernet cable into the socket labeled PL5 10/100-TX and the
other end into your development system.
The cable supplied in the kit is crossed cable, designed to go directly
between the SBC-GX1 and another PC. If you want to use a hub you must
use a straight-through cable instead.
6 Do one of the following:
If your kit does not include an LCD, plug one end of the supplied adapter cable
into a video monitor and the other end into the socket labelled PL11 VGA.
•
• If your kit includes an LCD, plug the interface cable into the SBC-GX1 flat
panel connector PL15. Plug the larger cable into the flat panel and the smaller
cable into the backlight inverter.
Make sure the power is off while connecting the LCD, as the backlight
inverter generates high voltages.
7 If the touchscreen is to be used, do the following:
Use the serial adapter cable provided to connect the 9-way D type on the
TSC1 to COM3 on the SBC-GX1.
•
• Connect the touchscreen to the TSC1 using the 4-way ribbon cable.
Pin 1 is marked on the touchscreen and the cable, but it can be difficult
to see.
• Connect the TSC1 to the power supply.
8 Fit the SBC-GX1 power supply to the socket labelled PL12 POWER.
9 Fit the appropriate power lead to the power supply unit.
© 2004 Arcom Issue D 12

 Loading...