SBC-GX1 Windows XP Embedded Quickstart Unpacking and connecting up
Unpacking and connecting up
Arcom’s Windows XP Embedded Development Kits are shipped ‘ready to run’. You
simply remove the various items from their packaging and connect them up. Remember
that a number of these items are static-sensitive, so you must take standard anti-static
precautions while unpacking. See Anti-static handling
, page 7.
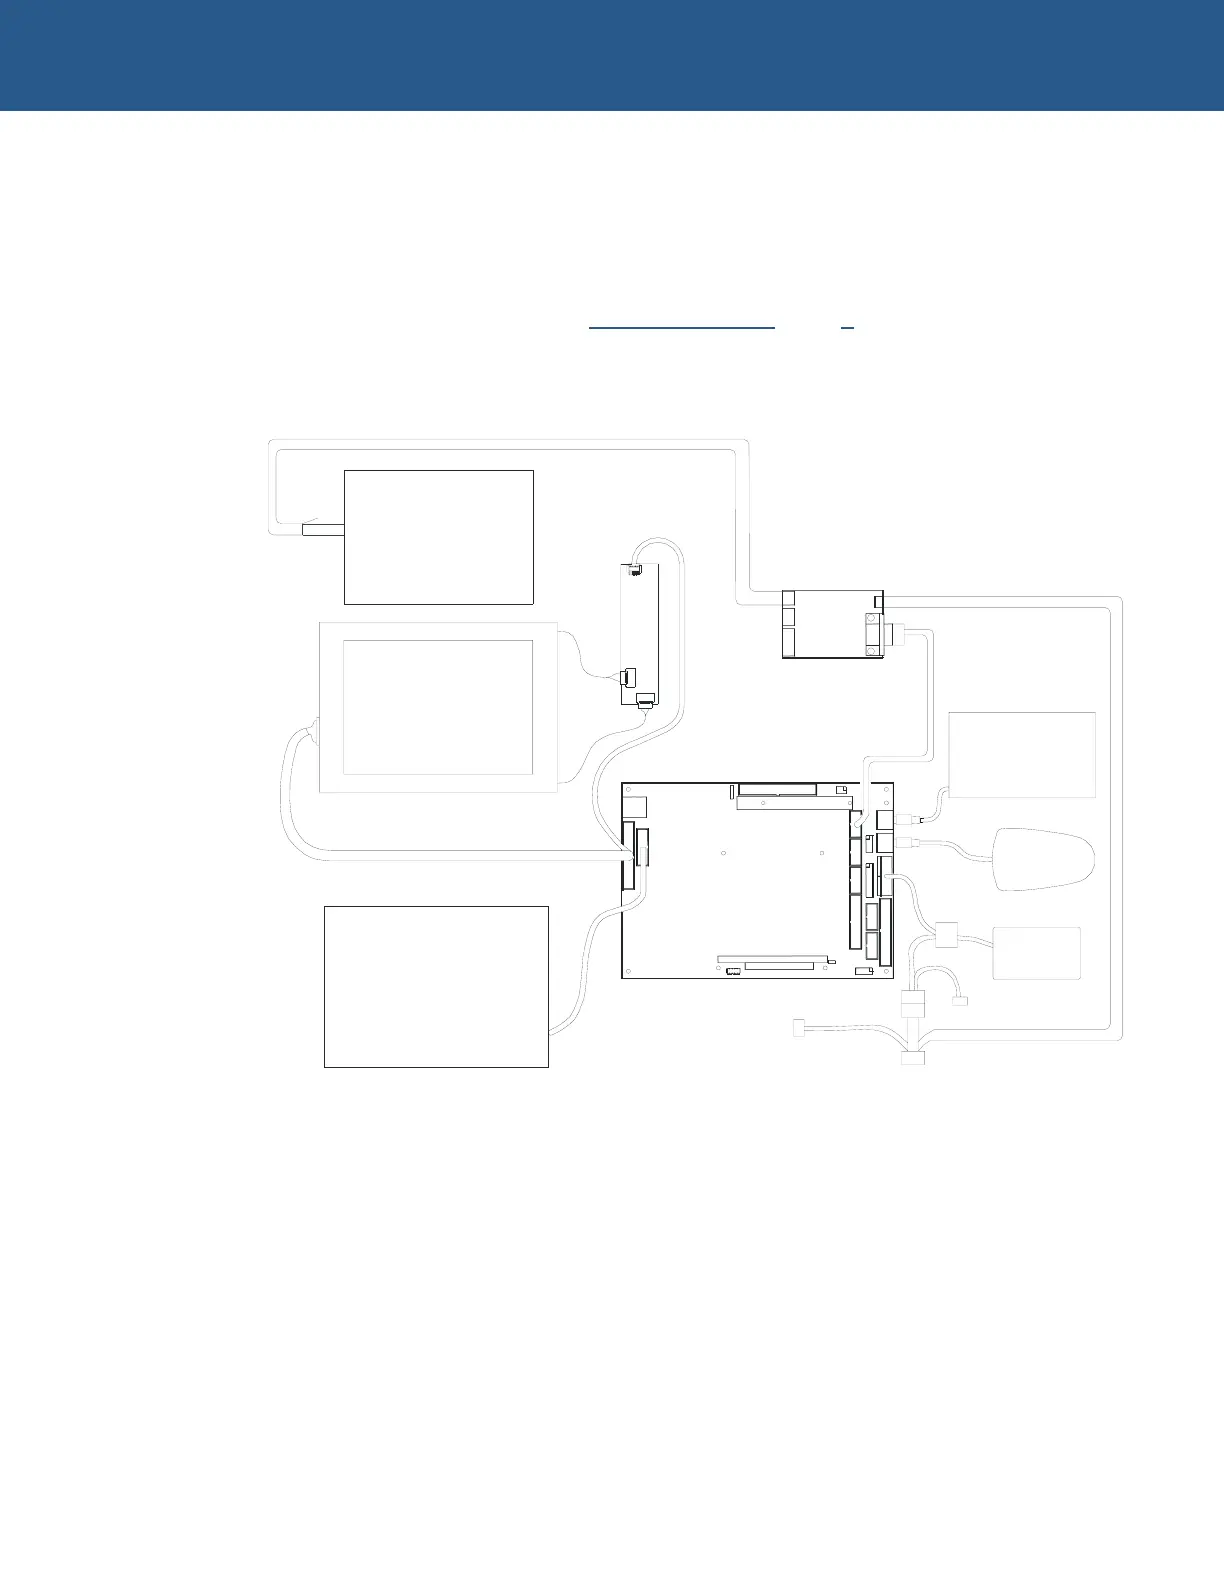
Refer to the diagram and procedure below to ensure that everything is connected up
correctly.
POWER
SUPPLY
MOUSE
KEYBOARD
CRT MONITOR
LCD DISPLAY
INVERTER
FLAT PANEL CABLE
INVERTER CABLE
SBC-GX1
FDD
POWER I/F CABLE
TOUCH SCREEN
4
5
1
1
8
1
TSC1
CAB-TOUCHSCREEN-4W
9 WAY D - 10 WAY IDC
COMMS CABLE
HDD
TSC POWER I/F CABLE
TTL-CONV.
POWER
PIN 1
1 Remove the SBC-GX1 CPU board from its packaging and place it on a static-free
work surface.
2 Enable the battery by moving the jumper labelled LK7 to position A.
3 Plug the mouse into the socket labelled PL9 MOUSE.
4 Plug a keyboard into the socket labelled PL7 KEYBOARD (using the PS/2
adapter if required).
© 2004 Arcom Issue D 11
 Loading...