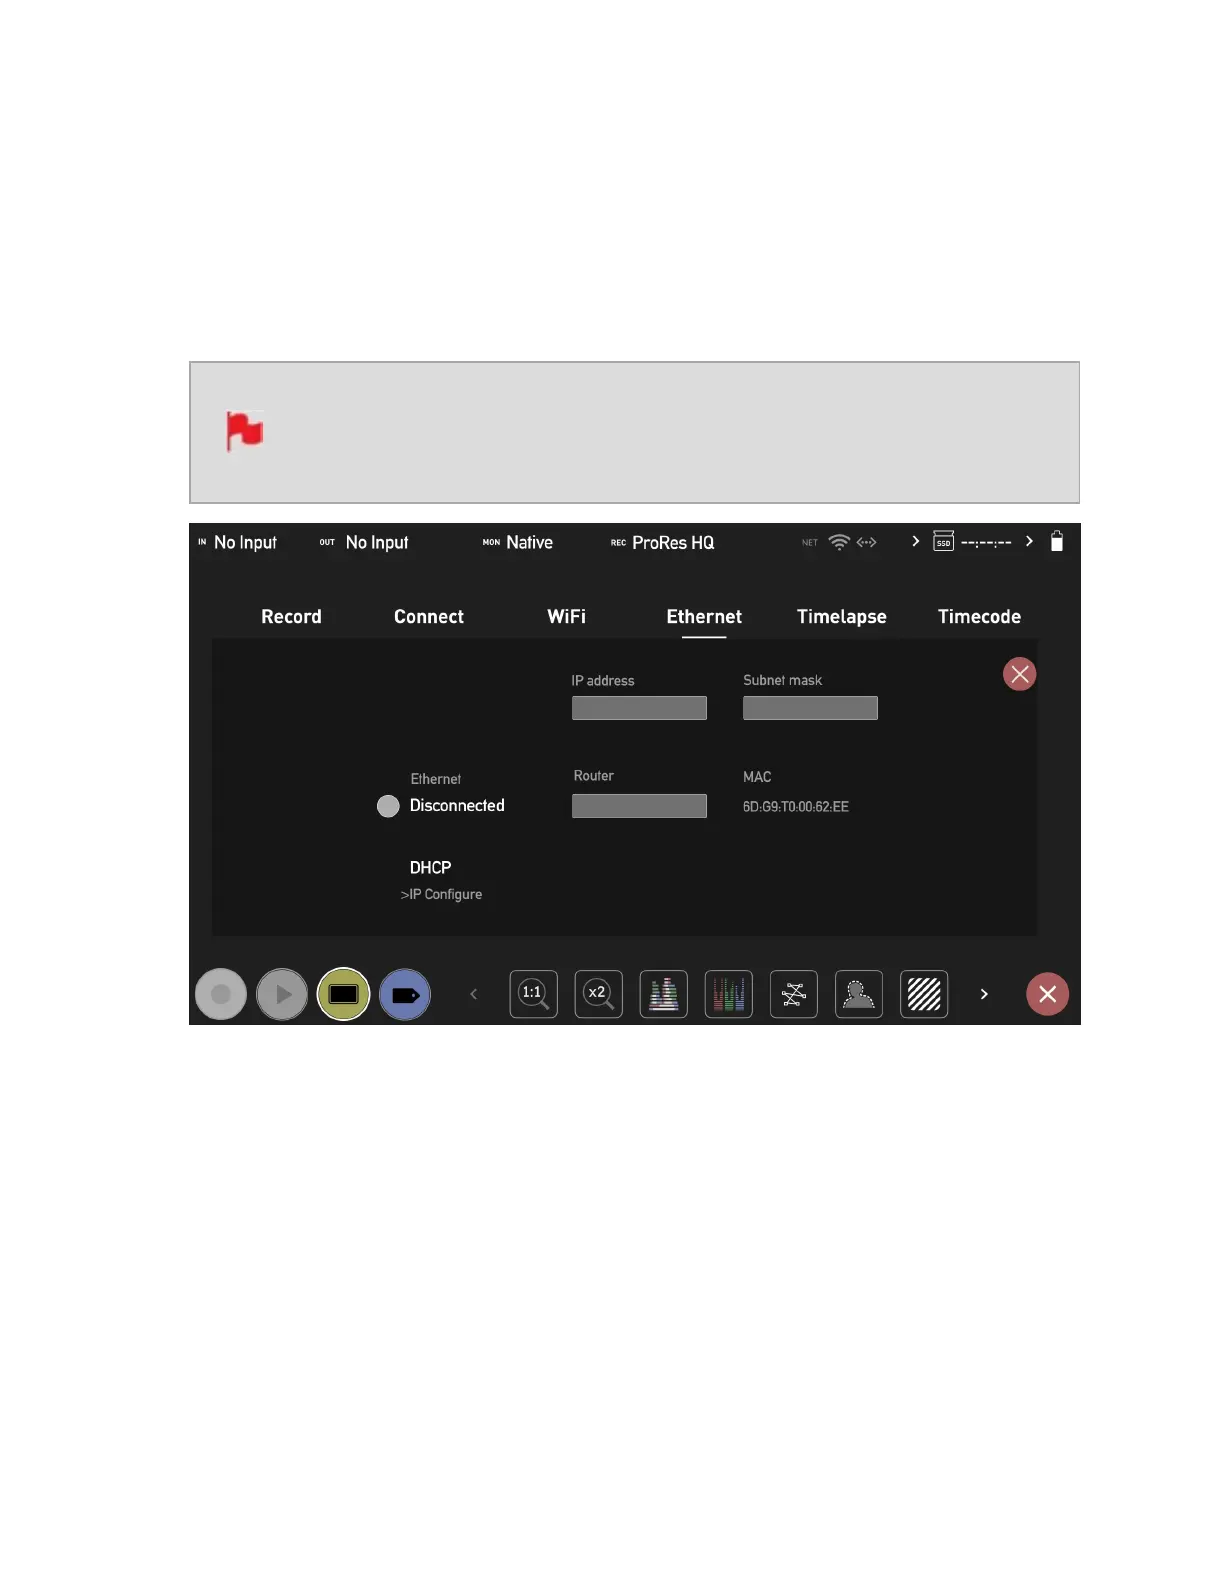
Ethernet Menu
When the Atomos CONNECT is attached to your NINJA V+ and the device is in Connect
Mode, the Ethernet menu tab will appear in the menu system. This menu provides set-
tings for connecting your device to a network via Ethernet, so that you can connect to
Atomos Cloud Services. For more information on Connect Mode refer to the "Connect
Menu" on page 133 section.
An Atomos CONNECT must be attached to your NINJA V+ and the device
must be in Connect mode before the Ethernet Menu page appears in the
menu system.
How to connect to an Ethernet network
1. Plug an Ethernet cable from your network into the Ethernet connector on your
Atomos CONNECT.
2. Navigate to the Ethernet Menu page on your NINJA V+.
3. Tap on IP Configure to cycle through DHCP and Static. Select DHCP to configure the
network connection details automatically. Your router will then automatically pop-
ulate the DNS, IP address and Subnet Mask fields.