Connect Menu - Capture to Cloud
ATOMOS Capture to Cloud provides a powerful, flexible, and immediate way to share clips
from a camera or device to remote team members using services like Frame.io Camera to
Cloud (C2C).
Using Frame.io Camera to Cloud (C2C)
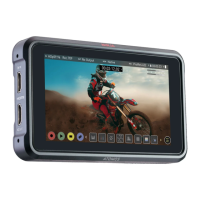
When it is paired with an ATOMOS CONNECT, your NINJA V+ can become a Frame.io C2C
Connected Device that connects directly into the Frame.io Camera to Cloud ecosystem.
This ecosystem connects Frame.io to the production set, by uploading video and audio
from your camera on set to Frame.io between each take.
Selecting Frame.io as a destination in Atomos Cloud Studio allows you to use Frame.io
Camera to Cloud to upload proxy files directly into your Frame.io project. Having the
proxy files uploaded to Frame.io whilst you are recording them, means that an editor can
access these files from anywhere in the world, and begin editing immediately. For more
information on Frame.io Camera to Cloud, refer to https://frame.io/c2c/ or watch the
Frame.io Training Series at https://frame.io/c2c-training/
The dual record feature of the NINJA V+, creates matching “hero” clips (at up to 4Kp30 )
in either Avid DNxHR/HD, Apple ProRes RAW* or Apple ProRes, and 'proxy' 1080p HEVC
(H.265) files so that a clip can be shared and securely backed-up even as it’s being recor-
ded. Once the edit is completed in your NLE, you can easily relink to the high quality
'hero' files for final color grading, visual effects or other post-production steps.
* This feature is coming soon
Setting up your Frame.io account
Before selecting Frame.io Camera to Cloud as a destination in Atomos Cloud Studio, you
need to have a Frame.io account already set up. Visit https://frame.io/ and follow the
prompts to create a Frame.io account.
You also need to have created a project that you can select as a media destination, and
ensure that in the settings for the project you have enabled C2C Connections. This
allows your NINJA V+ to connect directly into the Frame.io C2C ecosystem and upload
proxy files directly into your Frame.io project.
To enable C2C Connections, click the toggle switch at C2C Connections to ON when cre-
ating a new project from the web app, mobile web, or in the Frame.io iOS app.