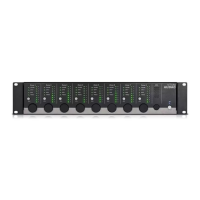
MWX65 All-in-one wall panel
Functions
TheMWX65istheadvancedAll-in-onewallpanelfortheMTX.Thiswallpanelhasa
graphicdisplayandcancontroltherouting,volume,bass,trebleandmuteforonezone.
Besidesthosecontrolfunctions,italsoprovidesthepossibilitytoconnectamicrophone
andastereolineinputsource.TheMWX65wallpanelshouldbeconnectedtotheWP
inputsoftheMTXbyusingCat5e(orbetter)cable.
ThefollowingfunctionsofmultiplezonesoftheMTXcanbecontrolled:
-Volumewithinarangeof0dBto-70dB
-Allinputscanbeselected
-Mutecanbeactivated
-Basswithinarangefrom-14dBto+14dB
-Treblewithinarangefrom-14dBto+14dB
Configuration
BeforetheMWX65canoperate,theconfigurationshouldbemade.Firstofall,anaddress
needtobeassignedandtheavailableinputsneedtobedefined.
Followthesestepstoconfigure:
1)Gotothe“Setup”menuandclick“Systemconfiguration”.Toconfigurethesettings
fortheMWX65wallpanels,clickthecorrespondingbutton.Afterthisbuttonisclicked,a
windowwillbeshownwherealltheconfigurationsettingsfortheMWX65canbemade.
Ontheleftside,adropdownlistisshownwherebytheaddressfortheMWX65canbe
selected.Theaddresscanbeselectedbetween“W001”to“W008”.Logicallyisstarted
withtheaddress“W001”forthefirstwallpanelandincreasestheaddressforevery
subsequentwallpanel.Afterthedesiredaddressisselected,clickthe“SetAddress”
buttonandthedisplayontheMWX65willstartblinking.Confirmtheaddressofthewall
panelbypushingthebigrotarybuttononthewallpanelandtheselectedaddresswillbe
assignedtothewallpanel.
2)Thezonewhichshouldbecontrolledbythiswallpanelcanbeselectedbythe
dropdownlistwhichisshownonepositiontotheright.
3)Theinputswhichareselectablewiththewallpanelcanbechoseninthe“Selectable
inputs”dropdownlist.Aftertheinputsareclicked,theywillappearinthelistboxshown
below.Theycanberemovedagainfromthislistboxbyselectingthem,andclickingthe
“RemoveInput”button.
Thoseselectableinputsarenotlinkedwiththe“Quickselectionmenu”liketheinputson
theMWX43/45are.
4)CertainactionssuchasVolumeChange,Inputchange,Mute,Tonecontrolandsettings
canbedisabledfromthewallpanelbycheckingthecheckboxes.
5)Themicrophoneinputhasthepossibilitytoprovide+12Vphantompowerforpowering
condensermicrophones.ThephantompowercanbeswitchedONandOFFbyclicking
the“EnableMicPhantom”checkbox.ThissettingcanalsobechangedintheMWX65
settingsmenu.(If“Blocksettingsmenu”isnotchecked)
6)TheBacklightlevel,screensaverandscreensaverdelaycanbesetbymeansofthree
dropdownboxes.ThissettingcanalsobechangedintheMWX65settingsmenu.(If