ADVANCED MANUAL / Bit One /
6
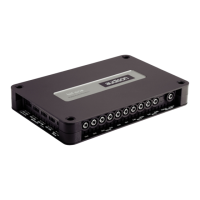
1. PRE OUT low-level analog signal (see section 5.6.2-3)
Ch1 - Ch2 - Ch3 - Ch4 - Ch5 - Ch6 - Ch7 - Ch8
Connect here the RCA cables going to the system’s amplifiers.
2.
AD Link - OUT digital signal (see section 5.6.1-3)
S/PDIF standard digital signal (Ch1÷Ch8) to connect amplifiers provided with appropriate ADLink input.
3.
AC Link 1 - 2 Remote Controls
DRC: Connection plug for the remote control panel of the processor functions and the devices connected to
the AMPS bus
(see section 5.3).
AMPS: Connection bus to control the amplifiers provided with ACLink connection (see section 5.6.1-3).
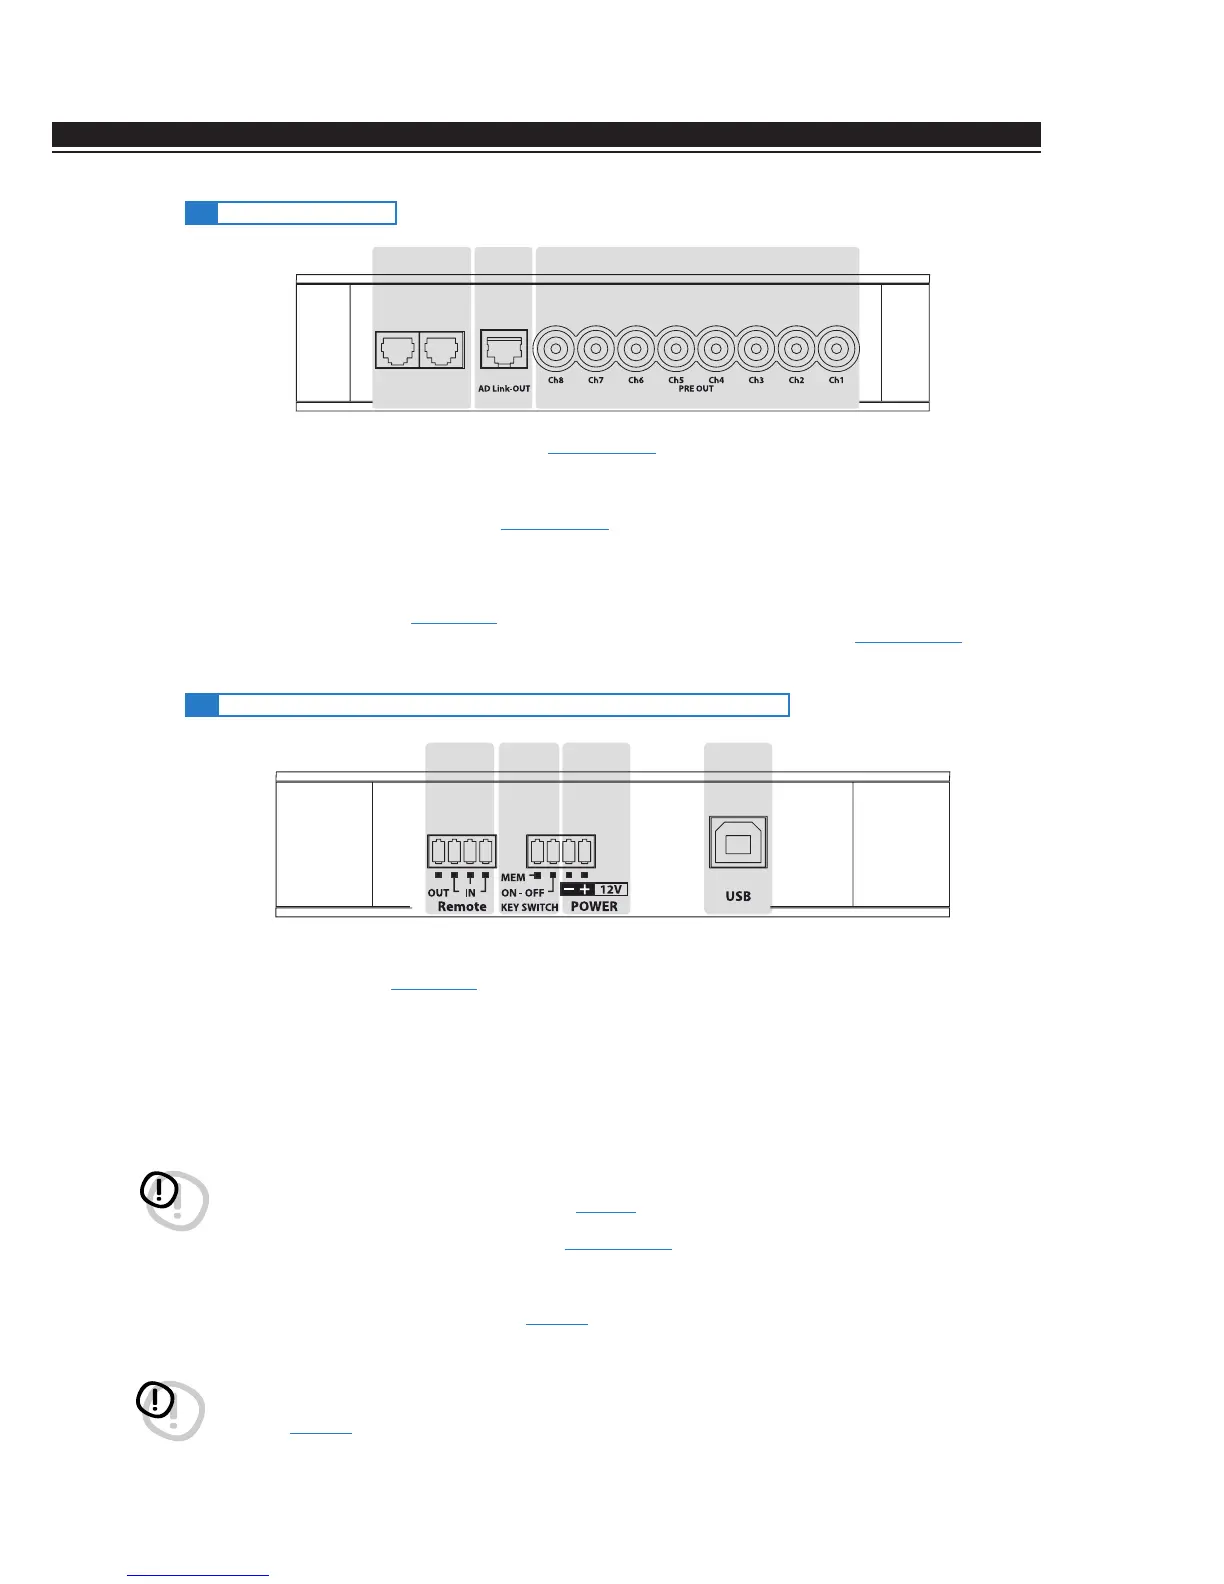
1. REMOTE IN-OUT (see section 5.1)
IN: for the processor remote turn-on through one or multiple signal sources, featuring Rem Out control.
OUT: output for the remote turn-on of the other devices/amplifiers connected to the processor.
The REMOTE OUT output current capability is 20 mA. From the REMOTE-IN signal, the processor only takes
7 seconds to supply the signal to the REMOTE OUT output.
WARNING: the Bit One must be switched on before the amplifiers connected edit are turned on. It’s necessary to
connect the sources Remote Out to the Bit One Remote In and then the Bit One Remote Out to the Remote In of the
other devices/amplifiers connected to the Bit One
(section 5.1)
.
2. KEY SWITCH ignition key connection (see section 5.2.3-4)
MEM: it stores the processor status when it is turned off.
ON - OFF: it turns the processor on and off when the vehicle turn on/off ignition key is turned.
WARNING: make sure the connection polarity is as indicated on the terminals. A mis-connection may result in
damage to the Bit One. After applying a 12V power, wait at least 20 seconds before turning the Bit One on.
3. POWER power supply connection (section 5.1)
- 12V + : Positive and negative connection terminal for car 12 V power supply.
IMPORTANT REMARK: current capability of the Bit One.1 version (check the label on the bottom of your Bit
One to know its version) is 130 mA; it can also drive an automotive relay (make sure its absorption is not higher
than 130 mA).
4. USB (section 5.3)
USB (B) connection plug, to connect the processor to a PC and manage its functions through the Bit One
software. The connection standard is USB 1.1/2.0 compatible.
4.3 INPUTS - REMOTE CONTROL OUTPUTS AND POWER SUPPLY
4.2 OUTPUT SIGNALS