16
Axess Pro Series 3000 Owner Installation Instructions
12. Coding Transmitter
The Axess
®
Pro Series 3000 can store 511 transmitters in its memory.
Each transmitter can be allocated an alpha-numeric ID label up
to eleven characters in length and each button can be assigned to
one of several control functions. The settings for a transmitter are
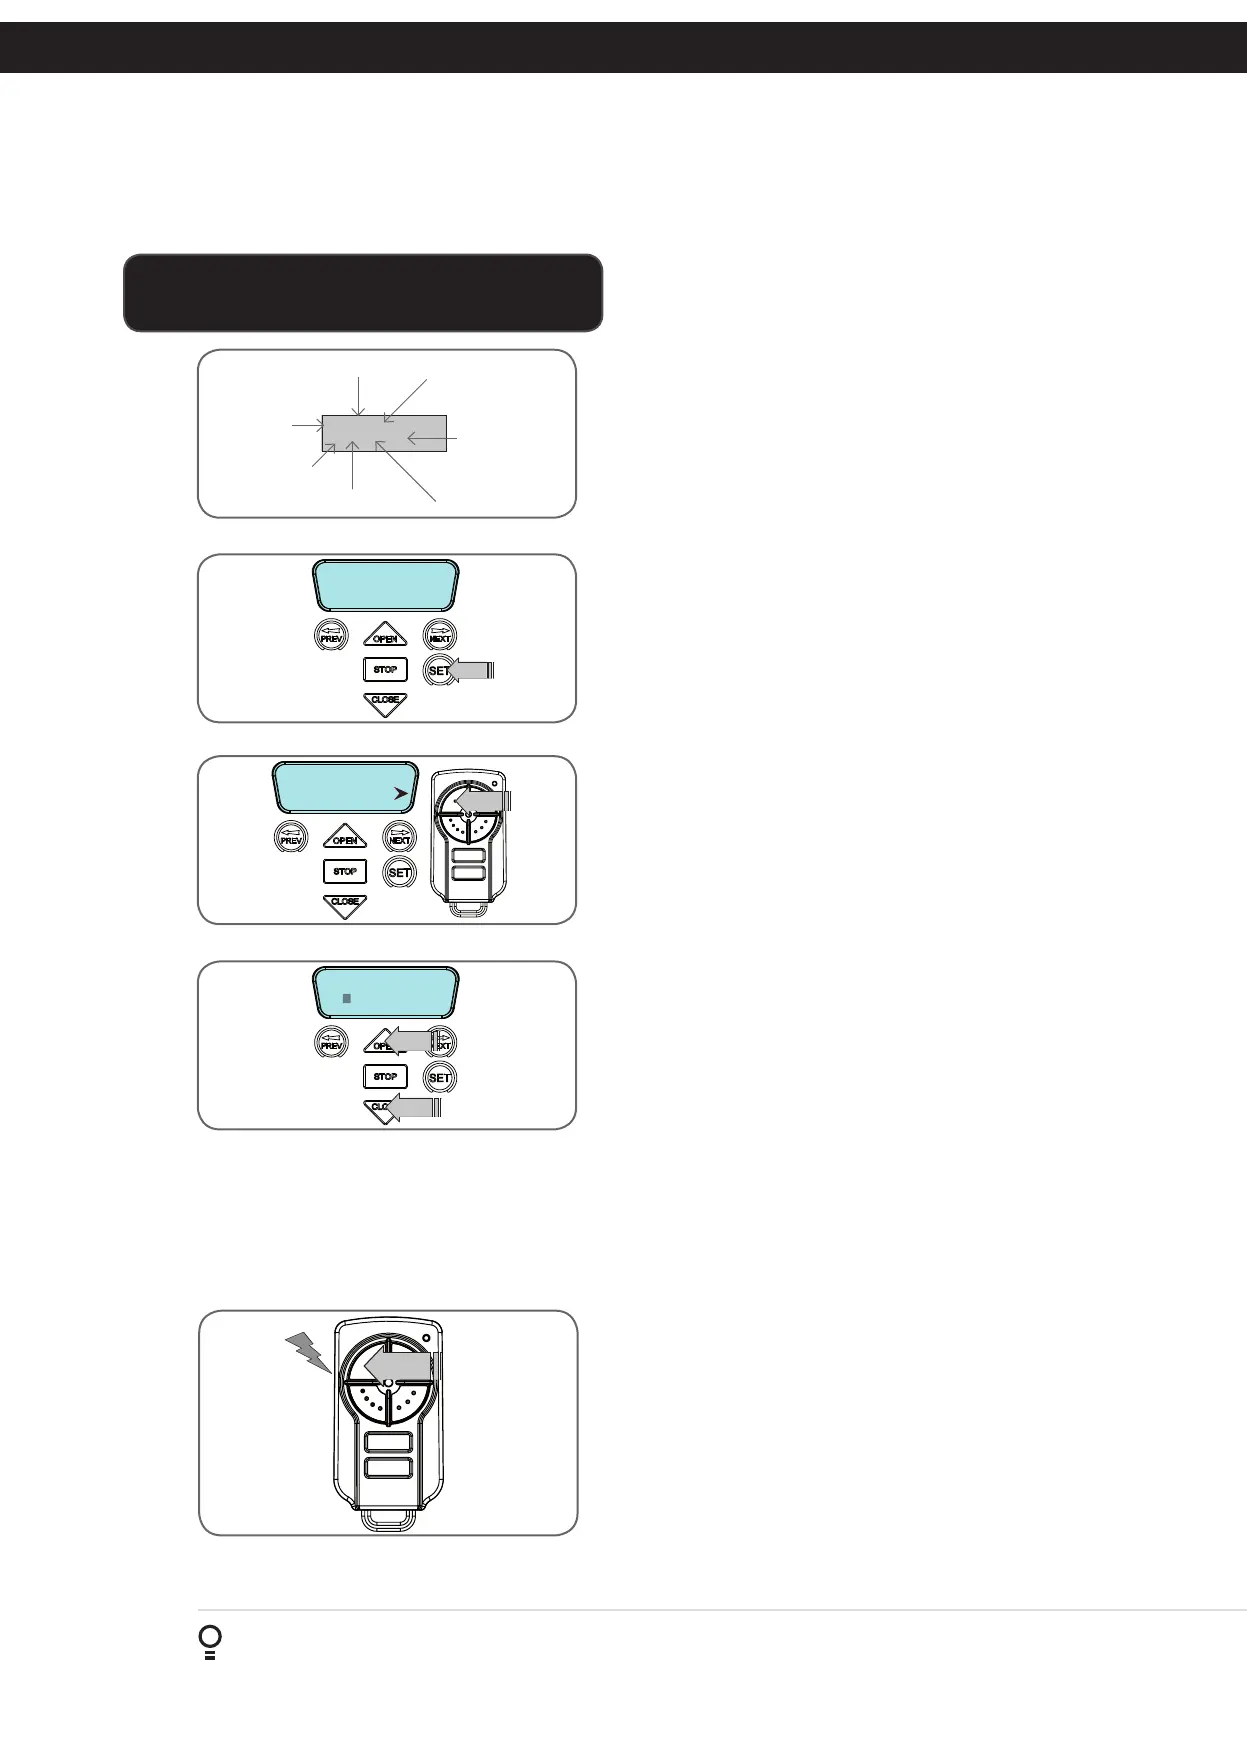
represented in Fig. 12.1. It shows the transmitter’s store number, ID
label or serial number and the functions assigned to each of the four
buttons. To toggle between ID/SN display, press UP/DOWN with the
cursor on the ID/SN indicator. The procedures below code, delete,
replace, edit and copy transmitter records.
12.1 Coding Transmitter Button
Navigating To Menu 1 “Code Transmitter”
a. Press NEXT to navigate to Menu 1 (Fig. 12.2).
b. Press SET to enter the code set procedure.
Storing Transmitter Code
a. The logic console will prompt to press one of the transmitter’s
buttons.
b. Press the transmitter button you wish to use to operate the opener
(e.g. button 1) (Fig. 12.3) .
c. Press the same transmitter button again as prompted by the
display.
12.2 Selecting Function Of The Button
The logic console will now show the transmitter’s record, with
a cursor on the field for the button being coded (Fig. 12.4). Use
OPEN/CLOSE to select the function for the button.
Available functions:
OSC (Open/Stop/Close) PED (Pedestrian access)
SWP (Swipe) CLS (Close)
OPN (Open) STP (Stop)
LGT (Courtesy Light) VAC (Vacation Mode)
AUX (Auxiliary ) OFF (No action)
NOTE: OSC can change to OS and CLS (Close) function, but is not
available in the case where PE Beams are not installed.
Press SET to save the settings or STOP to abort without saving.
12.3 Returning To Main Screen
Press STOP to return to the MAIN SCREEN and test the transmitter.
NOTE: To edit the other settings, refer to transmitter edit procedure
in Appendix F.
If a transmitter is already coded into the opener, additional
transmitters can be coded without being in direct contact with the
opener’s wall console unit.
NOTE: Only the function of the existing transmitter button can
be assigned to new transmitter. Please read instructions prior to
proceeding - there is a time-out facility for security reasons.
13.1 Selecting The Function To Be Coded
a. Using the existing transmitter, operate the shutter with the
transmitter button which has the function to be coded (Fig. 13.1)
(e.g. Button 1 has been coded with the OSC function assigned).
b. If the button’s function activates the shutter (PED, SWP, OSC, CLS,
STP or OPN) wait for the shutter to complete its cycle.
123
ID
Name/SN
OSC PED LGT VAC
MENU 1
Code Transmitter
# 1 [No Name]
OSC OFF OFF OFF
Press Tx’er
Button! List
I.D label/Serial number
Button 4 function
Button 3 functionButton 2 function
Button 1 function
Store number
ID/SN display indicator
Fig 12.1
Fig 12.2
Fig 12.3
Fig 12.4
PRESS
Existing
transmitter
Fig 13.1
IMPORTANT NOTE:
Only TrioCode
TM
128 Technology Transmitters are compatible
with the Axess
®
Pro Series 3000 products.
13. Remotely Coding Transmitters

 Loading...