19
4. Select a camera from the list. The corresponding fields of IP address will display.
5. To change the IP address of camera, user can select “DHCP” or “Static IP”.
The DHCP should get the IP address from local dynamic IP sever. The static IP, user can enter the
specific IP address. Click “Apply” to apply the setting to the camera. The password is required
(default password is aver4321).
6. Click “Search” button to re-scan the camera.
7. Double-click on the IP address of camera from the list can connect to camera through the browser.
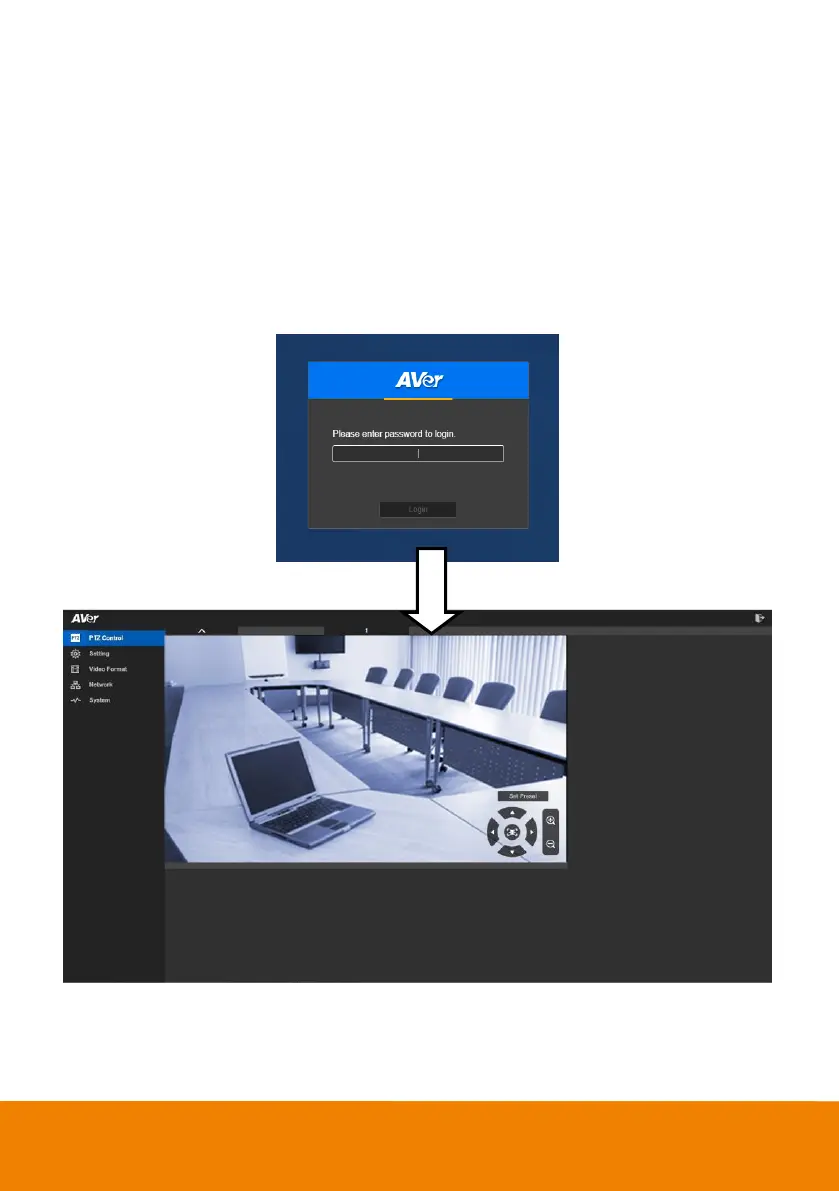
8. Enter the default password (aver4321) to login to Web setup screen.
[Note] If IP Finder cannot find the camera, please check follow ing:
Please make sure the Ethernet connection of camera is w ell connected.
The camera and PC (IP Finder) are in the same LAN segment.