64394-008 C-Clamp Wall Bracket Install Kit
ORI-UM-00025-EN-19
Mount the endpoint assembly
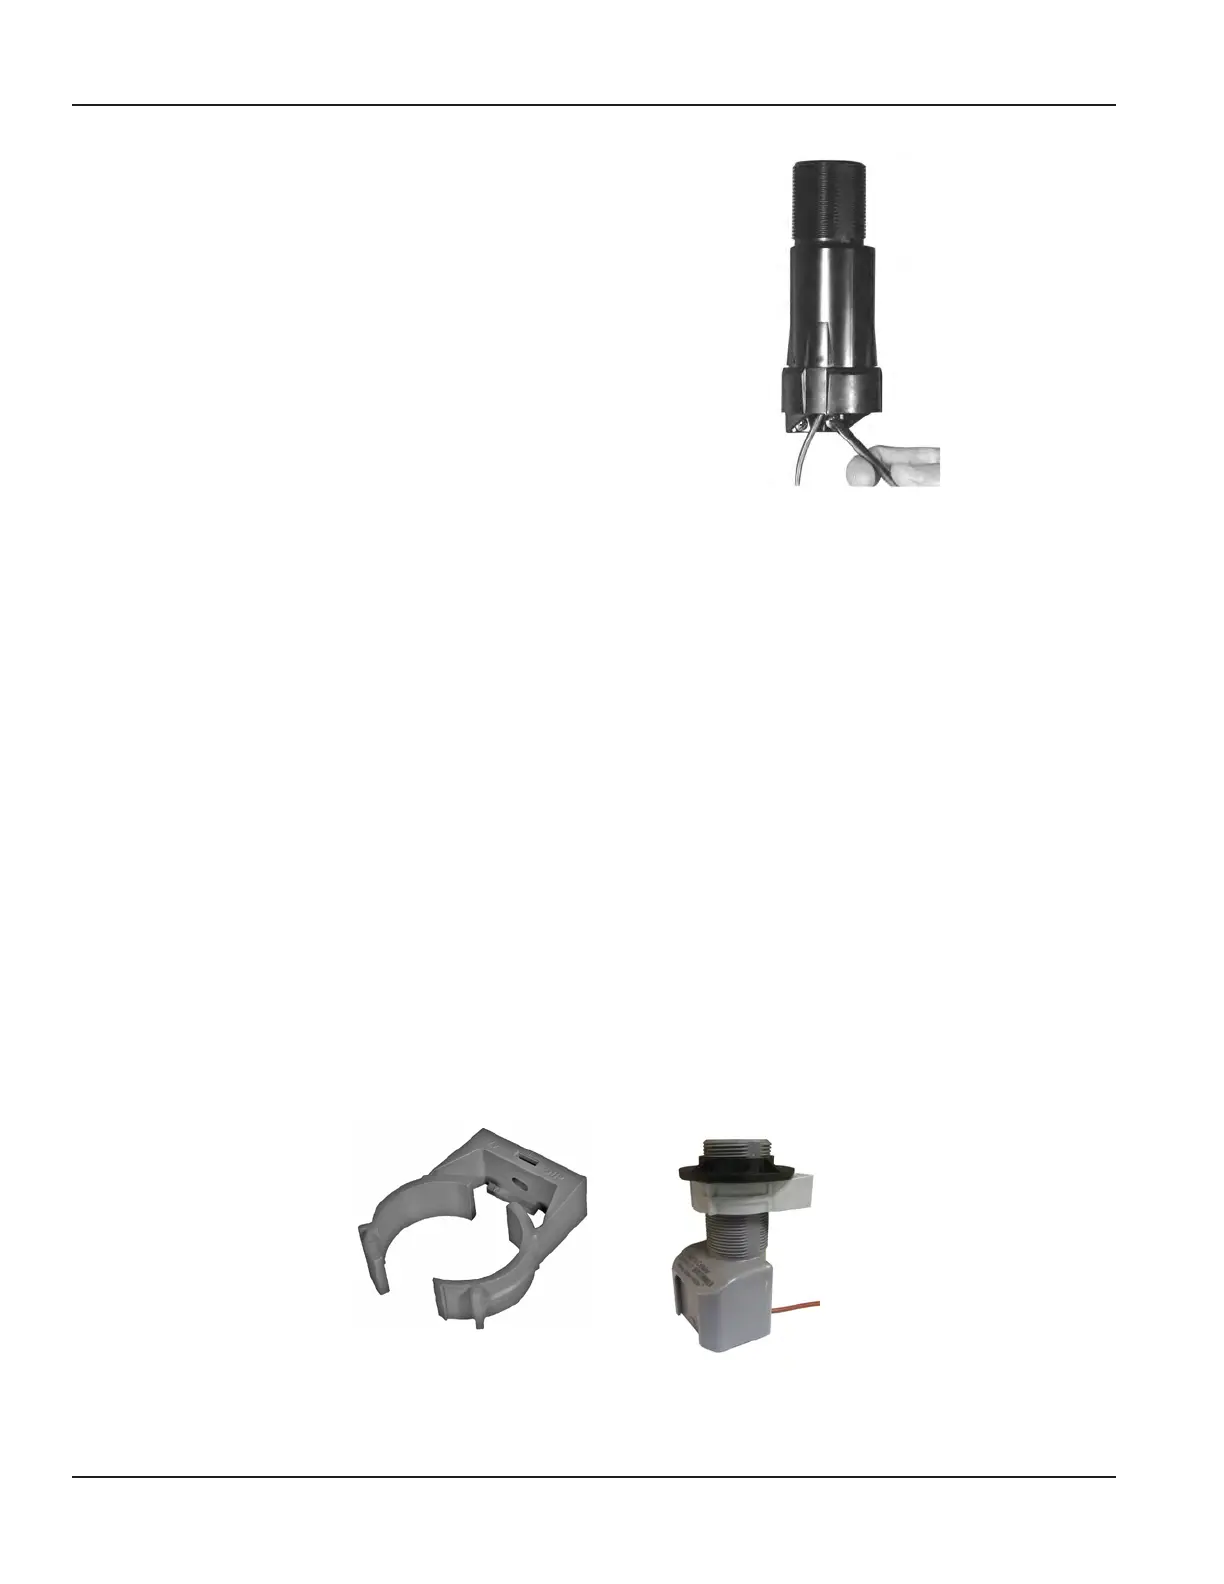
7. Make sure the endpoint antenna is upright
(Figure 23) when you place it into its nal position.
8. Using two customer-supplied screws, secure the
bracket assembly using the pilot holes you drilled in
Step 1.
Installation is complete.
Figure 23: Endpoint positioning
64394008 CCLAMP WALL BRACKET INSTALL KIT
C-Clamp Wall Bracket Install Kit (PN: 64394-008) can be used when mounting an endpoint to a wall.
For use with: All ORION endpoints. For ORION Cellular endpoints, the kit can be used for indoor and remote installations, but
should NOT be used in a vault.
To mount an ORION endpoint using this kit, follow these steps and refer to Figure 24.
1. Choose an appropriate location on the wall for the endpoint. Using an appropriate size fastener and washer
(customer-supplied), mount the C-clamp to the wall through the opening at the back. When mounting in a vault,
install the C-clamp close to the top to prevent damage when accessing the meter is required.
OTE:N ORION Cellular endpoints should NOT be mounted in a vault.
2. Place the neoprene spacer from the installation kit around the endpoint, approximately 1/2 inch (13 mm) from the
top of the endpoint. Hold the neoprene spacer in place with your ngers.
3. Thread the lock nut onto the endpoint until it makes contact with the neoprene spacer.
4. Insert the endpoint into the C-clamp, making sure the neoprene spacer stays inside the C-clamp.
5. Close the C-clamp and lock it in place so that it closes over the neoprene spacer and securely holds the endpoint as
shown in Figure 24.
Installation is complete.
OTE:N ORION radio endpoints perform best with a clear line of sight. Performance varies with installation.
C-Clamp
C-Clamp around endpoint
Figure 24: C-Clamp and placement
Page 18 February 2019
 Loading...