Integral Endpoint Installation
ORI-UM-00025-EN-19
INTEGRAL ENDPOINT INSTALLATION
ORION SE, ME and CE endpoints are available in an integral configuration in which the endpoint and encoder are connected
in one assembly. There are two types of integral configurations. This section includes instructions for mounting an integral
endpoint on a meter and also provides instructions for disassembling both types of integrals.
Mounting an Integral Endpoint on the Meter
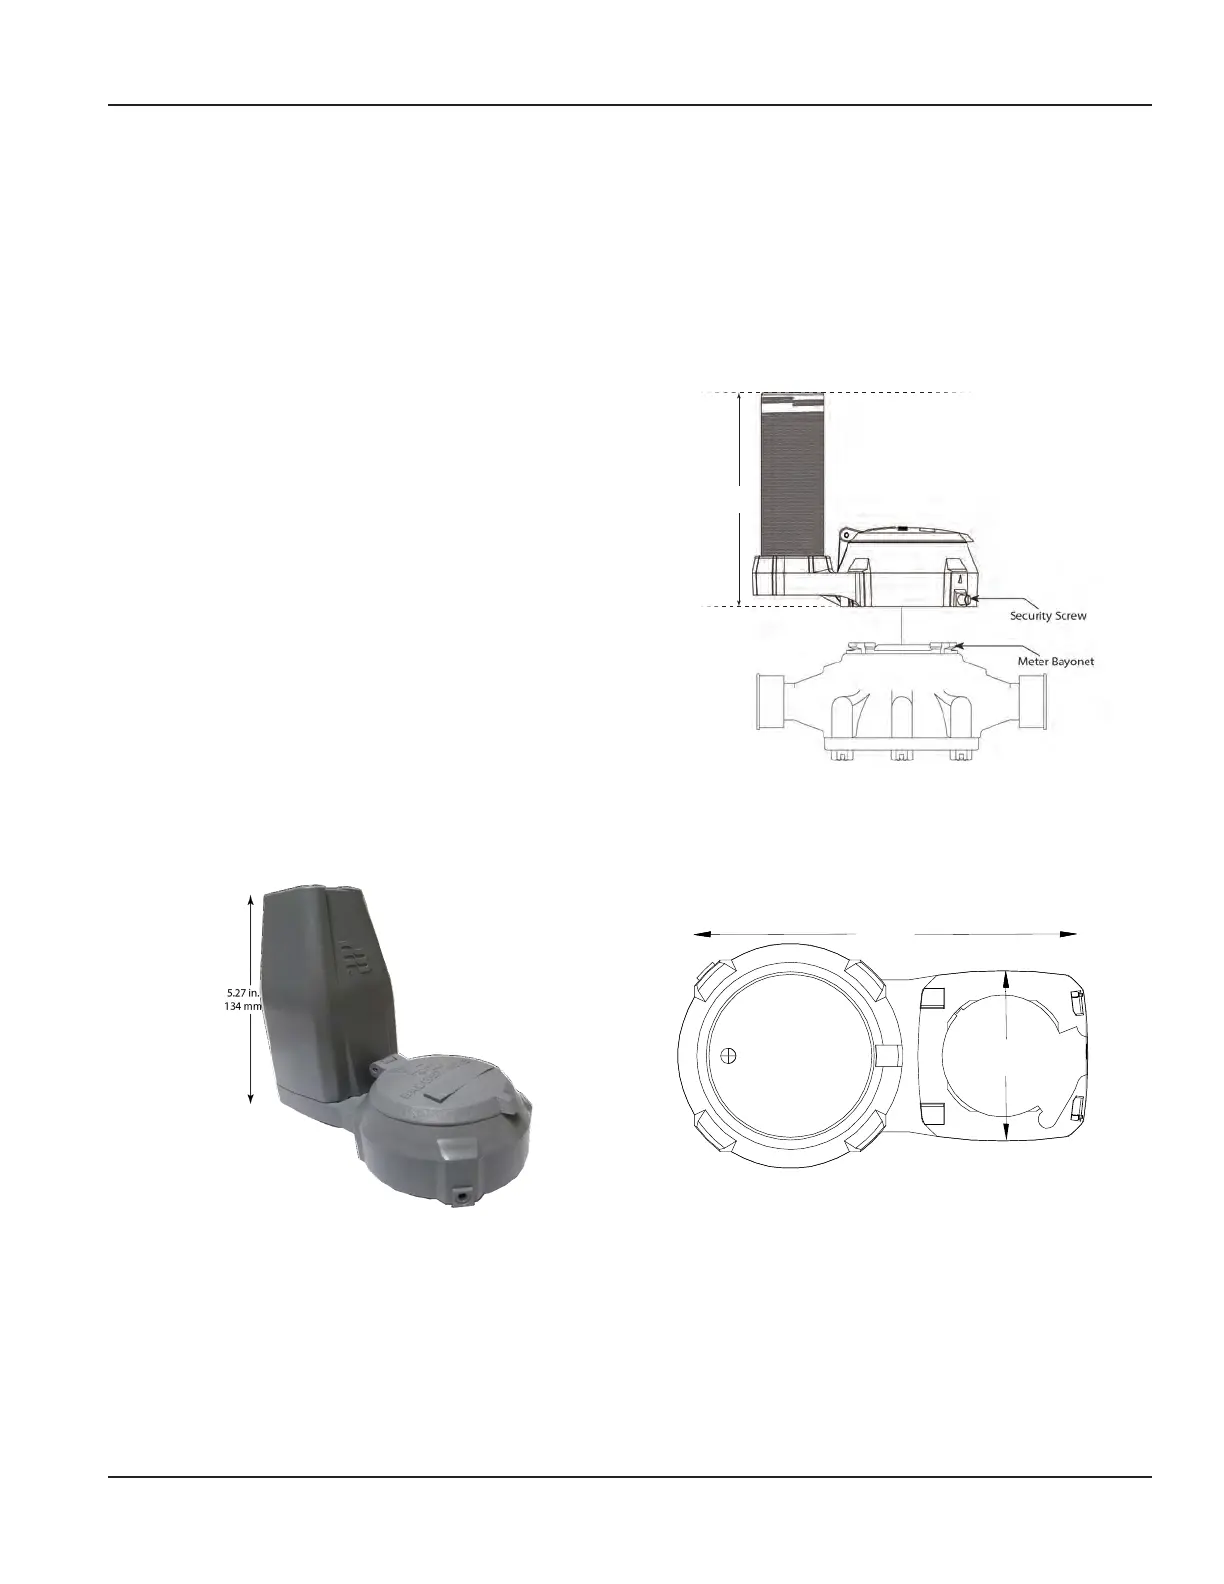
An integral endpoint can be installed on any Badger Meter
Disc, Turbo, or Compound Series meter. Both integral
configuration styles mount to the meter the same way, by
placing the assembly onto the bayonet of the meter and
rotating it into its locking position. See Figure 37.
1. Loosen the security screw on the endpoint
encoder assembly.
2. Mount the assembly housing on the meter bayonet.
3. Turn the assembly clockwise 1/4 turn to lock the
assembly into place on the meter.
4. After the assembly is mounted on the meter,
tighten the security screw to secure the assembly to
the register.
5.65 in.
144 mm
Figure 37: Integral assembly on meter
HR-E LCD Encoder Integral Conguration
Figure 38: HR-E LCD Integral
3.68 in.
93 mm
6.80 in.
173mm
Figure 39: HR-E LCD Integral base dimensions
Configuration
The ORION HR-E LCD Integral Assembly is shown in Figure 38. In an HR-E LCD integral assembly, the endpoint is
factory-wired to the encoder and both are mounted to the shroud bracket. Endpoints are available with a 3-foot or
10-foot wire that is wrapped around the body of the endpoint. The endpoint wire is contained under a removable cover. With
this option, the endpoint can be removed from the housing, if necessary, and mounted away from the encoder. The endpoint
can also be returned to the housing assembly without damage.
Page 23 February 2019
 Loading...