3. Teach the sensor.
Method Action Result
Push Button Press TEACH to teach the target. The measurement value flashes
briefly, and the sensor is taught the
first target.
and flash
alternately on the display. The 2-Pt
indicator flashes.
Remote Input Single-pulse the remote input.
It is possible to skip teaching the 0 V (4 mA) point and continue to use the existing setting. When using the push
button, hold for four seconds. The sensor displays SAVE and then flashes the existing value. When using the
remote input, double-pulse the remote input.
4. Present the target.
Method Action Result
Push Button
Present the second target. The sensor-to-target distance must be
within the sensor's range.
and flash alternately
on the display. The 2-Pt indicator
flashes.
Remote Input
5. Teach the sensor.
Method Action Result
Push Button Press TEACH to teach the target.
The new switch point flashes rapidly
and the sensor returns to Run mode.
Remote Input Single-pulse the remote input.
Note: If the same target is taught both times, and flash alternately on the display, the
10 V (20 mA) value is automatically adjusted to maintain the minimum window size, the new
distance quickly flashes four times, and the sensor returns to Run mode.
It is possible to skip teaching the 10 V (20 mA) point and continue to use the existing setting. When using the push
button, hold for four seconds. The sensor displays SAVE and then flashes the existing value. When using the
remote input, double-pulse the remote input.
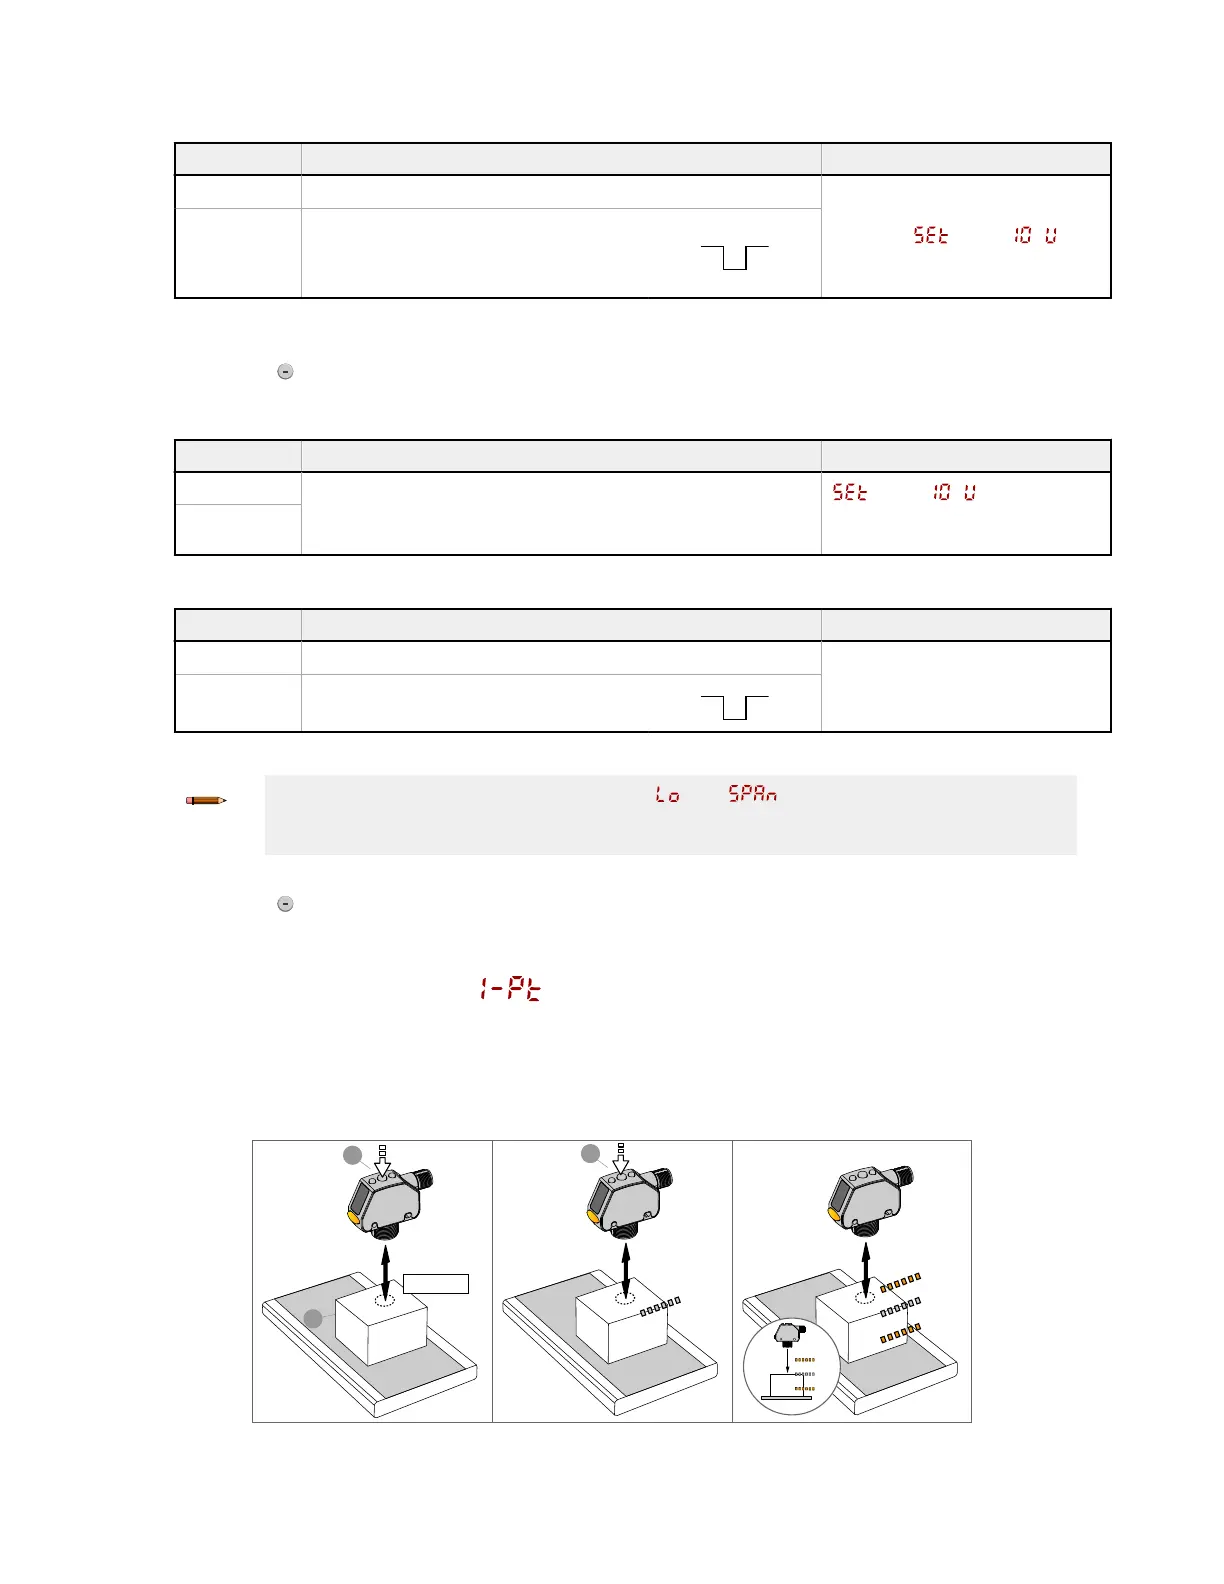
3.5.2 One-Point TEACH
One-point TEACH mode defines the span of the analog output. One-point TEACH also defines the 5 V (12 mA) midpoint of
the analog output to center the analog output around a reference target position.
Refer to Manual Adjustments in One-Point TEACH Mode on p. 17 for more information.
Figure 22. One-Point Window
10 V
0 V
2
Press and Hold
> 2s
Teach 5 V
5 V
5 V
10 V
0 V
5 V
1
Press again
3
Q4X Stainless Steel Analog Laser Sensor
20 www.bannerengineering.com - Tel: + 1 888 373 6767
 Loading...