127R5911705 /02 Bragi
8.4.4 Warp – 4 Corners adjustment
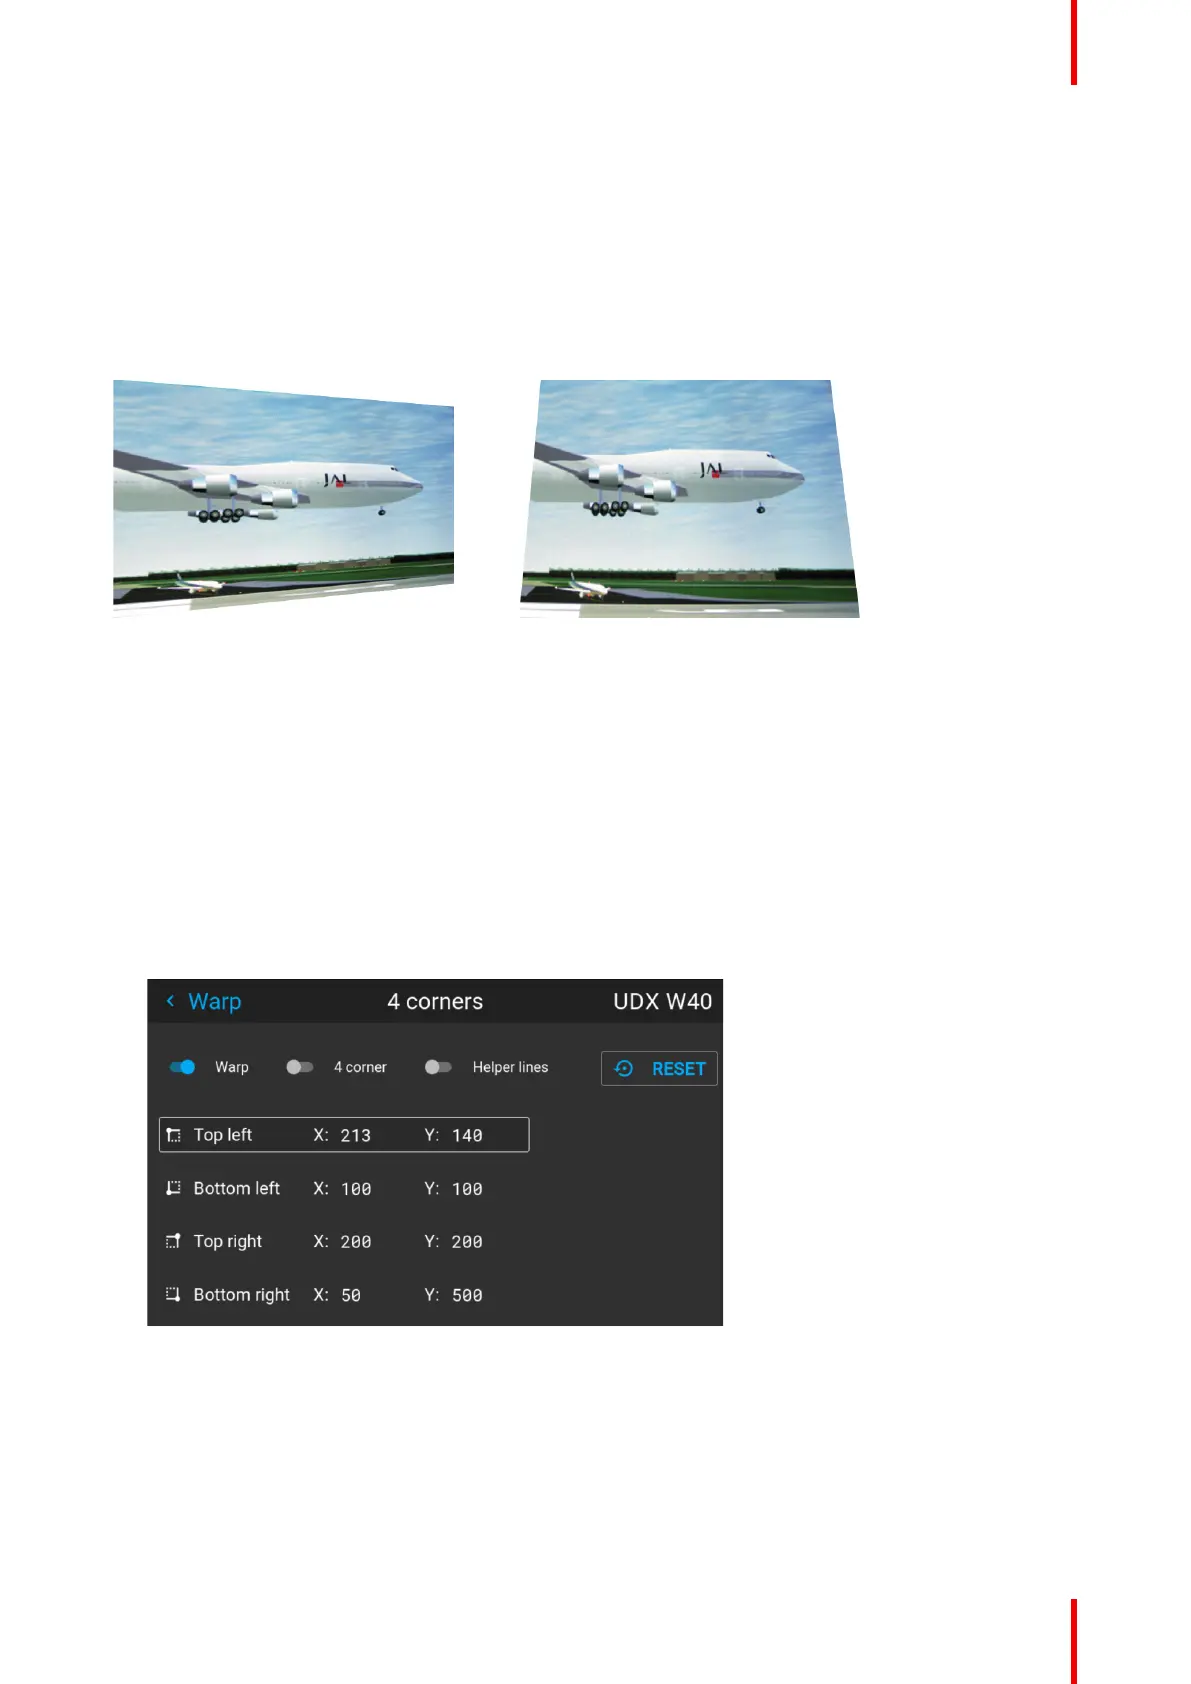
About 4 Corners adjustment
Basically, this type of warping adjusts each of the four image corners in the X and Y direction, if you have a
typical trapezoid picture of the screen as shown below.
To have a successful Warp correction, the size of the screen must be entered. See “Warping – Screen size”,
page 125
Some examples of pictures when the projector axis is not perpendicular to the screen.:
Image 8–20
How to adjust the image.
1. From the warp menu, select the menu Installation/Warp/4 Corners.
2. Select and enter the Helper lines slider. A yellow frame will be visible.
3. To enable the 4 Corners Warping, Set the Warp slider to the right position. (Select and enter).
4. Enable the corner that must be warped (Select and enter). If need for warping several corners, select and
adjust the corners one by one.
5. Adjust the value by the arrow keys. The X value is adjusted by the left/right arrows on the remote control,
and the Y vale is adjusted by the up/down arrow in the remote control. The value represent the movement
of the X and Y coordinates for each corner. When the warping is complete, exit the menu by using the
“Back” button.
Image 8–21
6. If the picture still has a trapezoid shape, warp is not enabled. Select the Installation / Warp menu, and
press enter. The slider moves to the right, and the warp status changes to “On”.
Installation menu

 Loading...


