R5906848 /04 DP2K SLP Series 143
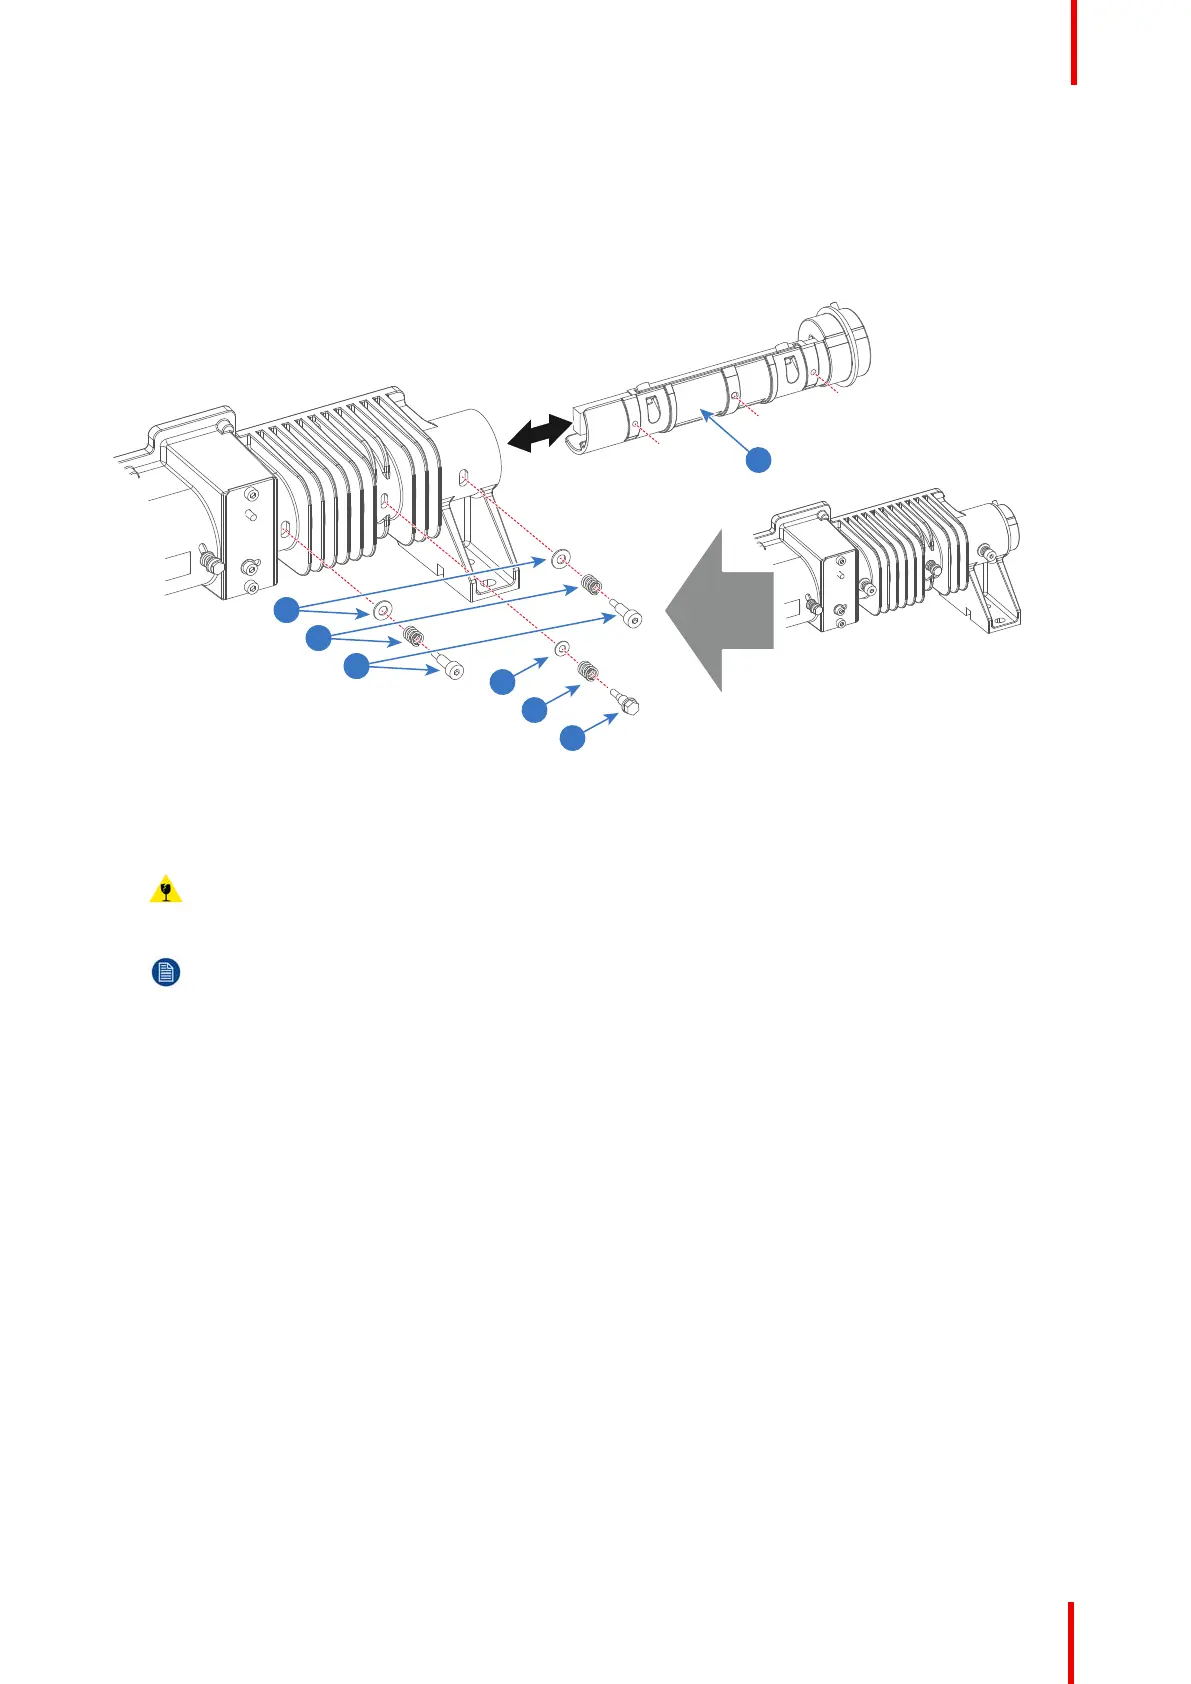
2. Remove the two fixation screws (reference 1 Image 11-5) of the Integration Rod. Note that a plain washer and
spring (reference 2 & 3 Image 11-5) comes loose together with the fixation screw. Use a 2.5mm Allen wrench.
3. Remove the adjustment screw (reference 4 Image 11-5) of the Integration Rod. Note that a plain washer and
spring (reference 5 & 6 Image 11-5) comes loose together with the adjustment screw. Use a 5.5mm nut driver.
4. Carefully slide the Integration Rod assembly (reference 7Image 11-5) out of the Light Pipe.
Image 11-5
5. Carefully slide the new Integration Rod assembly in the Light Pipe. Ensure that the three mounting holes of the
Integration Rod assembly are oriented towards the three holes in the Light Pipe housing to insert the screws.
Caution: Wear cotton gloves and do not touch the glass of the Integration Rod. Furthermore, ensure
that nothing hits accidentally the glass of the Integration Rod.
Note: The spare part Integration Rod assembly comes with a protective cap mounted on the Rod
entrance side (reference 9 Image 11-6). This protective cap remains until the Integration Rod
assembly is fully installed.
6. Insert the two fixation screws (reference 1 Image 11-5) of the Integration Rod as illustrated. Place a spring and
a plain washer (reference 2 & 3Image 11-5) on each fixation screw. Use a 2.5mm Allen wrench.
7. Insert the adjustment screw (reference 4 Image 11-5) of the Integration Rod. Place a spring and a plain
washer (reference 5 & 6 Image 11-5) on the adjustment screw. Use a 5.5mm nut driver.
8. Carefully remove the protective cap from the Integration Rod entrance. Use a 2.5mm Allen wrench.
Integration Rod