2-10
2.3
Installation of Replacement ROMs in
the BAS 100B/W
a) Remove the CPU as described in section 2.2
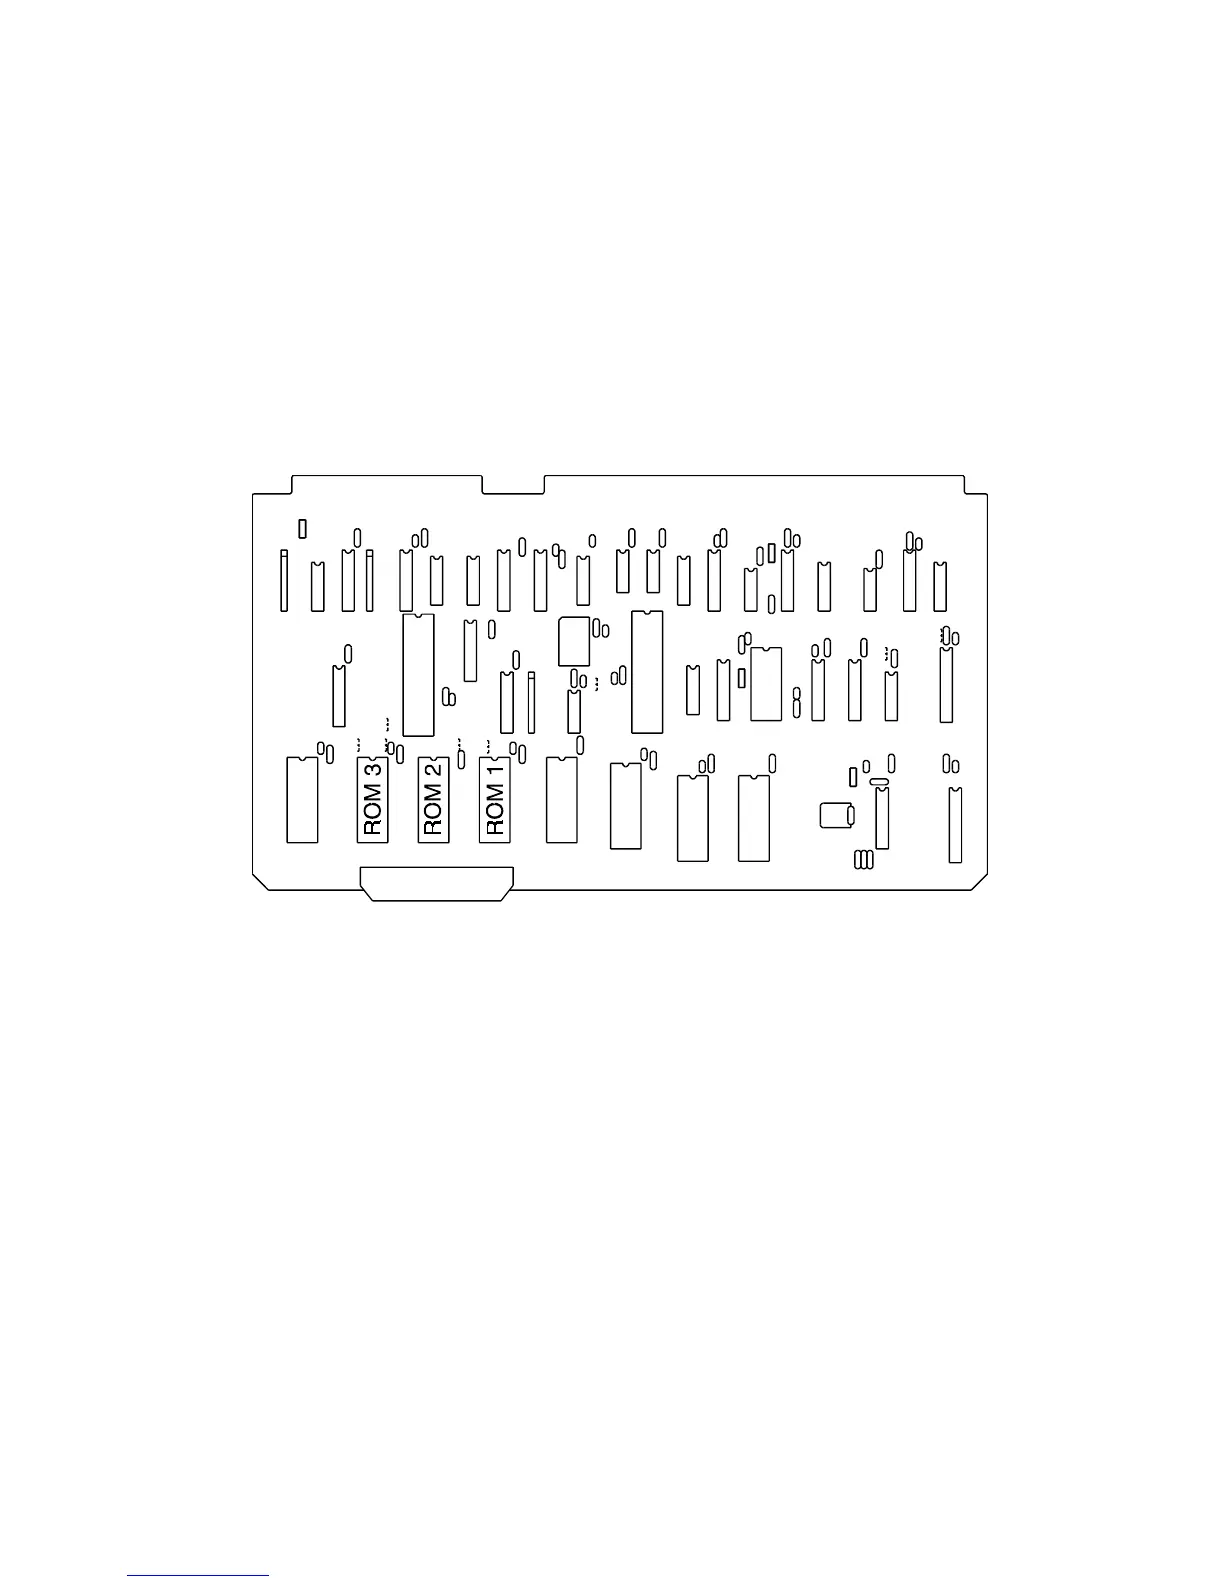
b) Lay CPU board (Figure 2-8) on a flat surface. Components of the CPU board
are sensitive to static. Do not lay the board on carpeting, plastic (e.g., bubble
wrap), or other surfaces that build up static charge.
Figure 2-8. CPU Board
c) Carefully pry ROM 1 out of its socket - be careful not to bend the legs of the
chips.
d) Properly align new ROM1 on the socket and press in. It is imperative that the
chip oriented as shown in Figure 2-8 (notched end away from the board edge
with the ribbon cable connector). Be careful not to bend the legs and ensure
that all the legs are inserted into the socket.
e) Replace ROMs 2 and 3 in the same way, and reinstall board.