SCR Replacement
8.7 SCR Replacement
This section is to help with SCR replacements on stack assemblies. Please read prior to installation.
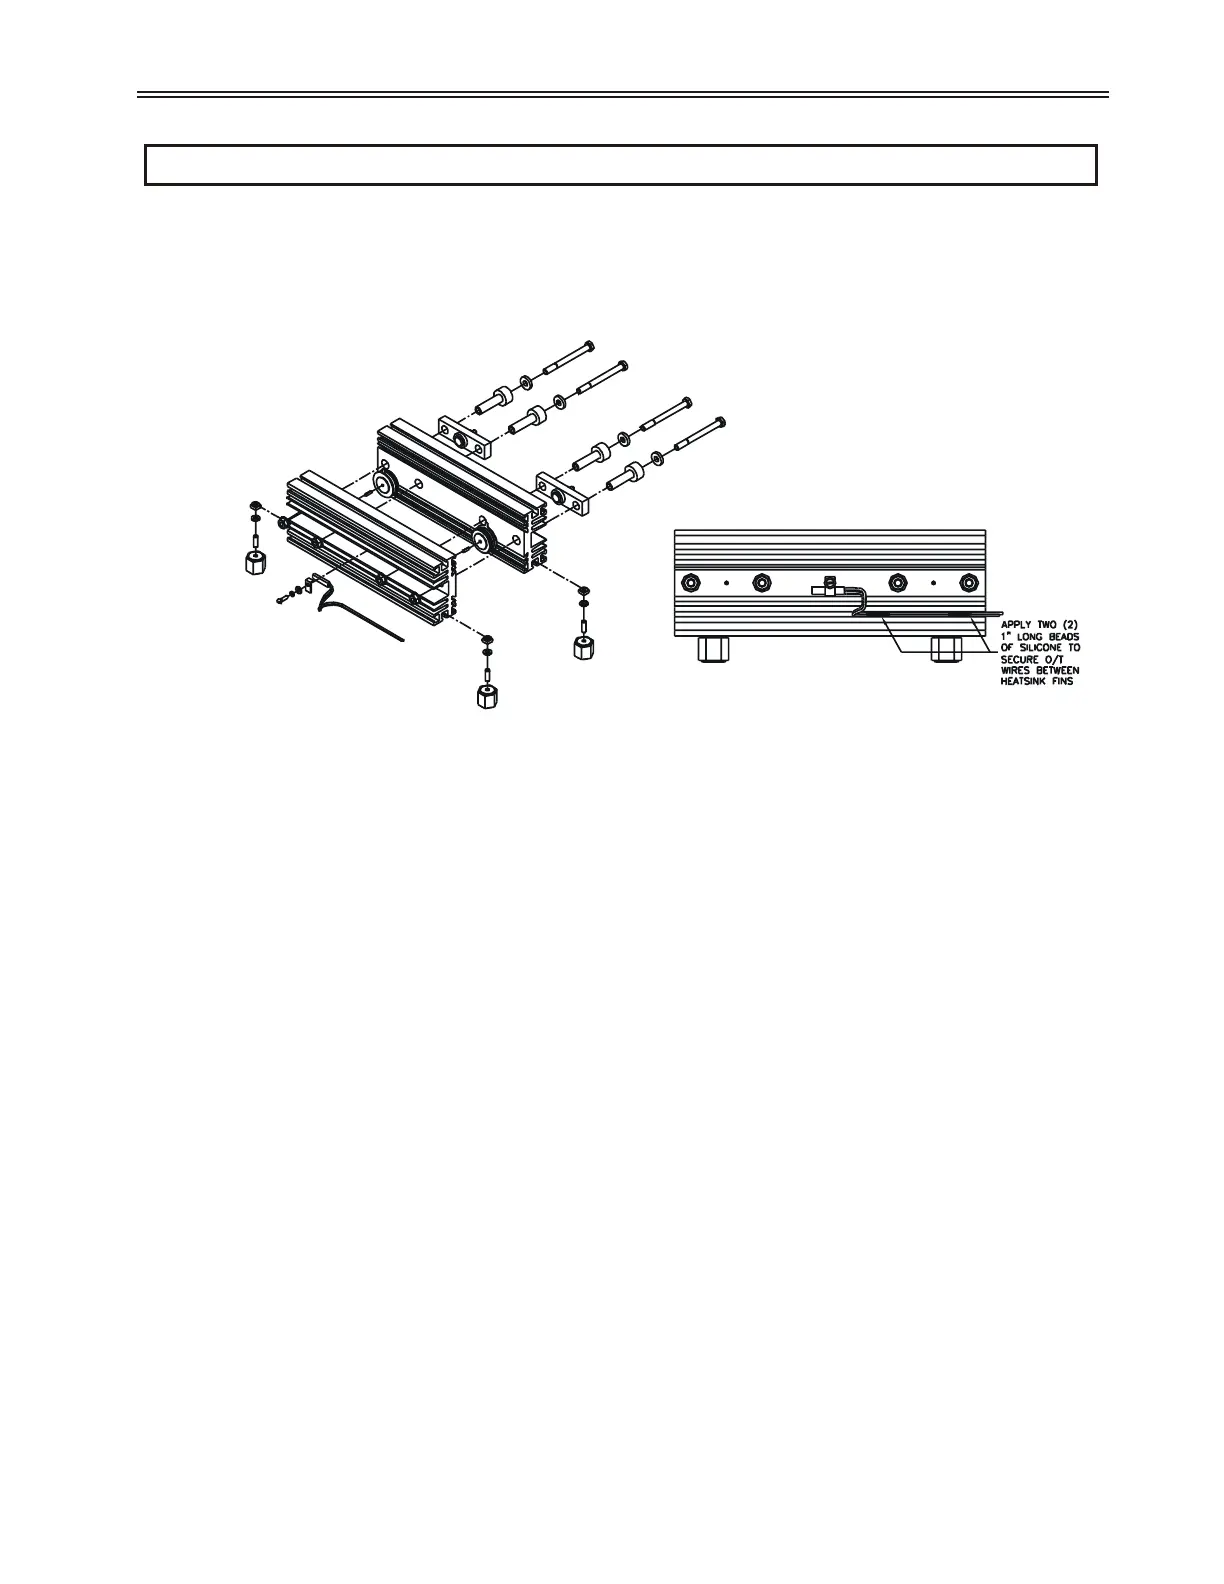
8.7.1 Typical Stack Assembly
8.7.2 SCR Removal
To remove the SCR from the heatsink, loosen the two bolts (3) on the loader bar side of the clamp. Do not turn on the nuts (5). The nuts
have a locking ridge that sink into the aluminum heatsink. Do ¼ turns until the SCR comes loose. Remove the SCRs from the heatsink.
z NOTE: Do not loosen nut on indicator washer (6). This will change the clamping pressure of the clamp and the clamp will be
defective.
8.7.3 SCR Installation
• Coat the faces of the SCRs to be installed with a thin layer of EJC (Electrical Joint Compound).
• Place the SCRs onto the dowel pins. The top SCR will have the cathode to the left and the bottom SCR will have the cathode to the
right. The SCR symbol has a triangle that points to the cathode.
• Finger tighten nuts on the bolts.
191
8 - TROUBLESHOOTING & MAINTENANCE
 Loading...