3INSTALLATION
Before You Start
3.1 Before You Start
3.1.1 Inspection
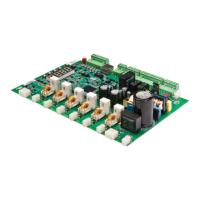
Before storing or installing the RediStart MX
2
Series Starter, thoroughly inspect the device for possible shipping damage. Upon receipt:
• Remove the starter from its package and inspect exterior for shipping damage. If damage is apparent, notify the shipping agent and
your sales representative.
• Open the enclosure and inspect the starter for any apparent damage or foreign objects. Ensure that all of the mounting hardware and
terminal connection hardware is properly seated, securely fastened, and undamaged.
• Ensure all connections and wires are secured.
• Read the technical data label affixed to the starter and ensure that the correct horsepower and input voltage for the application has
been purchased.
• The numbering system for a chassis is shown below.
3.1.2 Installation Precautions
Installation of some models may require halting production during installation. If applicable, ensure that the starter is installed when
production can be halted long enough to accommodate the installation. Before installing the starter, ensure:
• The wiring diagram (supplied separately with the starter) is correct for the required application.
• The starter is the correct current rating and voltage rating for the motor being started.
• All of the installation safety precautions are followed.
• The correct power source is available.
• The starter control method has been selected.
• The connection cables have been obtained (lugs and associated mounting hardware).
• The necessary installation tools and supplies are procured.
• The installation site meets all environmental specifications for the starter NEMA/CEMA rating.
• The motor being started has been installed and is ready to be started.
• Any power factor correction capacitors (PFCC) are installed on the power source side of the starter and not on the motor side.
Failure to remove power factor correction or surge capacitors from the load side of the starter will result in serious damage to the starter
that will not be covered by the starter warranty. The capacitors must be connected to the line side of the starter. The up-to-speed (UTS)
contact can be used to energize the capacitors after the motor has reached full speed.
3.1.3 Safety Precautions
To ensure the safety of the individuals installing the starter, and the safe operation of the starter, observe the following guidelines:
• Ensure that the installation site meets all of the required environmental conditions (Refer to Site Preparation, page 29).
• LOCK OUT ALL SOURCES OF POWER.
• Install circuit disconnecting devices (i.e., circuit breaker, fused disconnect or non-fused disconnect) if they were not previously
installed by the factory as part of the package.
• Install short circuit protection (i.e., circuit breaker or fuses) if not previously installed by the factory as part of the package.
• Consult Power Ratings for the fault rating on pages 18-20.
• Follow all NEC (National Electrical Code) and/or C.S.A. (Canadian Standards Association) standards or Local Codes as applicable.
• Remove any foreign objects from the interior of the enclosure, especially wire strands that may be left over from installation wiring.
• Ensure that a qualified electrician installs wiring.
• Ensure that the individuals installing the starter are wearing ALL protective eyewear and clothing.
• Ensure the starter is protected from debris, metal shavings and any other foreign objects.
The opening of the branch circuit protective device may be an indication that a fault current has been interrupted. To reduce the risk of
electrical shock, current carrying parts and other components of the starter should be inspected and replaced if damaged.
28
3 - INSTALLATION
 Loading...