3.10.3 Installing Display
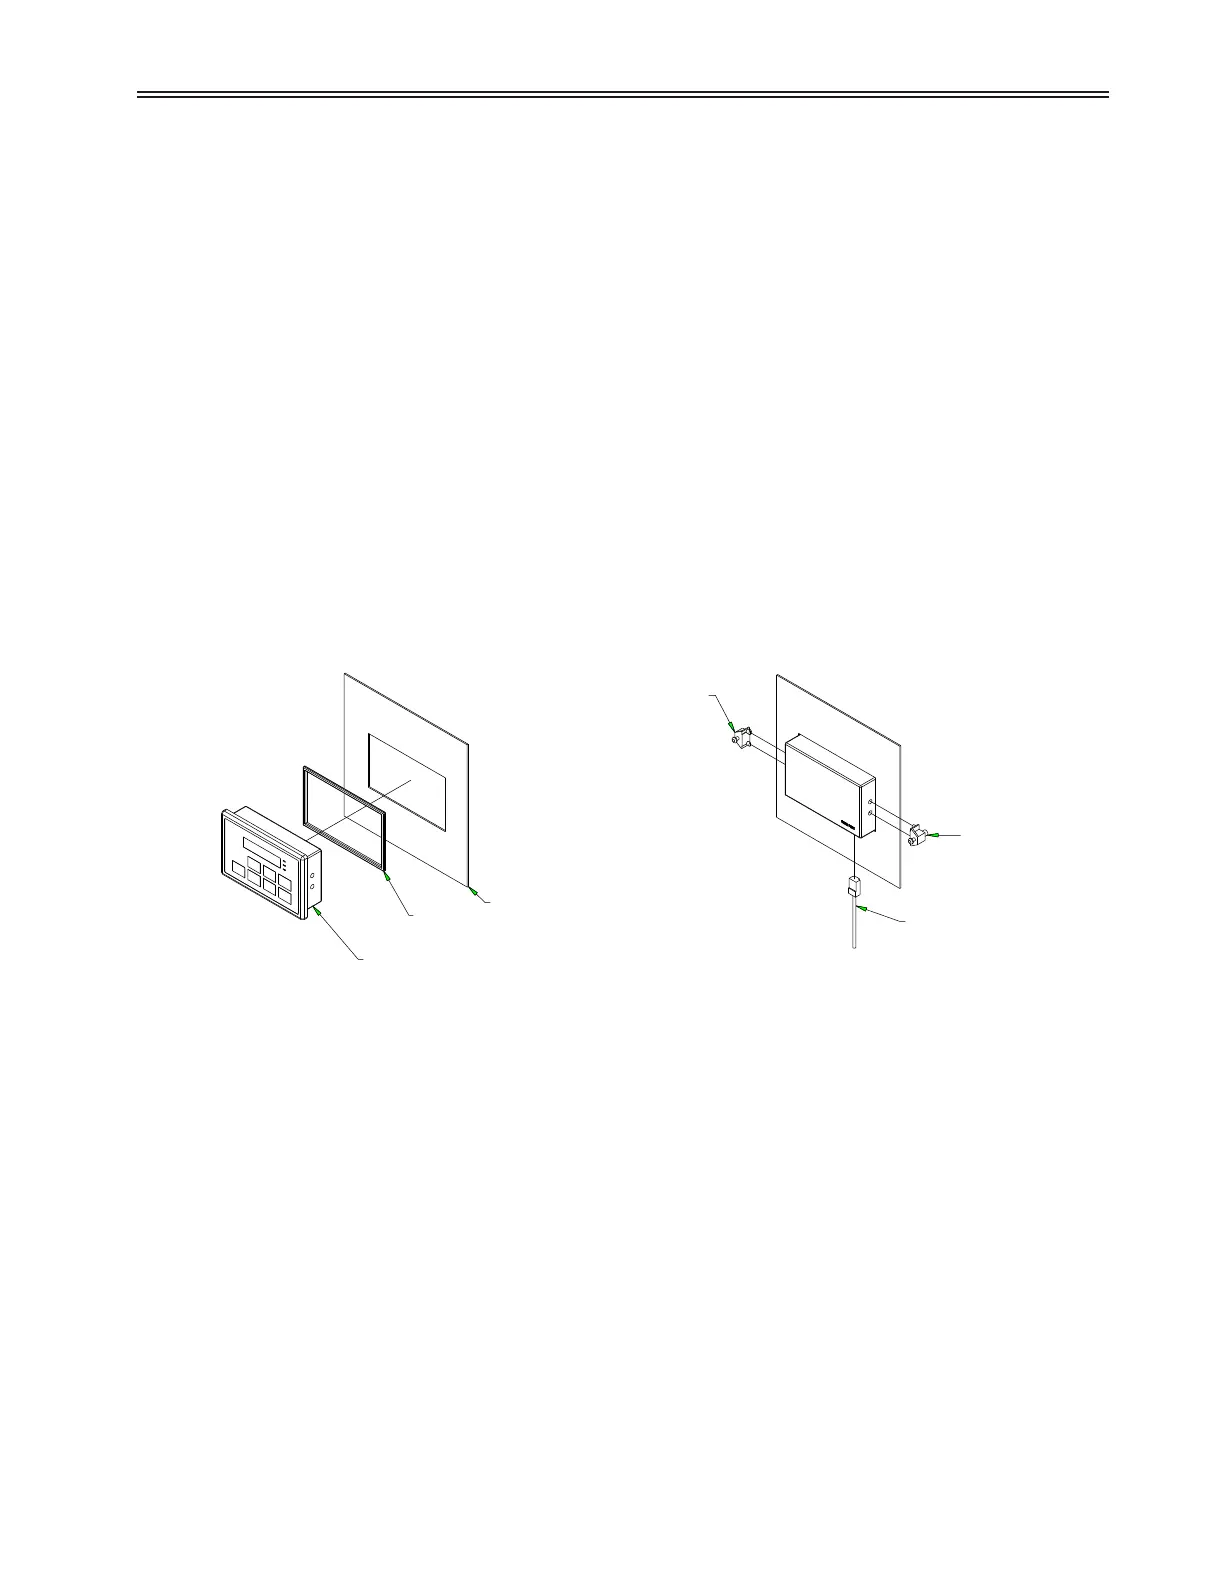
The remote display is installed as follows:
• Install the gasket onto the display.
• Insert the display through the door cutout.
• Insert the mounting clips into the holes in each side of the display.
• Tighten the mounting clips until they hold the display securely in place. Torque requirements for the display screen is 0.7 NM (6.195
in lbs).
• Plug the cable into the display connector on the MX
2
card. See Figure 12 – Control Card Layout on page 39 for the connector
location.
• Route the cable through the enclosure to the display. Observe the wiring considerations as listed in section 3.4.3 on page 31.
• Plug the other end of the cable into the LCD display.
z NOTE: At temperatures less than -20°C, the LCD contrast may be impaired.
45
3 - INSTALLATION
MX² DISPLAY
GASKET
ENCLOSURE DOOR
MX² DISPLAY CABLE
CLIP
CLIP
Figure 21: Mounting Remote Keypads
 Loading...